ArahDrape
A texture mapping software to help weavers, designers and
retailers in making a better presentation of their fabrics.


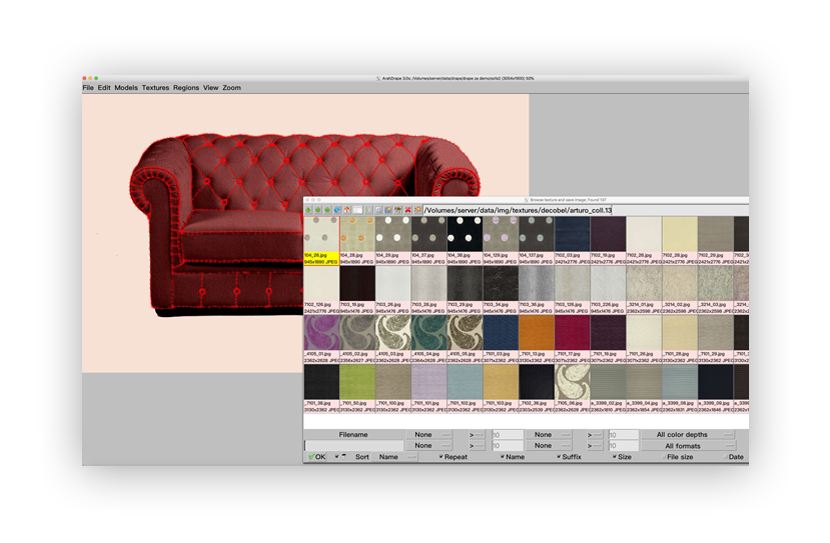
With 3D Grid and Shading tool you can reach the effect of a photographed image. Adjust the applied fabric with 3D grid to make it look realistic. Use shading to take the shades of the original photo for depth effect on the image. No need for expensive and time consuming process of making products and photographing them.
Batch function allows you to make and save thousands of product photos draped with different textures automatically. Just select the texture directory, click on the first one, and the software will start with the process of draping and saving.
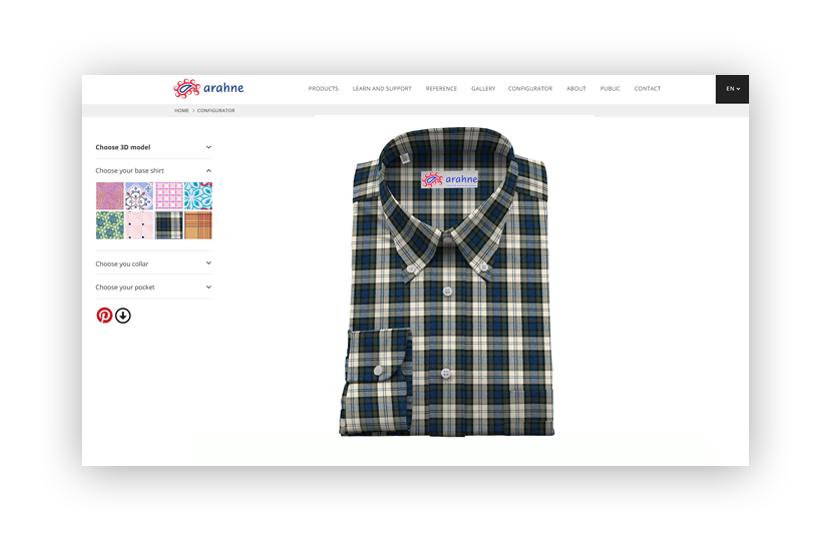
Show your product on-line with product configurator. Use your product image and different fabrics to allow customer to change the fabrics on the product on-line. Product configurator will definitely spice up your website and attract potential clients. Use it on the desktop computer, tablet or mobile phone.
Check our product configurator here.
For comfortable work, bigger screen and high resolution graphics is recommended. Nowadays the HD resolution (1920×1080) is quite affordable, and will give you enough space to express your ideas.
If your hard drive is based on SSD technology, program will work considerably faster. Software needs about 100 MB for installation, and you may need an extra 50 GB for your data. The rest will be used for the operating system and other programs.
If your CPU is multicore, they will all be used. So the more you have, the better it will work. Nowadays 4 core processors are relatively inexpensive, chose 4 cores instead of 2 cores, if you can.
High resolution Epson ink jet printer is recommended. Photo line of printers with 6 inks will give you better printout than 4 color printers. You can also use laser printers, cost per page is usually lower than ink jet, but so is the print quality.
A three button wheel mouse will allow you easy access to all program’s functions.
If you need floppy to transfer the designs into production, you need an external USB floppy drive.
You may also choose to replace the floppy on your jacquard controller with floppy emulator, and use USB pen drive to transfer your designs.
If your looms are in network, you can send designs directly from CAD to the loom using TCP/IP network.
If you need to share your work with several designers, and like having backup in cloud, we recommend storing all your CAD data in Dropbox.
On Mac, it is easy; ArahWave will run on any Mac, as long as it is based on Intel processor.
This is easy to check, if your Mac dates from 2006 or later, then it is probably Intel based.
ArahWeave uses XQuartz in order to work.
On a PC, you can choose Intel or AMD processor.
Since ArahWeave is Linux based, you can run Linux directly or in a virtual machine.
If you run it natively, it will run slightly faster and graphics will work better.
Which Linux should you choose? We recommend OpenSUSE but you may also use RedHat, Fedora, Ubuntu or other versions.
If you use virtual machine, you avoid problems with unsupported hardware, as virtual machine will use drivers which are already working in Windows.
Using virtual machine is better, if you rely on some Windows-only programs for your daily work, and you don’t want to dual boot your computer.
You can use Vmware or VirtualBox as your virtual machine.
On Linux, software will work better with NVidia graphics card, but AMD or Intel graphics is also supported.
|
File format |
Read
write |
Filename extension |
1-bit |
8-bit colormap |
24-bit truecolor
|
Notes |
|---|---|---|---|---|---|---|
| PNG | rw | PNG |
• |
• | • |
|
| JPEG | rw | .JPG .JPEG |
• |
grayscale only | • |
|
| TIFF | rw | .TIF .TIFF |
• |
• | • |
|
| WebP | rw | .WEBP |
|
• |
|
ArahDrape Desktop Edition
Price: 2500€
Includes
Support