
![]()

TUTORIALS
Simple Damask: From a scanned picture to a design ready for production
From a scanned picture to a design ready for production
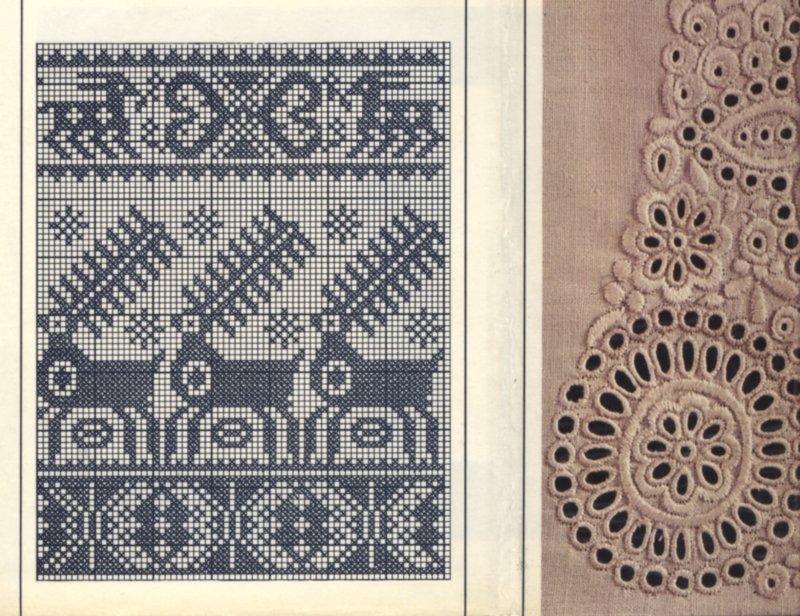
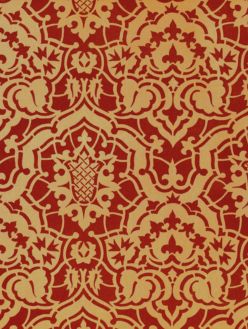
We start with an image scanned at 200 dpi.
Load the image in ArahPaint. If your scan is not perfectly straight you can use the Rotation tool to straighten the image. Normally, you need to select an area and then rotate it by a certain angle defined by degrees. In most cases, it is difficult to enter the degrees angle and visually assess if the image is straight after rotation or not. ArahPaint allows you to draw a line over the picture area, which is supposed to be straight, and the program will calculate by which angle the image should be rotated, and will rotate the image for you. Select Image > Rotate image…. Use the mouse to draw a line which is supposed to be horizontal (or vertical). Usually, this line will lie on the border of the repeat area.
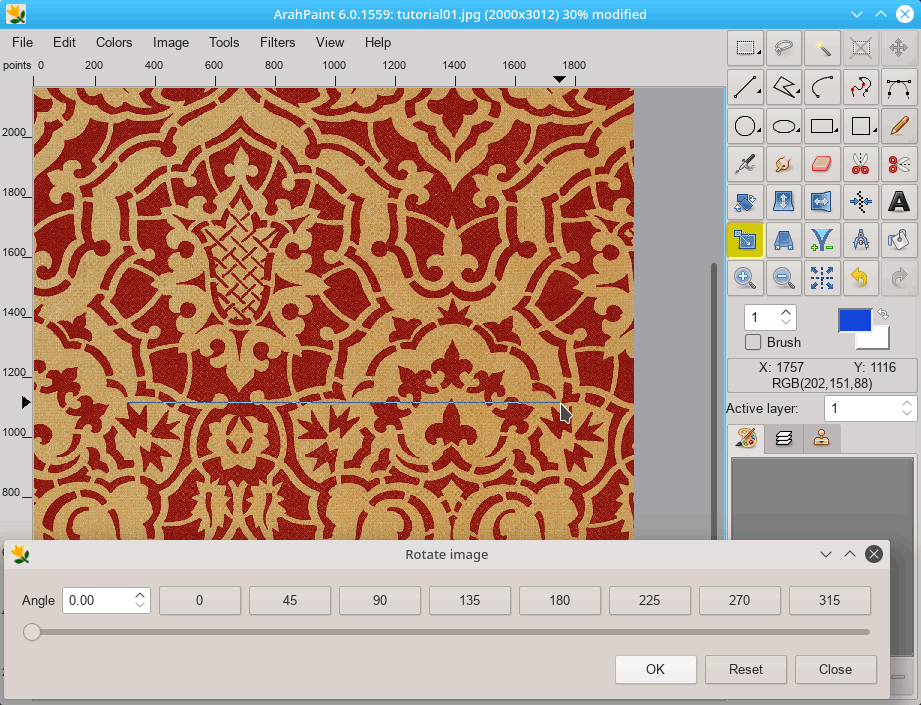
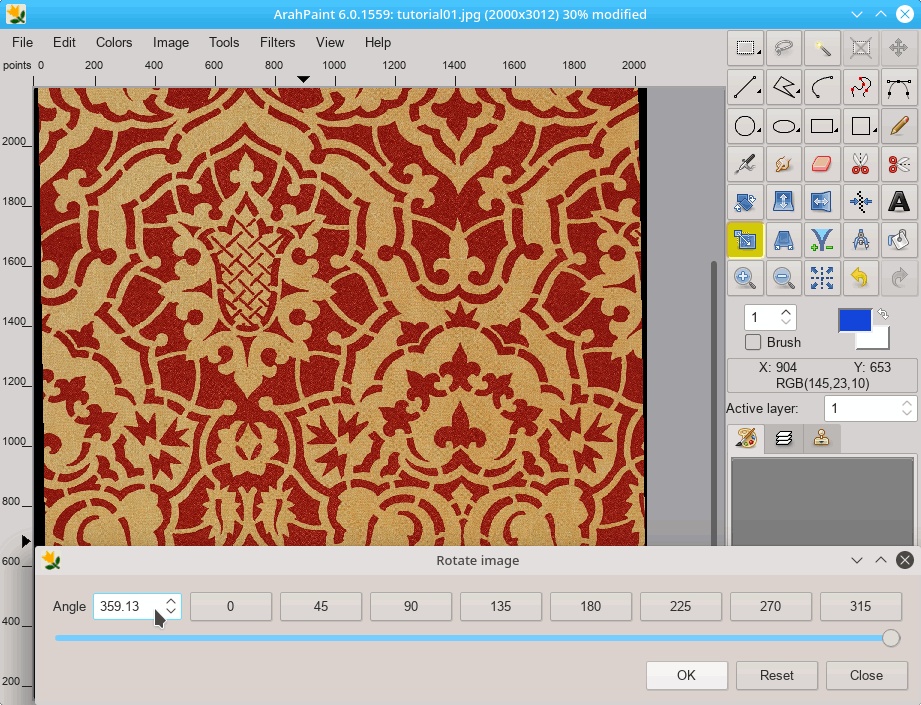
The upper image shows the image before rotation, and the lower one after rotation. If you like the result, press Close, if not press Reset and redraw the line.
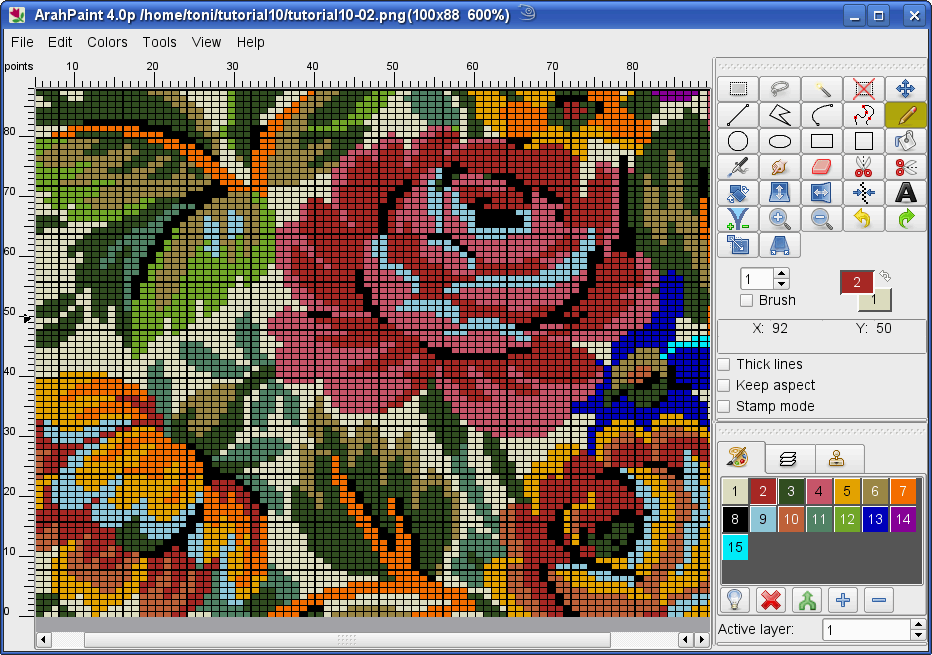
Then we have to find the smallest element of repetition (without mirror and half-drop) and cut it out of the image. To accomplish this, choose the rectangular selection tool ![]() from the toolbox, and draw the selection of your repeat with a mouse.
from the toolbox, and draw the selection of your repeat with a mouse.
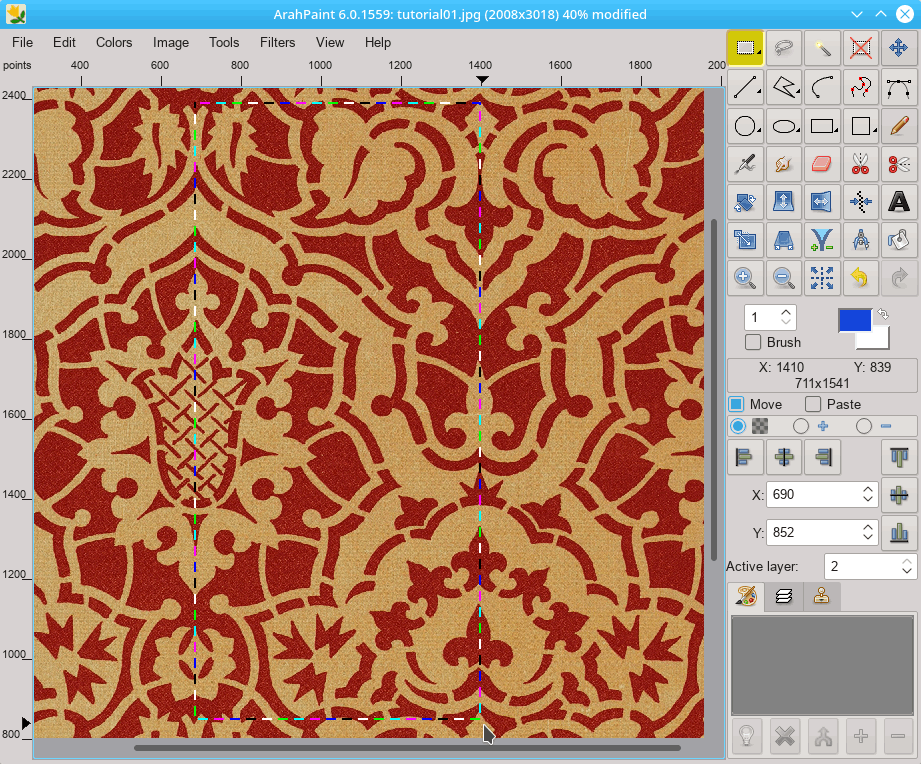
In the above image, we have intentionally selected a slightly bigger repeat area; we will fine-tune the repeat borders on a magnified picture. To zoom in or out, use + or – key, or press CTRL key and roll the mouse wheel up or down. To change the position of the selection border (before moving the selection), move the mouse over the selection border, and when the mouse cursor changes, press the left mouse and adjust the selection size.
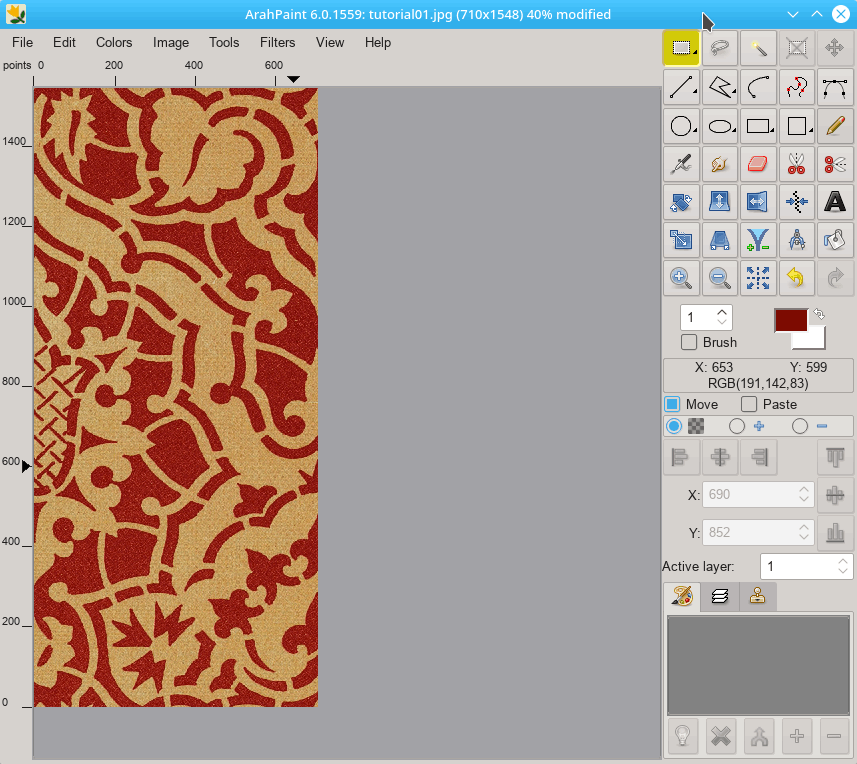
Then select Image > Crop to selection. The picture in ArahPaint, now contains half of the mirrored repeat. The title bar displays a filename, current image size, zoom level and the status (if modified).
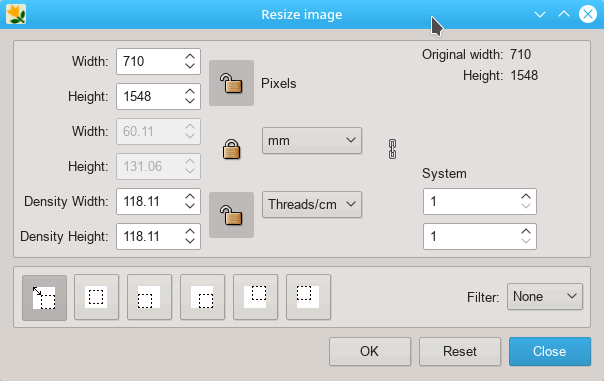
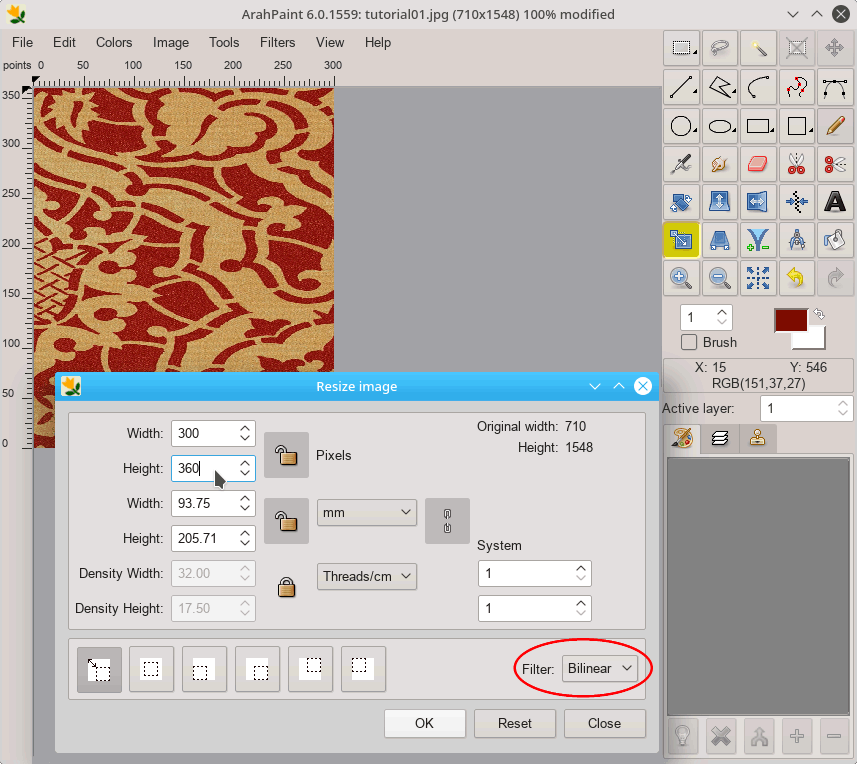
Before doing any image cleanup and corrections, we need to set the size of the image with respect to the number of ends (hooks) and weft density in the finished fabric. Open the Resize image dialog (Image > Resize image).
The Resize dialog of ArahPaint6 is divided into four parts:
- The information about the current image size is at the top of the window.
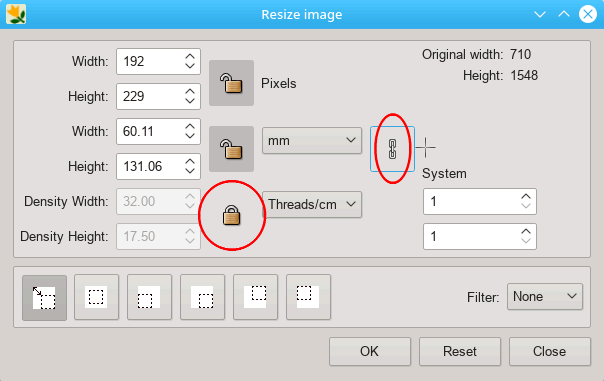
- The main section, where you change the dimension (in pixels or in physical size in length units (mm, cm, inches, or percent of original size), and change the density (dpi) of the image. If the associated linking chain
 is broken
  , you can change the Width and Height separately.
 - Section, where you choose either you will scale the whole image (
 ) or just add extra space in the foreground color to it (
 ).
).
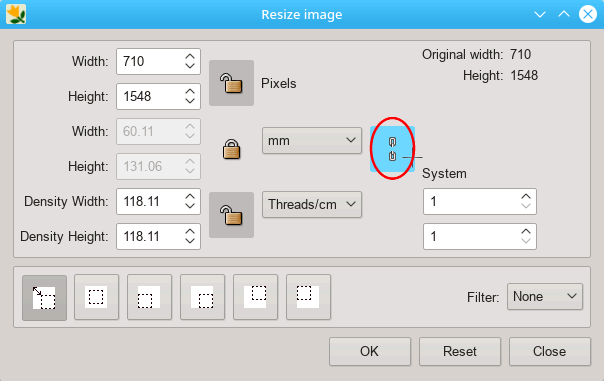
First set the warp and weft density of the final fabric, but before entering it, break the chain by clicking on it ( ![]() ). It changes to the broken chain icon (
). It changes to the broken chain icon ( ![]() ). Now you can set each density independently.
). Now you can set each density independently.
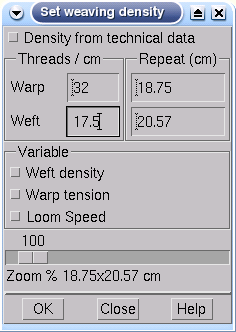
Set the unit of the density (Threads/inch or Threads/cm) and type-in both densities. Our fabric has 32 ends/cm and 17.5 picks/cm. As you set the density, the width and height values change too.
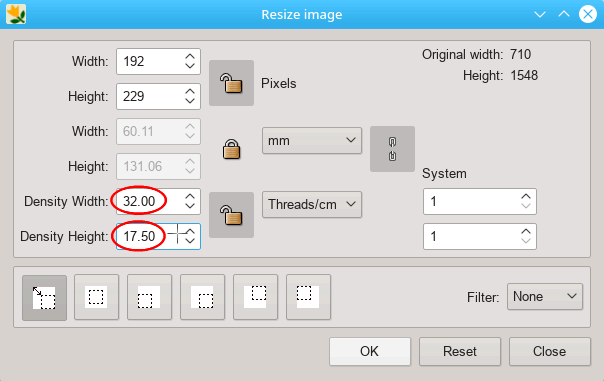
Lock the density – it means that it will remain the same, when you change other parameters. Close the chain again, so that the width and height will be calculated in the proportion to the density.
Set the new width dimension in pixels (usually it matches the number of hooks or some divisor of that number). In our example, the design width will be 600 threads; as we use just a half of the repeat at the moment, the width number is 300. Accordingly, the height is changed, as well as physical dimensions.
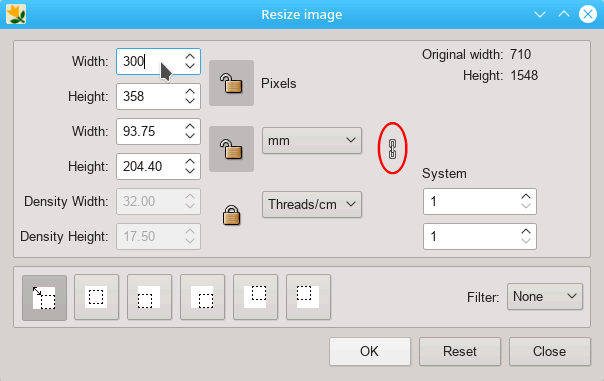
The software has calculated the Height of 358. This is mathematically correct, but we advise you to change it to a number, which is divisible by 3, 4, 5, 8 and 10, so you will be able to use weaves with different repeat size in height.
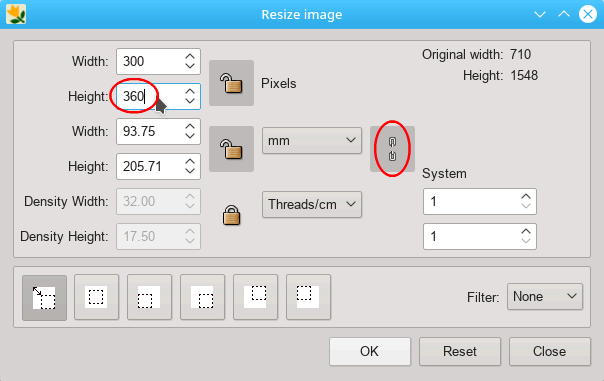
Break the chain by clicking on it ( ![]() ). It changes to the broken chain icon (
). It changes to the broken chain icon ( ![]() ). Enter 360, which is divisible by many numbers and is not too far from 358, in the height field.
). Enter 360, which is divisible by many numbers and is not too far from 358, in the height field.
Set the Bilinear filter as a type of image scaling algorithm; it reduces the errors caused by resizing the image. Then press the OK button.
The resulting image size is 300 x 360px.
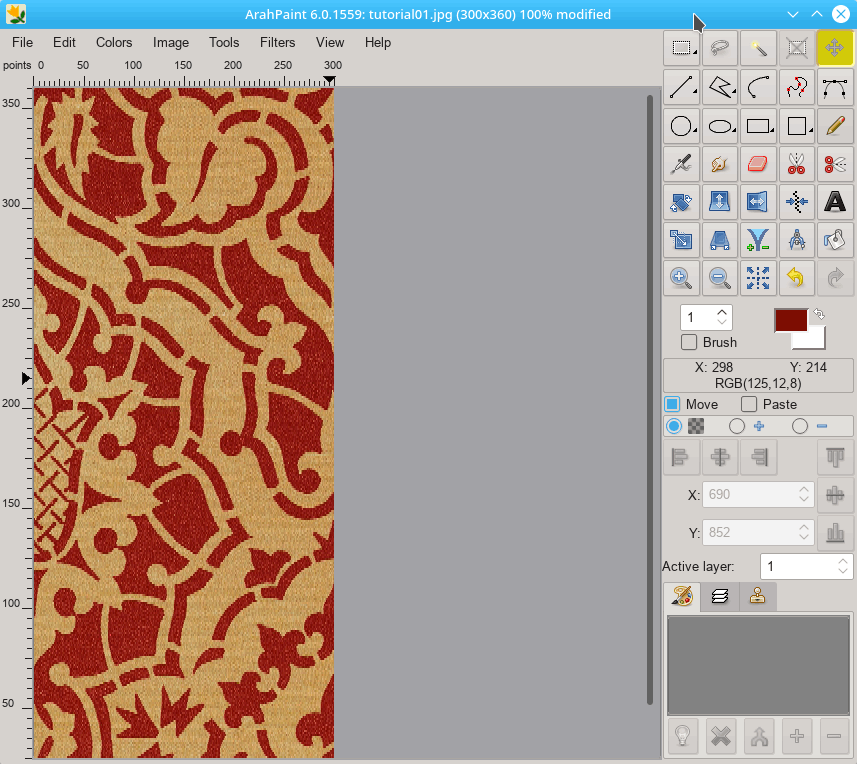
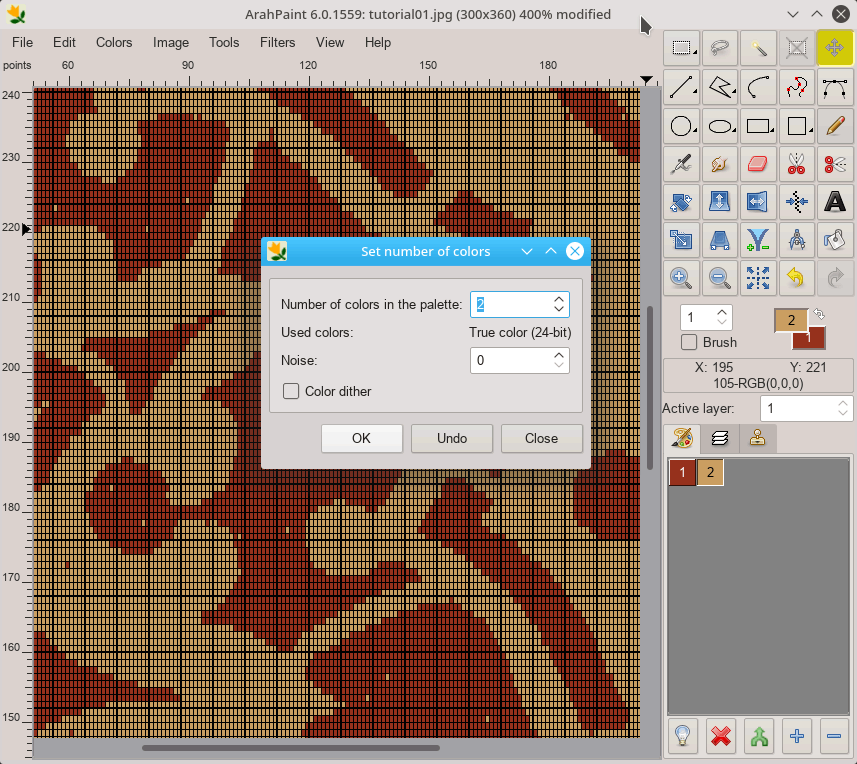
Currently the image is still in true color mode, you can see that the color palette in the lower right angle is empty. We need only two colors, since we will insert two different weaves, one for light and one for dark color. You can use two types of color reduction:
- automatic: Choose Set number of colors from Colors menu, and change the current number of colors to the desired one. Program will automatically select the colors, which are the most important for this image, and map all the other colors to the chosen ones.
- user defined: Choose Reduce number of colors from Edit menu in color palette window, and manually select colors, which you want to keep in the image. You can also use the Preview button, to check if it really keeps the visual information which you want to retain.
In this example, we are using automatic reduction. Set number of colors to 2.
Once you click OK, all colors will be mapped to the closest among the selected colors, and you will get the resulting color palette in the lower right corner.
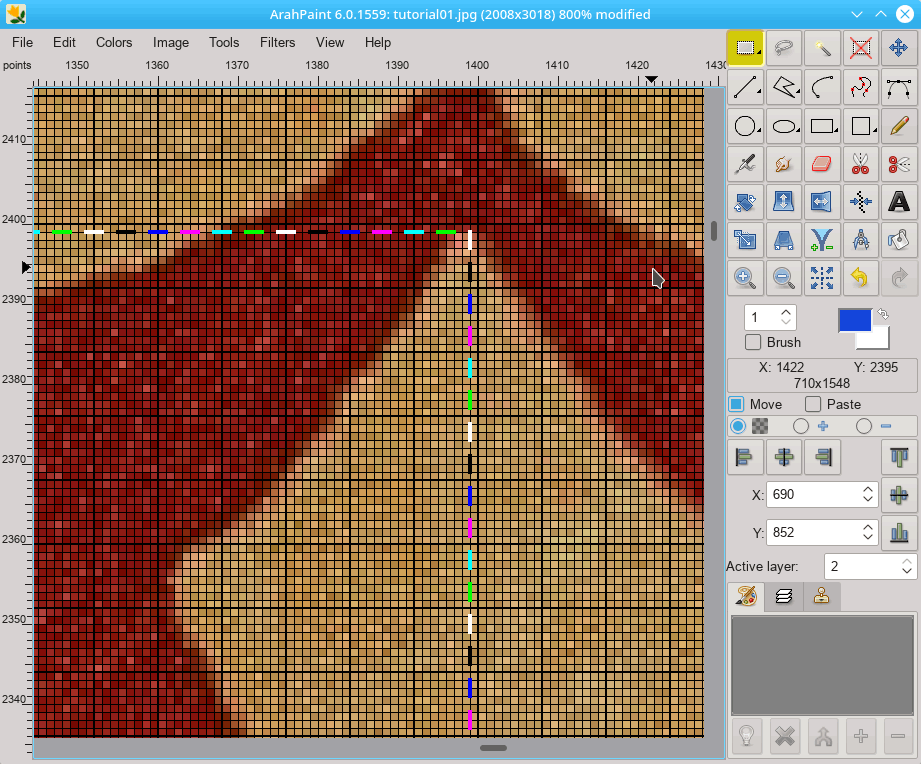
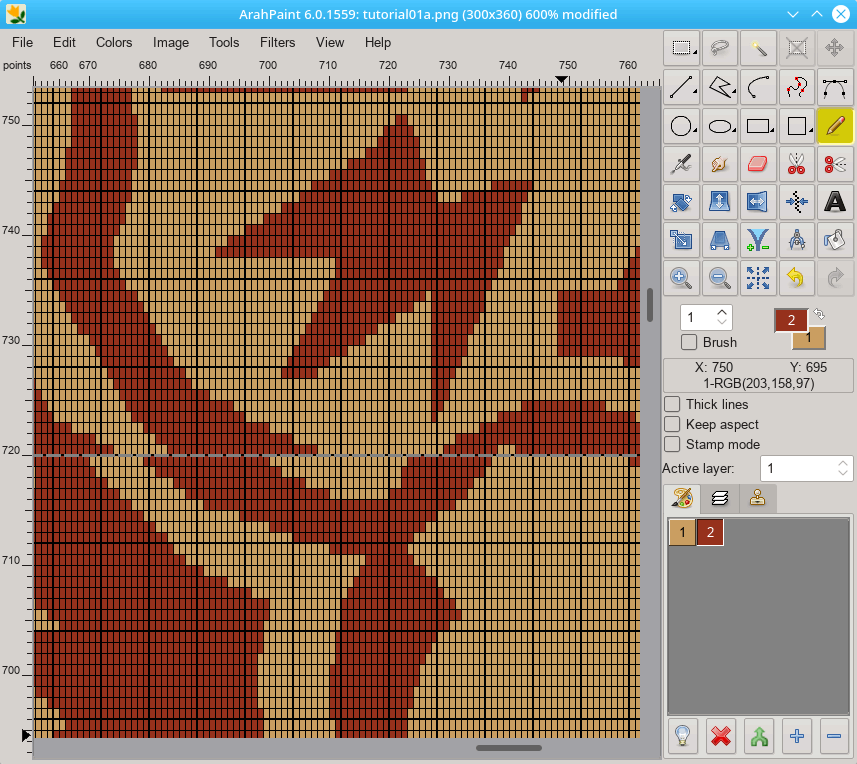
At this point we start with the correction of contours. You should use different drawing tools (single line, arc, fill with color…) and work in the different levels of zoom. To check and correct borders of the repeat use Image > Drawing in repeat and select the correct type of repeat and position of each motif. If you just click OK, the program will switch to the repeat view.
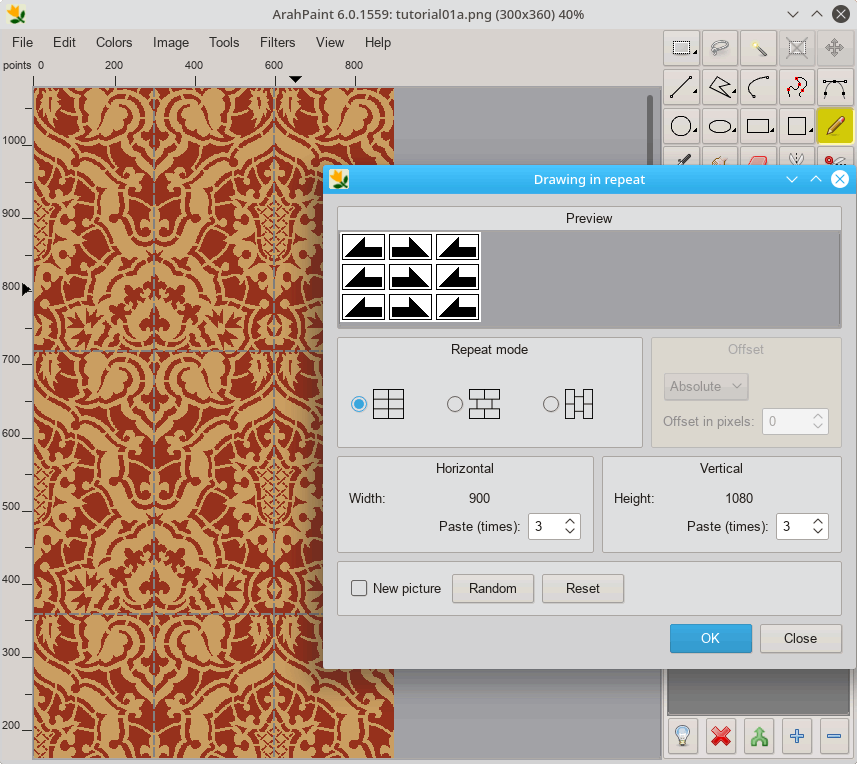
You can also draw the image in repeat, across borders. There are few mistakes in the image which are easy to correct in the repeat view.
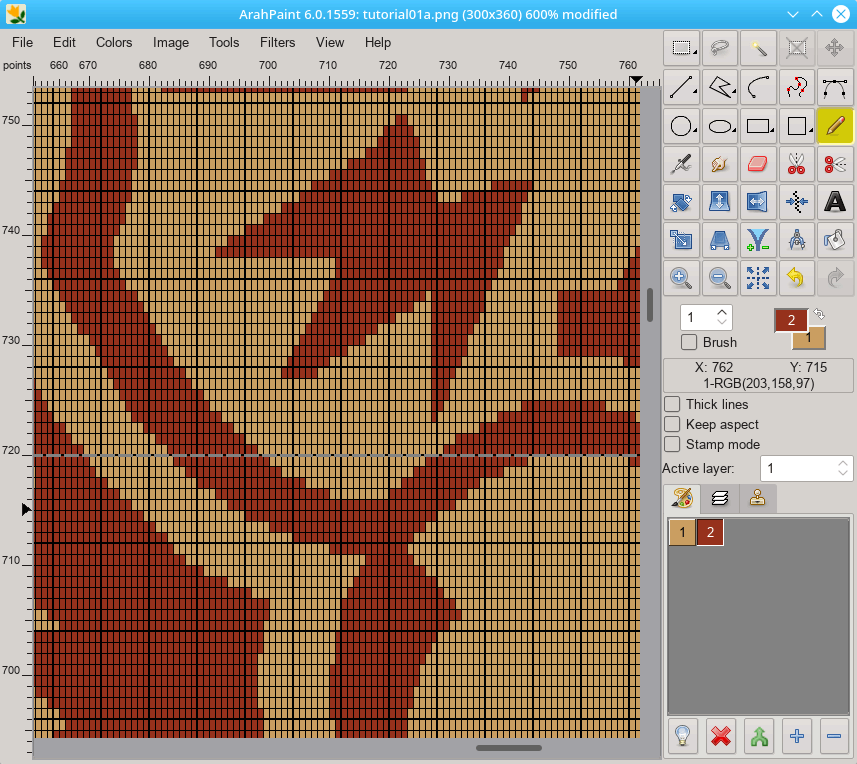
The above image has small errors on repeat junctions, and below is the corrected image.
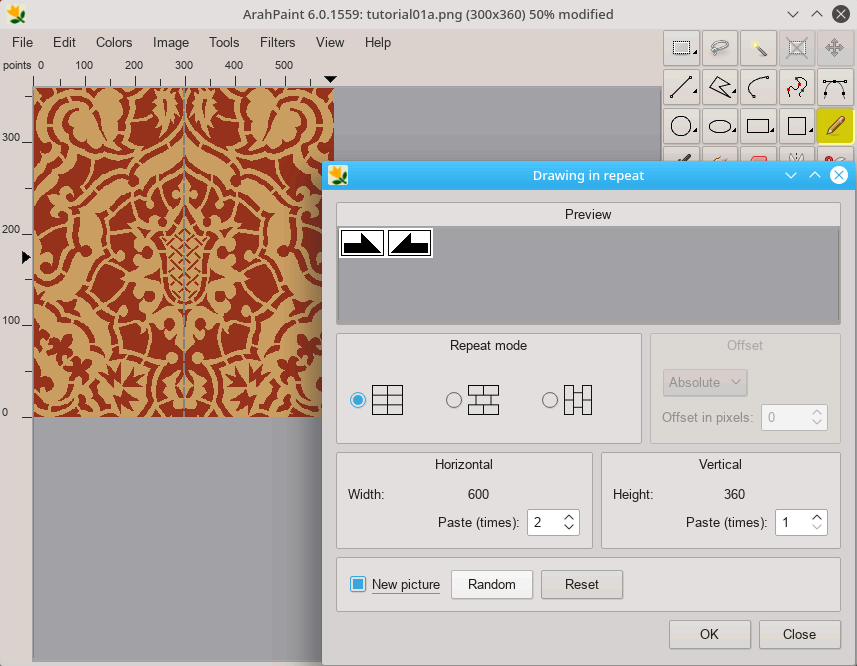
We will use the mirroring of the basic motif, to get the final size of the picture. Again use Image > Drawing in repeat, select just two horizontal repeats, and enable New picture toggle button before pressing OK. This will generate a new image with size 600×360 in the specified repeat.
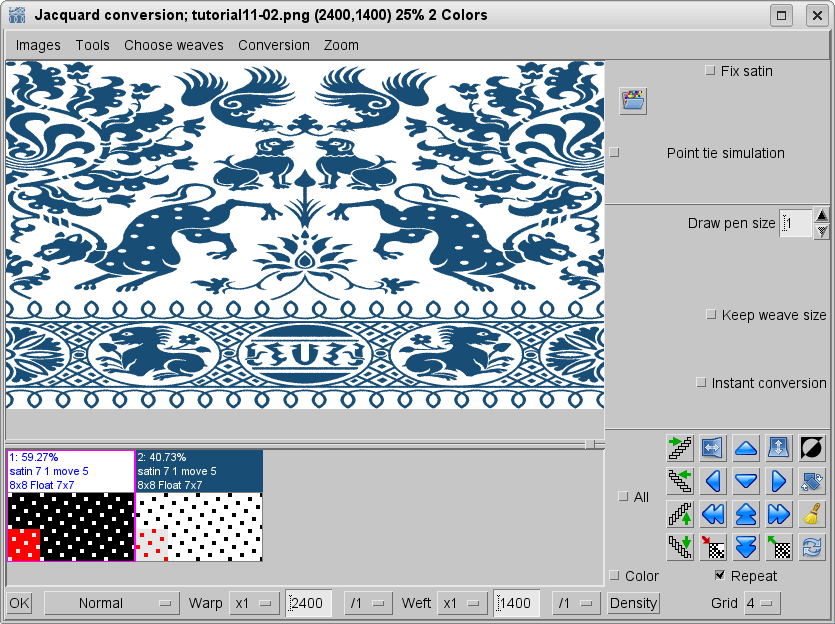
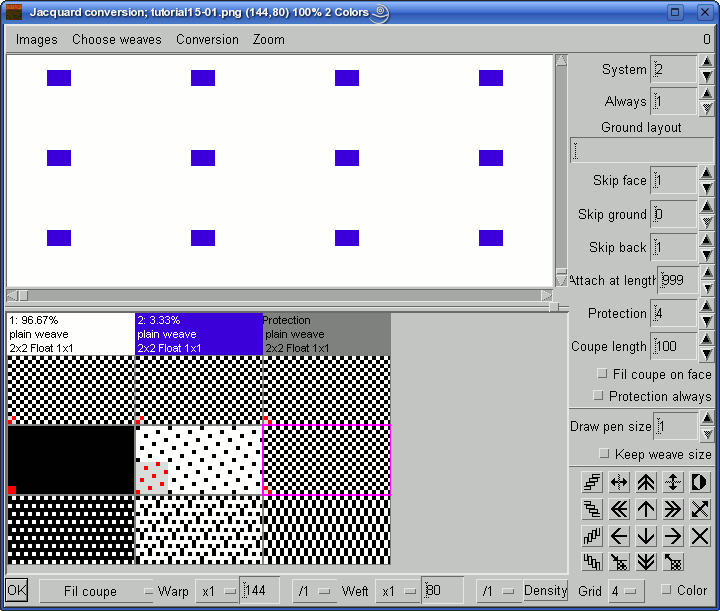
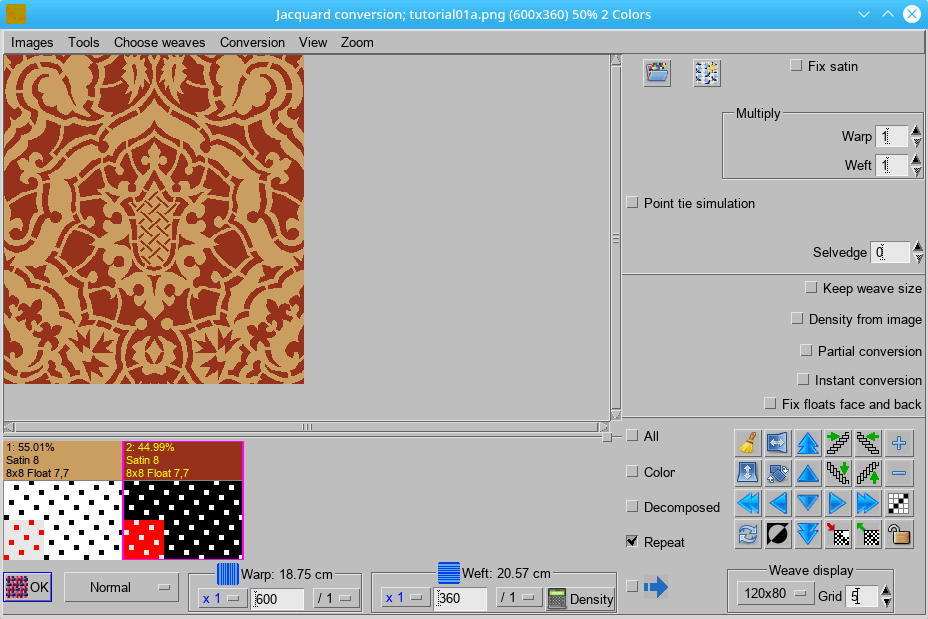
When the image is in seamless repeat, the number of colors equals the number of weaves to be used, and the size of the image equals or divides the pattern hooks (warps) and wefts (picks), we can pass the image to ArahWeave. There, we will select one weave for every color, and apply the weaves: colors will be replaced by weaves. You can now save your image, close ArahPaint and open ArahWeave. Open the Weave menu and choose Jacquard conversion. A new window will be opened. Load a finished picture, and then load a suitable weave for each color. In our example, we will use warp satin 7/1 for ground, and weft satin 1/7 for effect. We can use weaves from our database, or we can create/draw weaves during jacquard conversion. If we just load the first satin, then we can generate the second one by copying it to the second color with the right mouse button, making a negative of it with ![]() from the tools on the right, and then mirroring it vertically by
from the tools on the right, and then mirroring it vertically by ![]() .
.
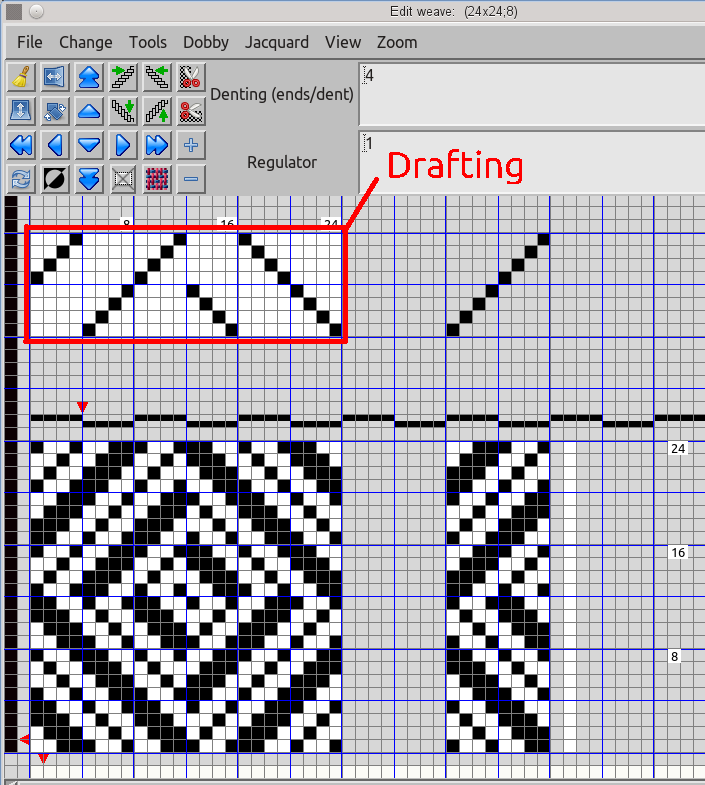
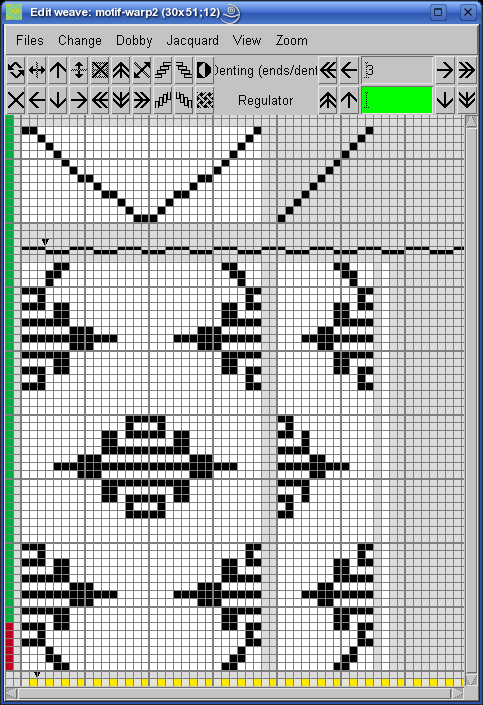
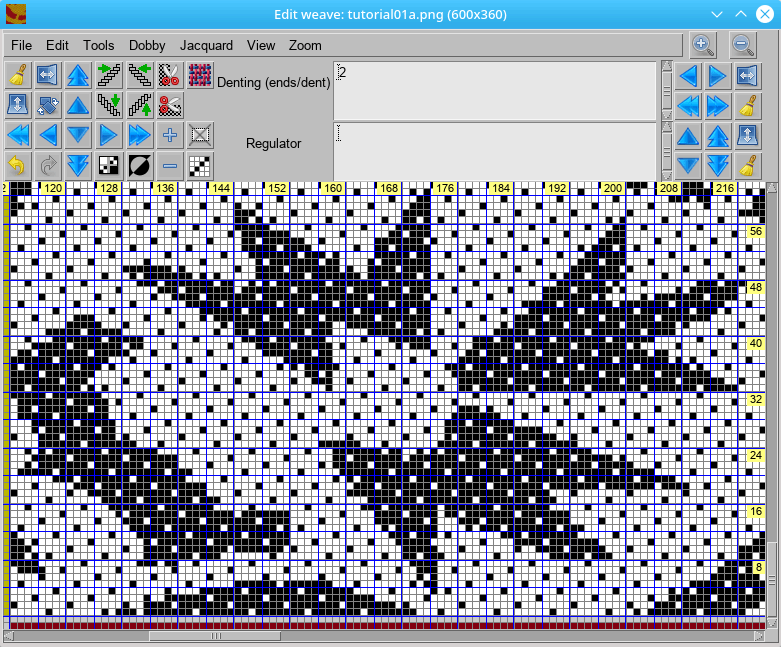
By pressing OK, you get the jacquard weave based on color image and weave selection. The final jacquard weave is shown below in the weave editor. To get the weave editor, you can press the right mouse button in the main ArahWeave window, with the weave area positioned at the mouse click.
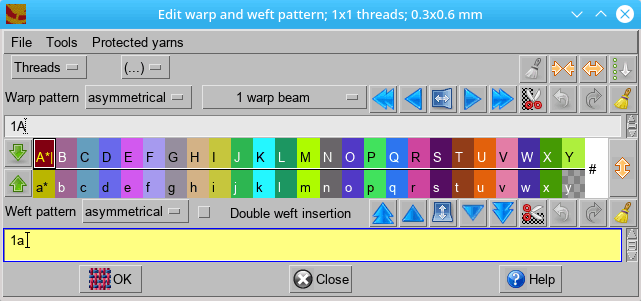
If we want to see a realistic fabric simulation prior to weaving, we need to set a few more parameters. First, set the warp and weft patterns to 1a, since we are only going to use one yarn color in warp, and one color in weft. Use Fabric > Thread pattern from the main menu. Then enter the warp and weft pattern, followed by a click to OK and Close.
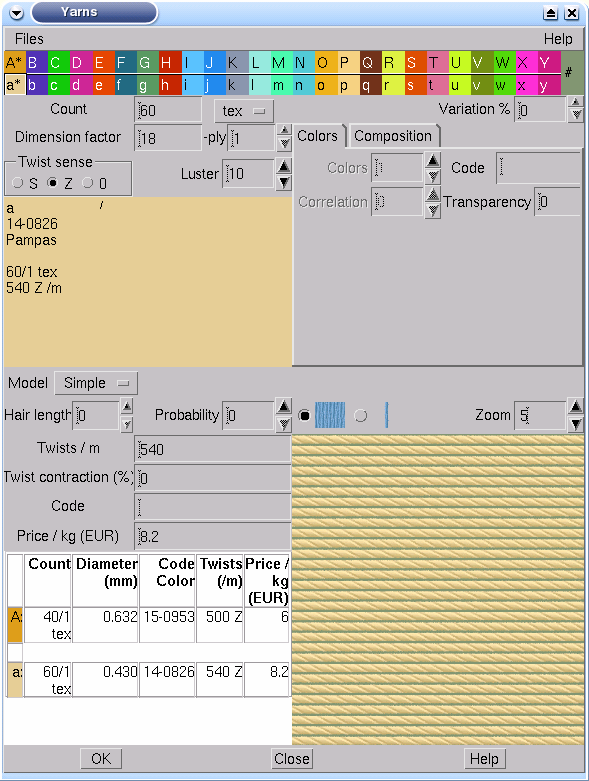
Set yarn count and twists in yarn editor (Fabric > Yarns). First click on the yarn you want to change; A for first yarn in warp, or a for weft, and then edit it.
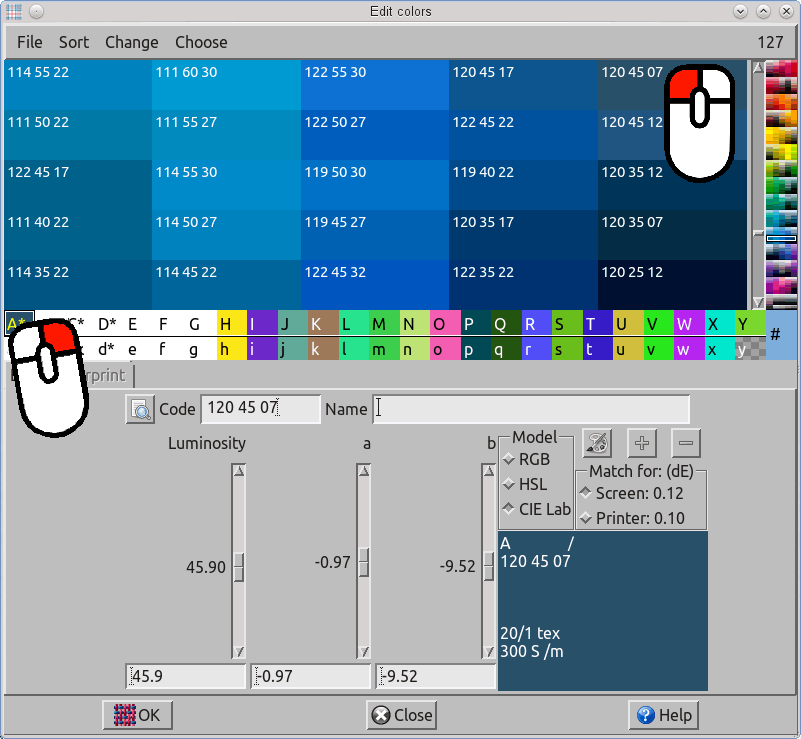
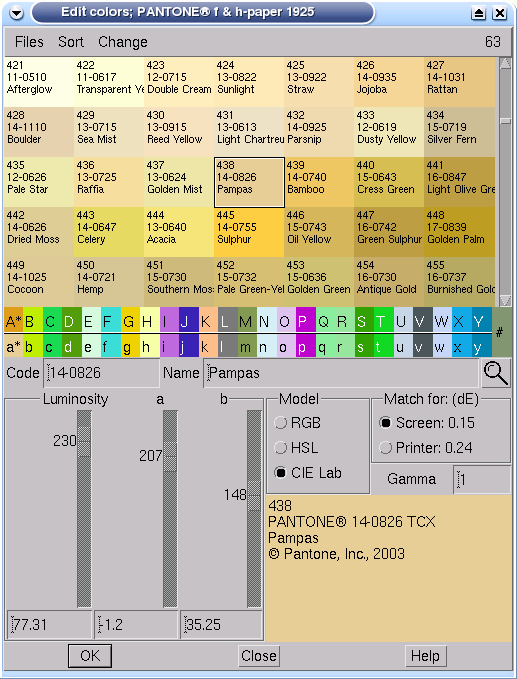
Set the desired colors in the Color edit window using Fabric > Colors. In this example we use PANTONE® for fashion and home, which is very common in textile world.
Go into Fabric > Density and set the correct density for warp and weft.
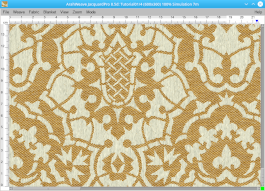
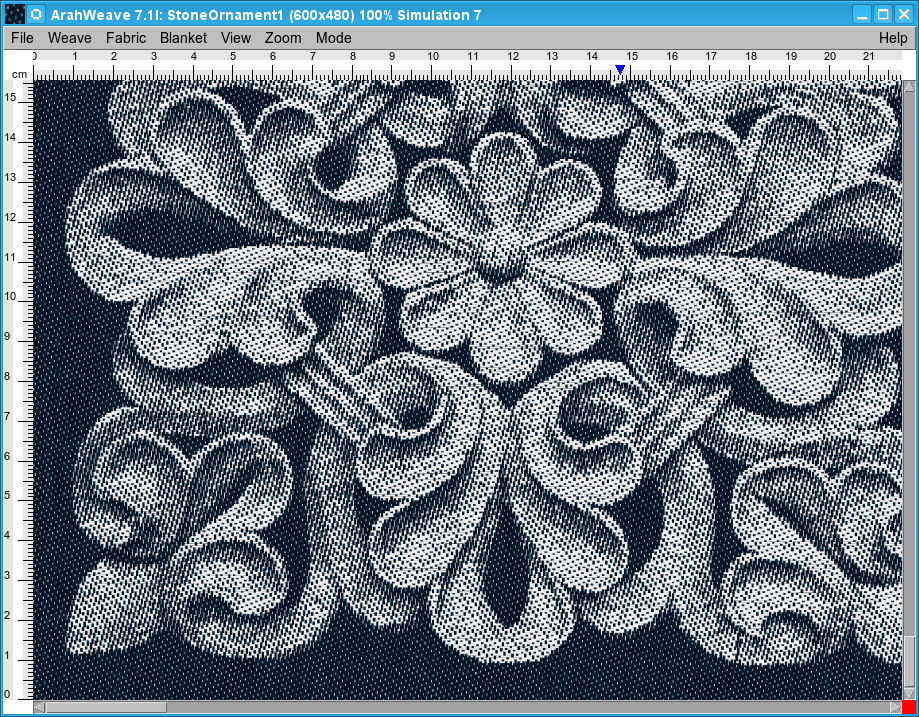
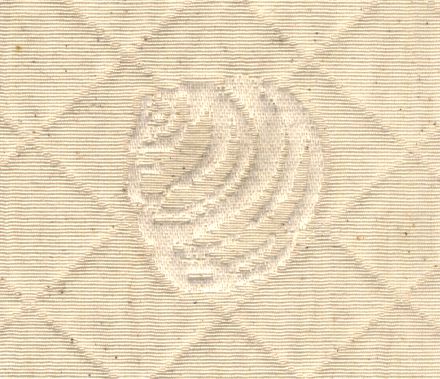
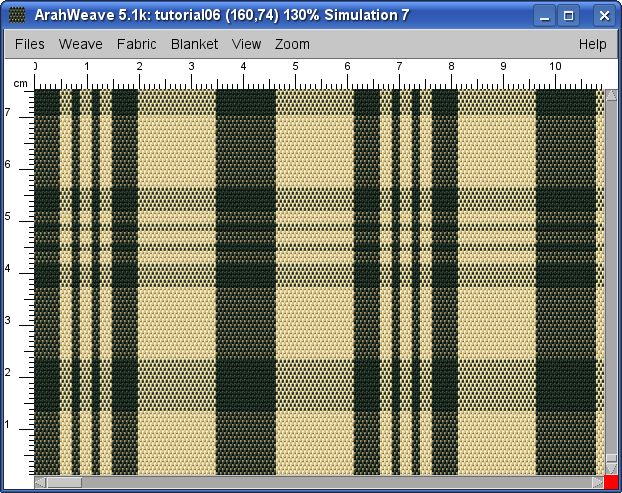
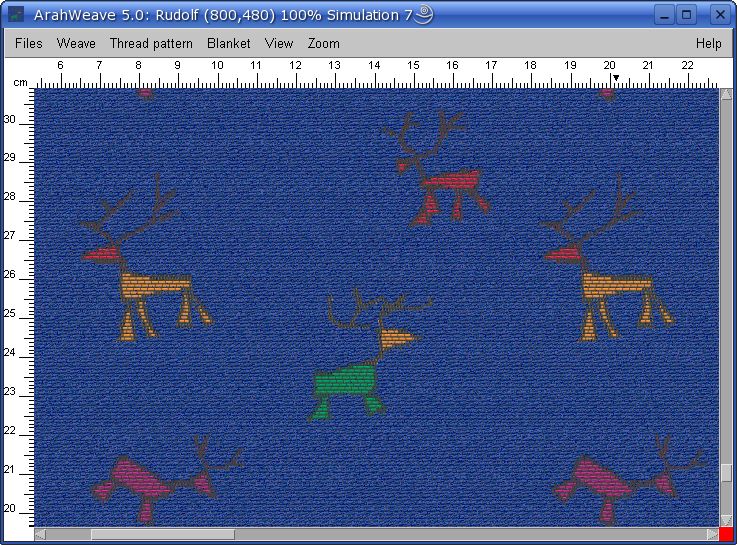
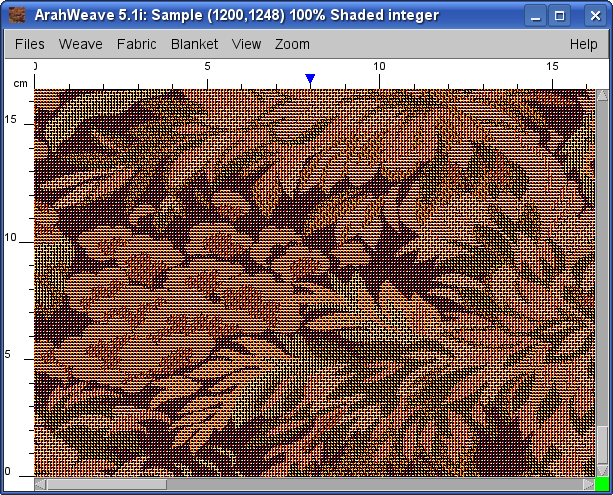
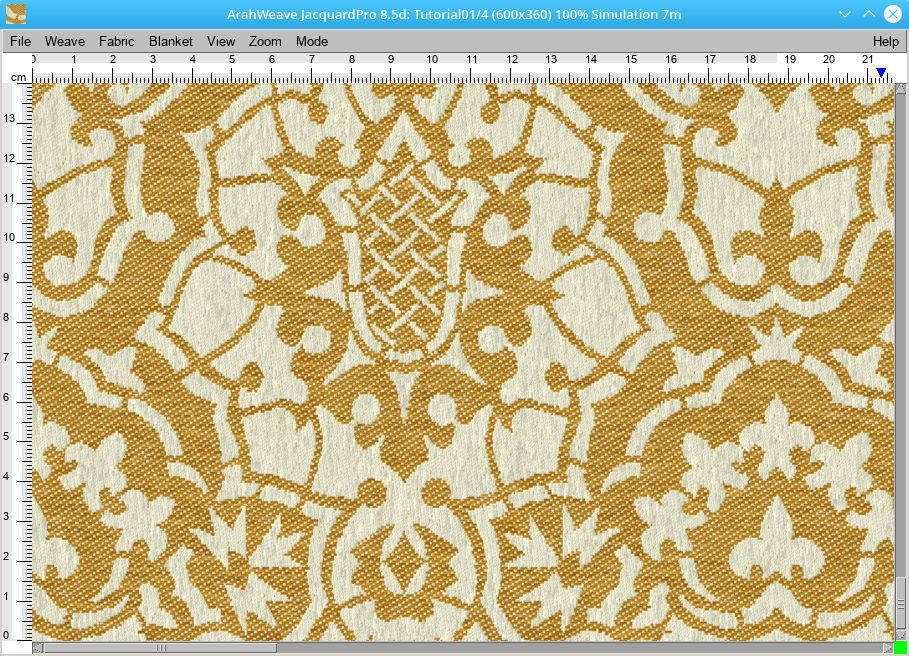
To get the simulation of the fabric, choose View > Simulation 7. If you want a higher quality of simulation, select a simulation with a higher number. Rendering will be slower, but precision will be better.
If you wish, you can print out the fabric simulation to a printer, or save it to an image file, like JPEG, so that the customer can confirm the pattern before weaving. For best results, use the printout, but if a customer is very distant, and you agree to use the color library for color specification, you can save a lot on the express courier, if you just e-mail the picture. To print a fabric simulation, use Files > Print fabric to printer.
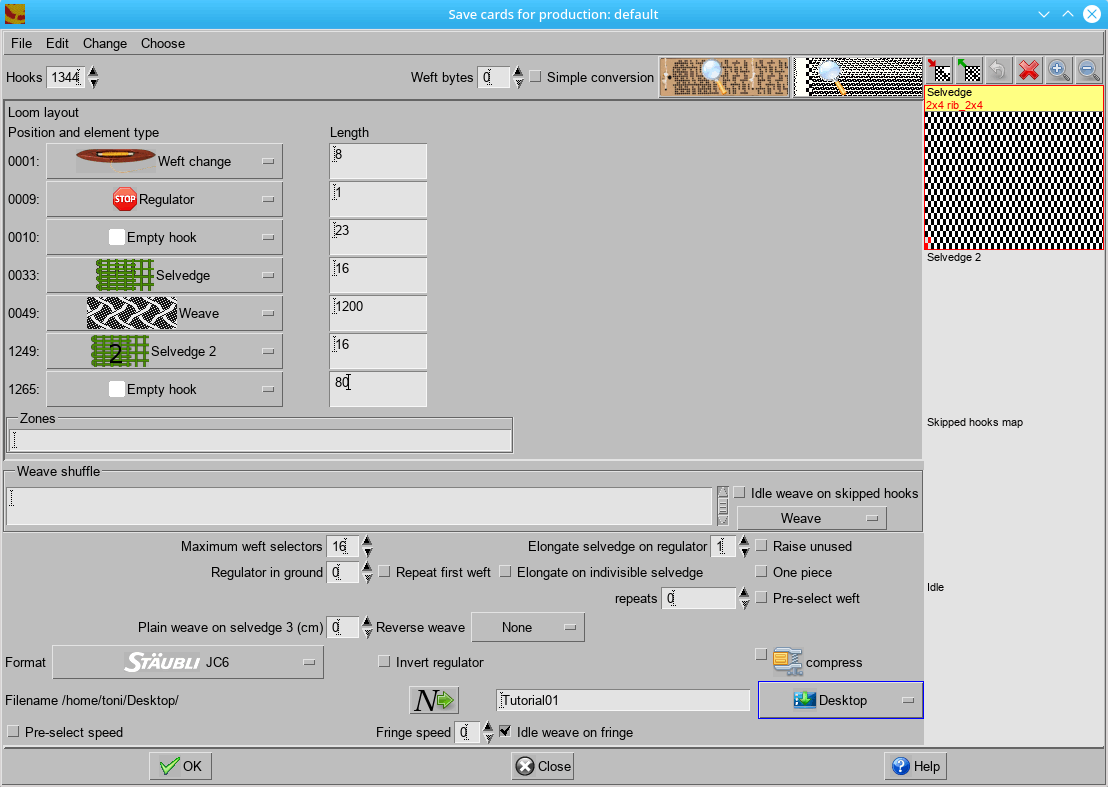
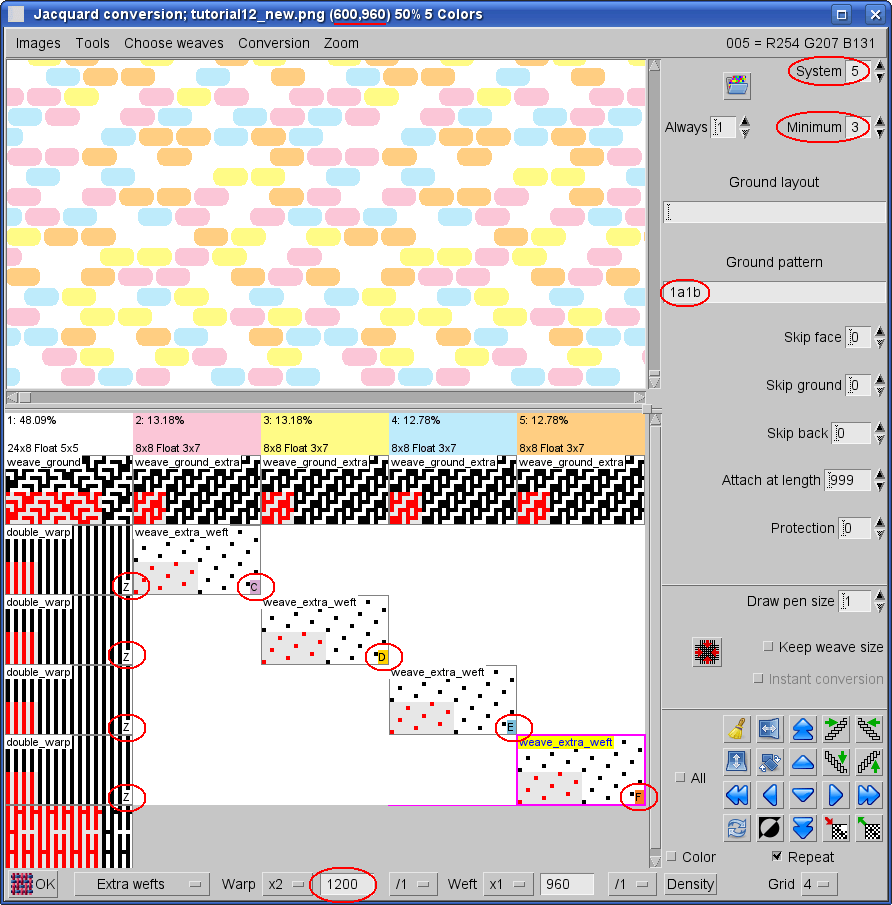
We are now at the last step of preparation of our sample for production. You have to know the parameters of the jacquard and the loom to accomplish this. In the example, we have a single jacquard head with 1344 hooks, out of which 1200 are used for design, and each design hook carries four threads. Enter total number of hooks in Weave > Save cards for production. Then edit the loom’s layout, by entering the type and number of hooks for each element, load a weave for selvedge (by clicking on upper right corner area) and choose the output format and destination for saving.
Since you do not want to enter this information every time you make a jacquard file, you can also save it using Files > Save loom layout, so you can load it later, if you want to prepare another design for the same loom.