
![]()

TUTORIALS
Creating Name Selvedges in ArahWeave
First we need to create an image with text and maybe some figuring elements, which will be used to create a weave for “name selvedges”. We will edit the image in a horizontal layout, and when finished, we will rotate it into a vertical position.
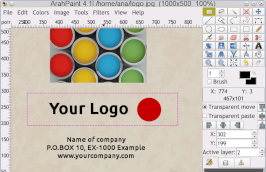
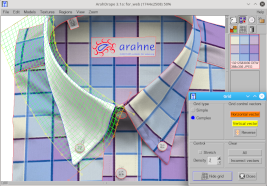
Open ArahPaint ![]() and choose New picture from the File menu. Enter the Height value—in our case, it is 36 (half of the number of ends in the selvedge). The width value is not that important; just make sure that there is enough space for design. We will delete unnecessary pixels later in the design process.
and choose New picture from the File menu. Enter the Height value—in our case, it is 36 (half of the number of ends in the selvedge). The width value is not that important; just make sure that there is enough space for design. We will delete unnecessary pixels later in the design process.
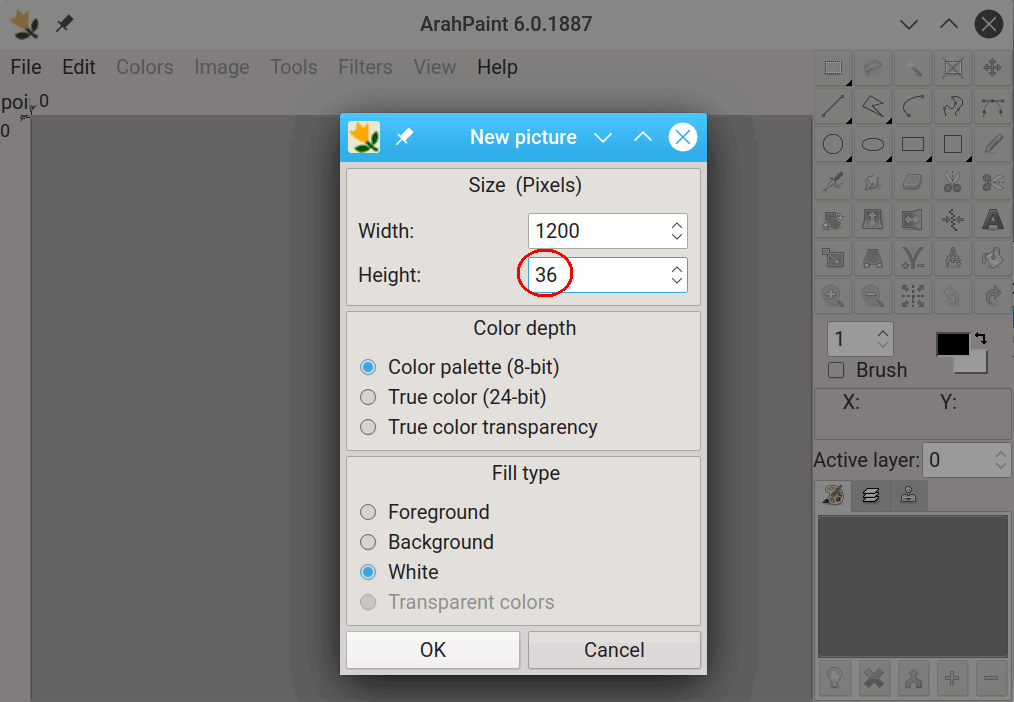
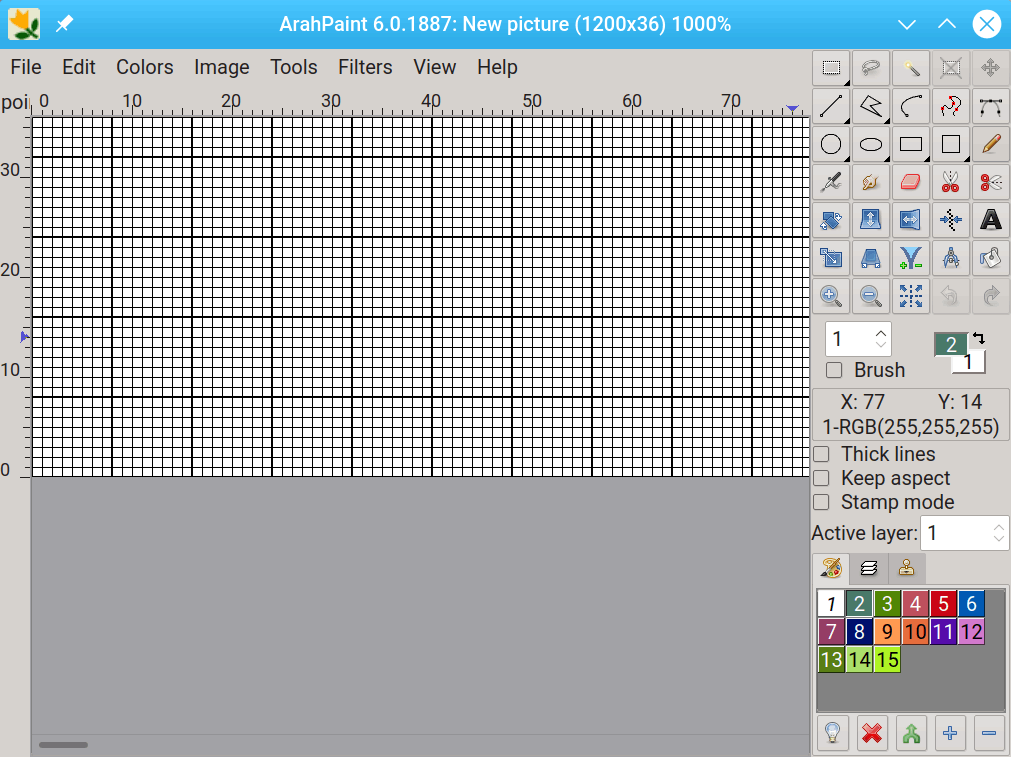
You get the image with a size of 1200×36 pixels.
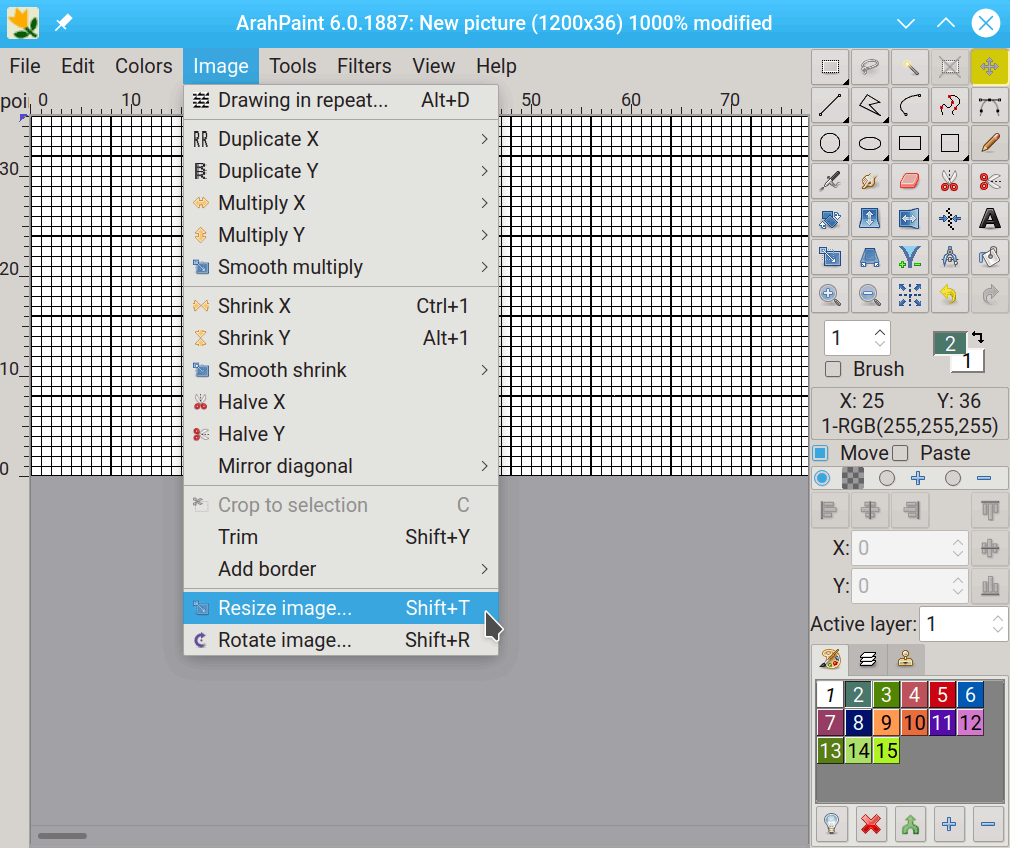
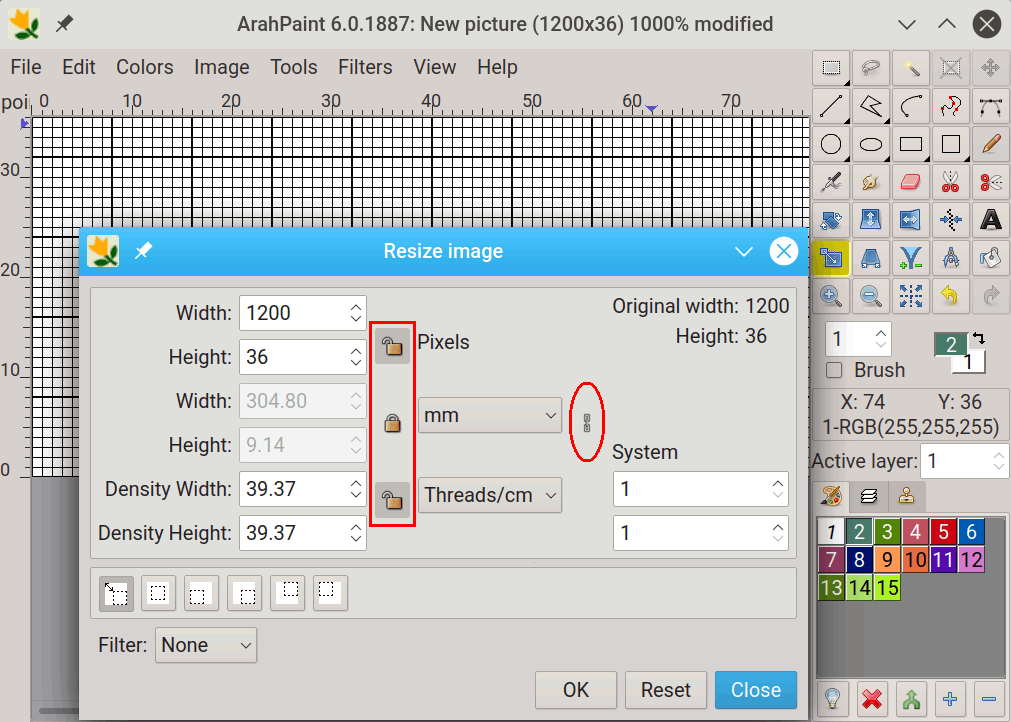
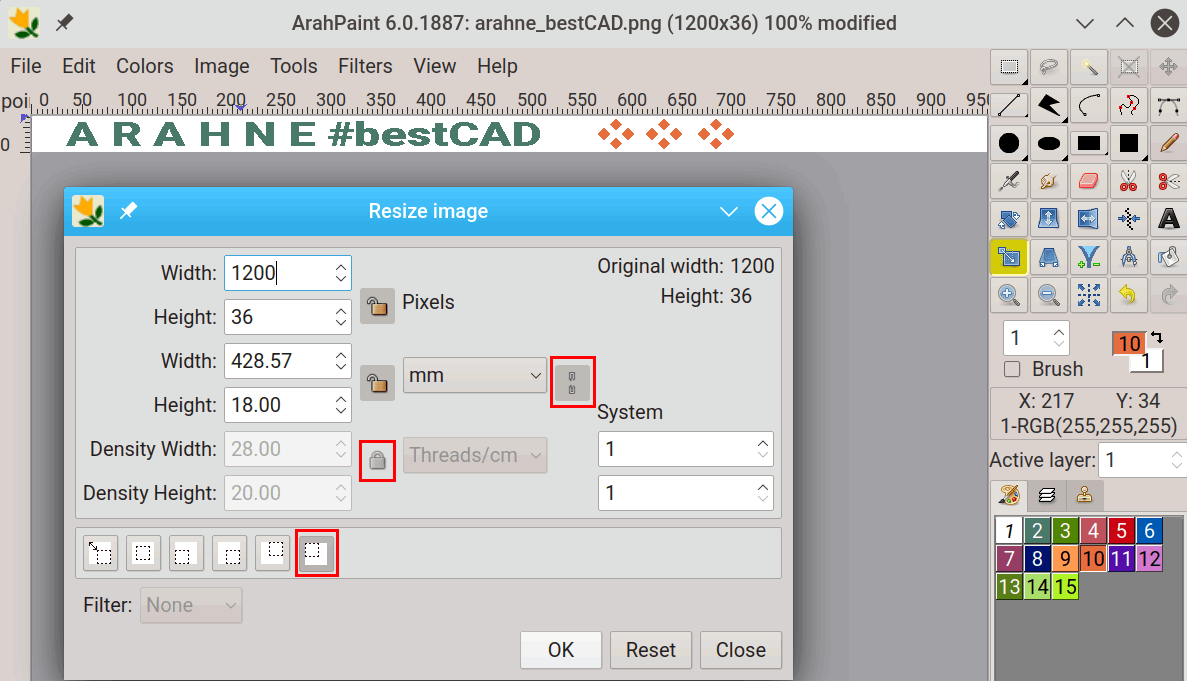
Before we do any designing work, we should set the dpi of the image to match the warp and weft density of the fabric (selvedge). Open the image resize dialogue (Image > Resize image).
The picture below shows the default setting of three locks and chain links in the Resize image dialogue. If you click on the lock next to the Width and Height text boxes (Pixels) and lock it, the width and height values will not be changed as you set the density. If the chain icon next to the Width and Height boxes is unbroken, the Width and Height will stay in the same proportion to each other. If you break the chain by clicking on it, you can scale the width and height independently of each other.
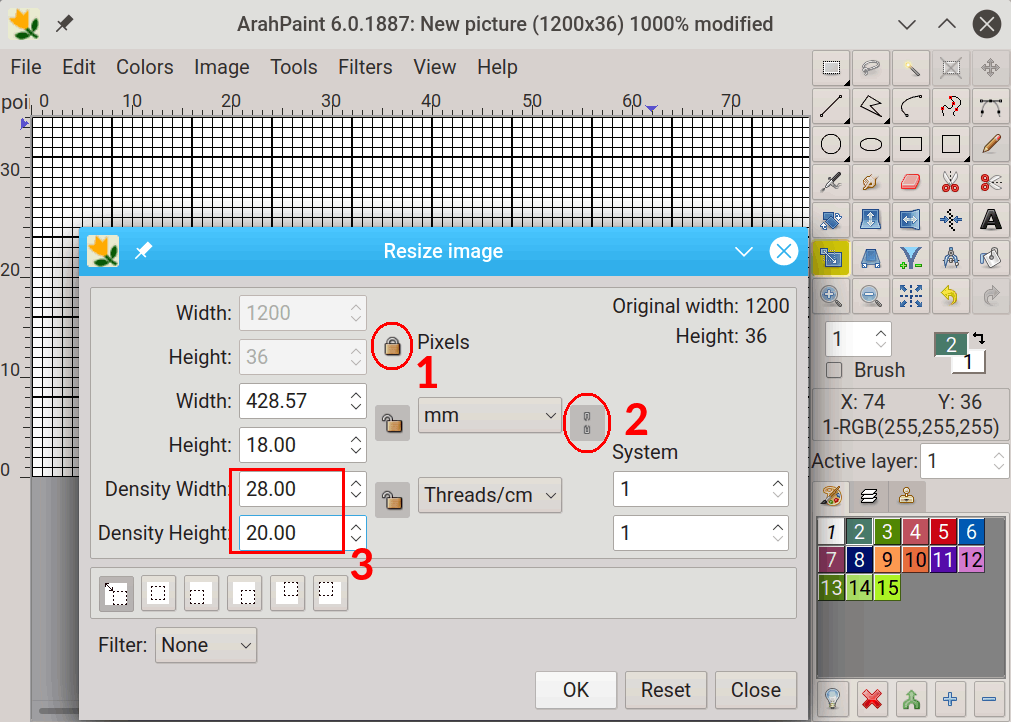
1. Click the Pixels lock and change its status to locked. The image width and height in pixels will remain unchanged.
2. Break the chain, so both densities can be changed independently of each other.
3. Set the density. Suppose that the density of warp is 40 ends/cm and the density of weft is 28 picks/cm. We should enter the weft density into the width text box, and the warp density into the height text box. We will use just a half value of the warp density (20 ends/cm) because we will multiply the design by two before converting it into a jacquard file.
4. Click OK.
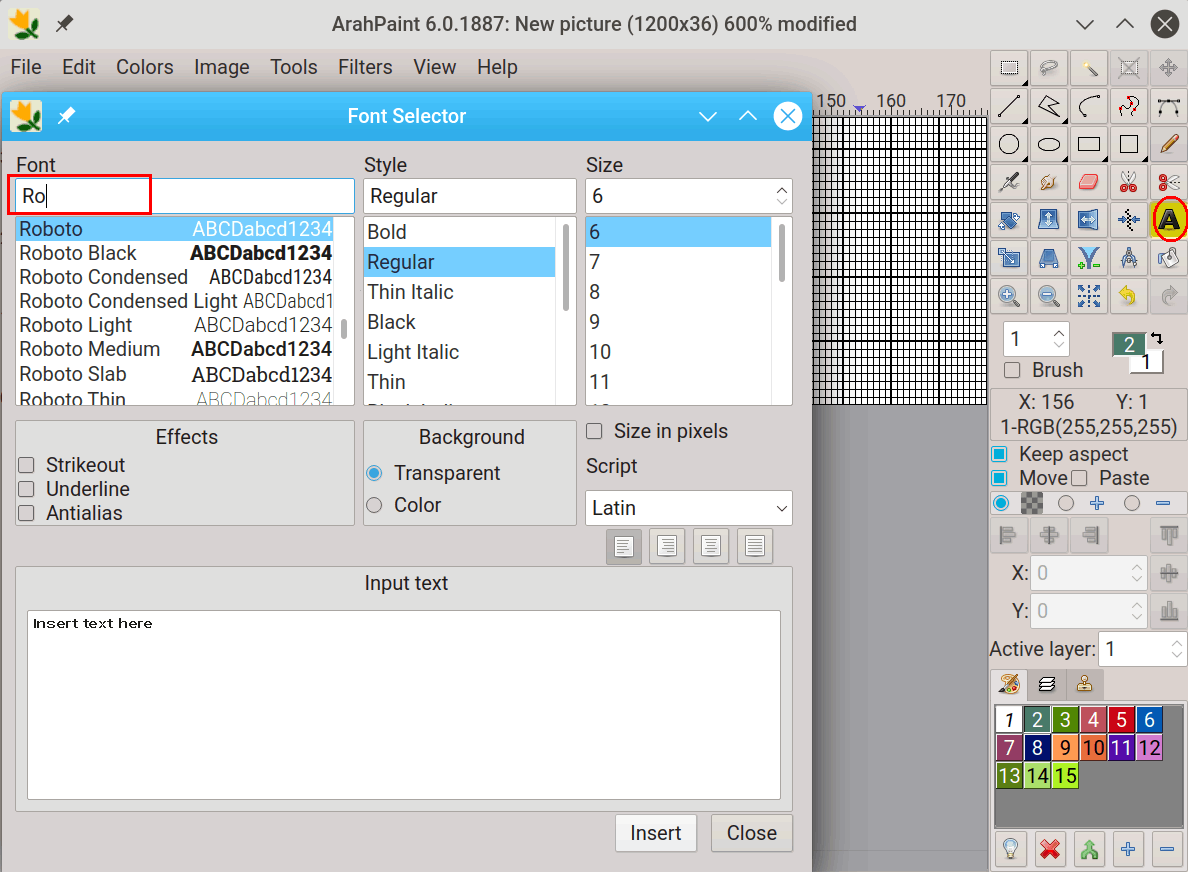
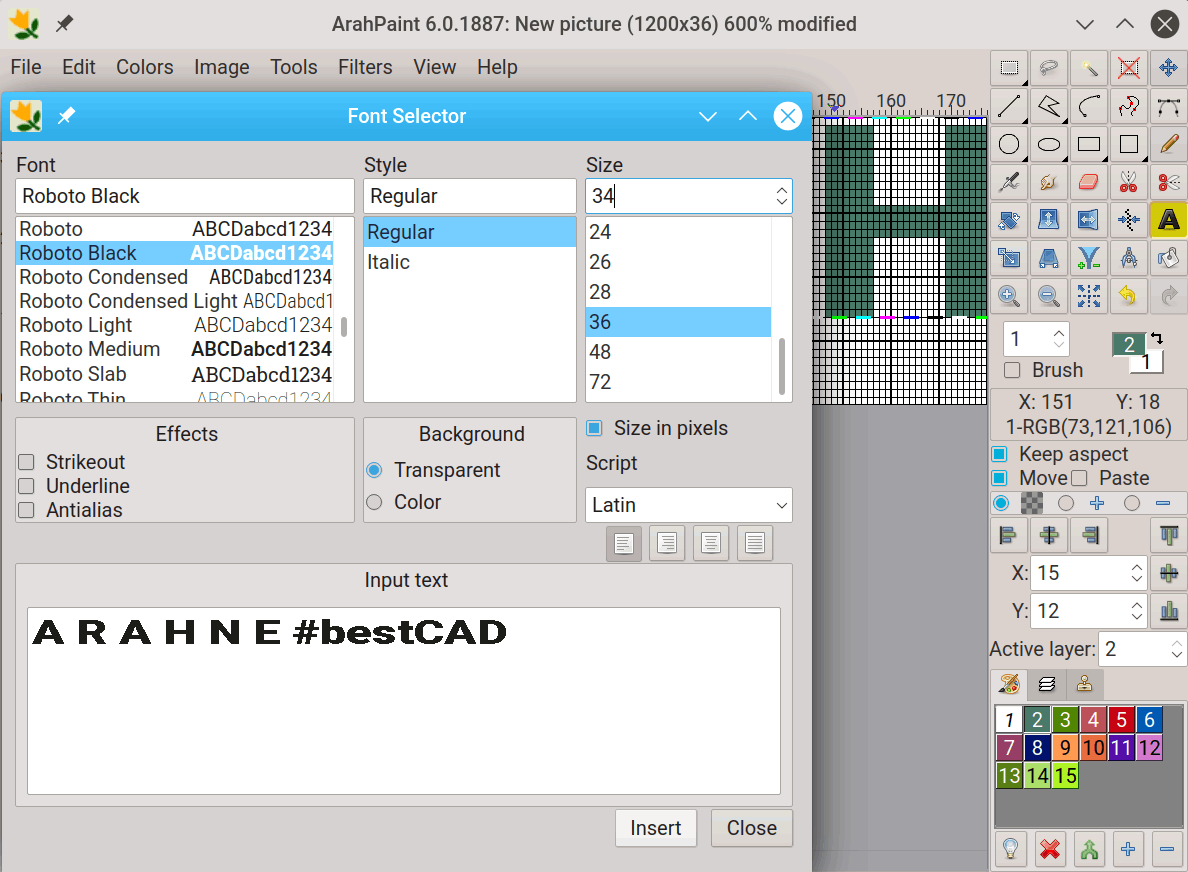
Select the Text tool ![]() in the toolbox. Choose a font in the Font Selector window. You can scroll the list, or you can use the filter text box to search for the desired font. In the figure below, there is “Ro” written in the Font filter field, because we were searching for the Roboto group of fonts.
in the toolbox. Choose a font in the Font Selector window. You can scroll the list, or you can use the filter text box to search for the desired font. In the figure below, there is “Ro” written in the Font filter field, because we were searching for the Roboto group of fonts.
Select the font type that you want to use, and the size (height). I have chosen a size of 36, so about 28 out of 36 threads will be used for letters. Full 36 pixels will be used if the text contains characters like g and Ü, which stick out of the cap height (the height of regular capital letters). Then type in the name or text that you want to use on the selvedge.
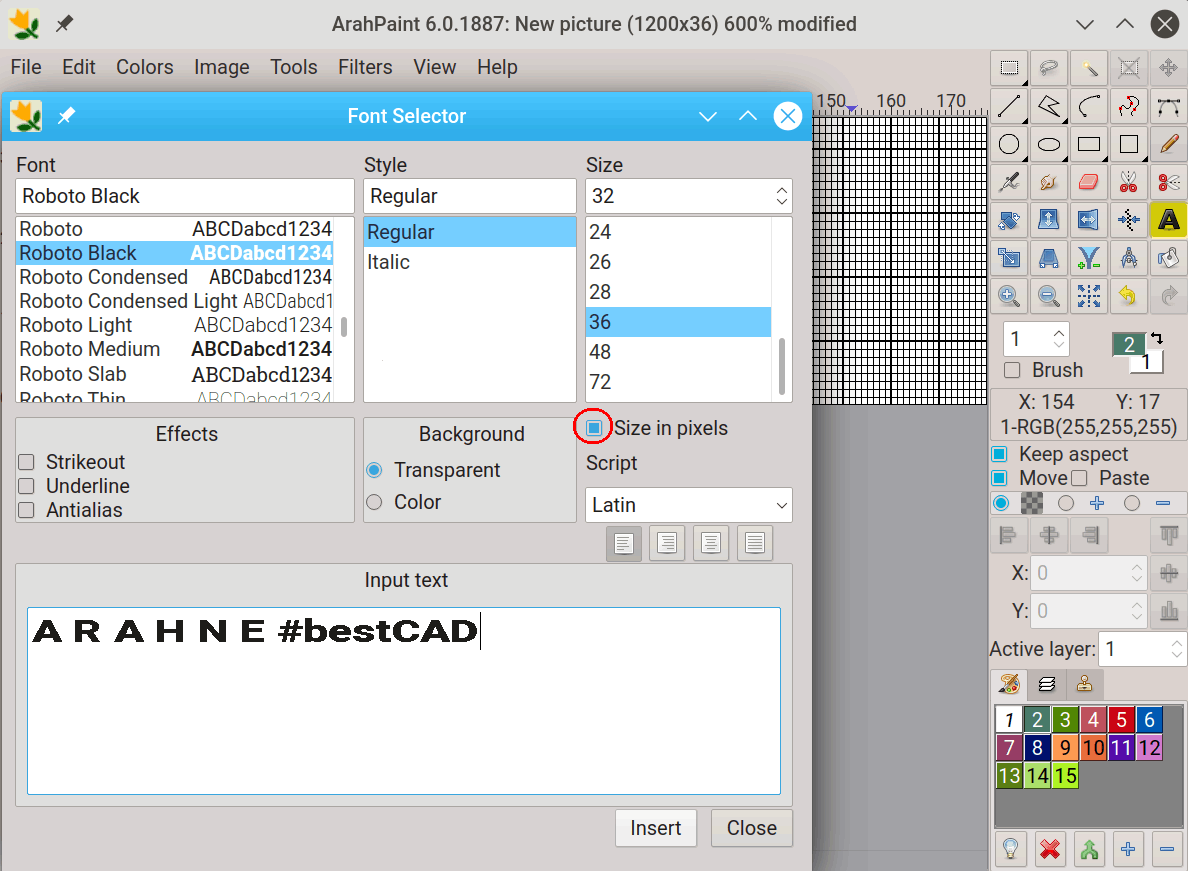
Click the Insert button. The text will be inserted into the image as a separated layer. If you notice that the size is not correct, or that you want to use another font, change values in the Font selector, and click the Insert button again. The new layer will replace the old one. When you think that the text is fine, close the Font Selector dialogue.
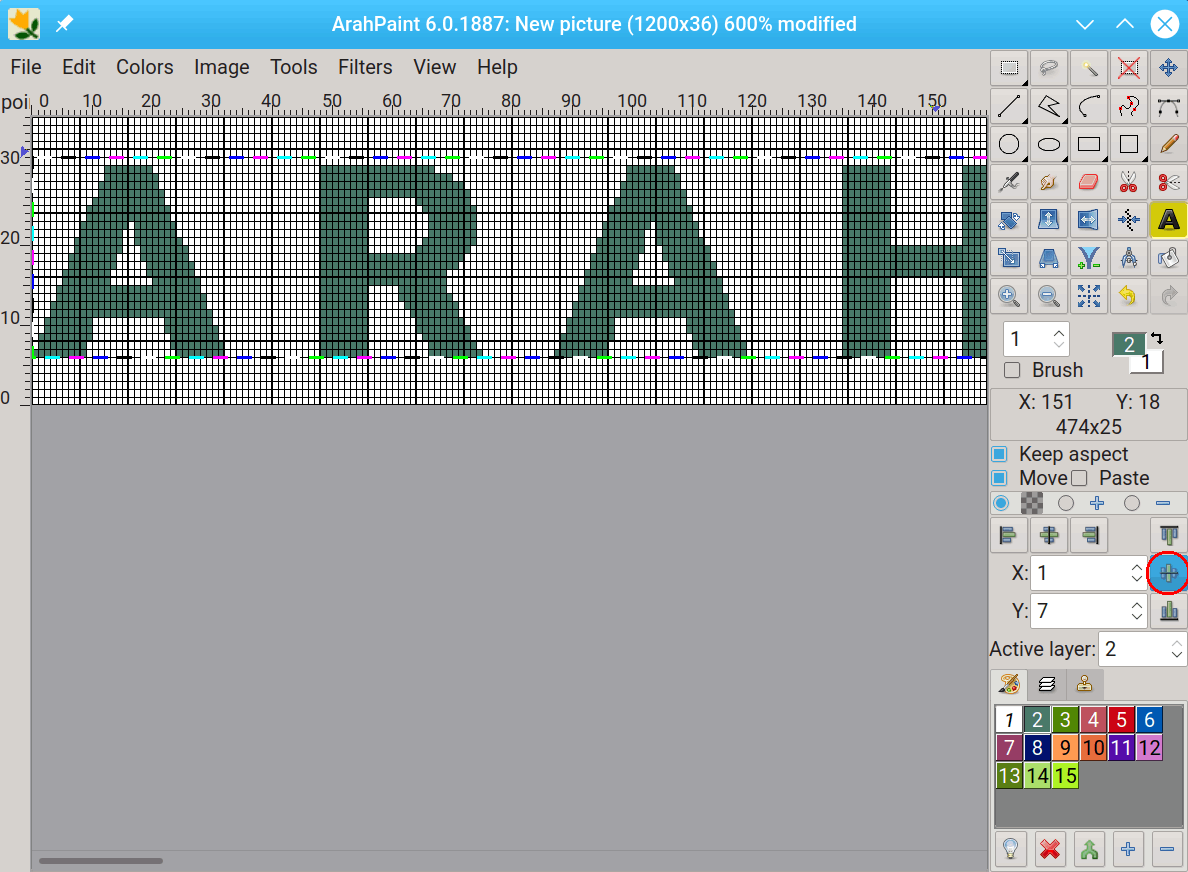
Select the Move tool (![]() )in the toolbox. Click on any letter and drag the layer to the proper position (probably the middle of the image). You can also use the Center vertically icon
)in the toolbox. Click on any letter and drag the layer to the proper position (probably the middle of the image). You can also use the Center vertically icon ![]() to place a layer exactly in the middle of the image.
to place a layer exactly in the middle of the image.
Then click the Merge down icon ![]() to merge a layer and the image.
to merge a layer and the image.
As you may know, the colors in the image are not the actual colors of the woven fabric. They just determine areas that will be replaced by weaves in the process of designing a selvedge.
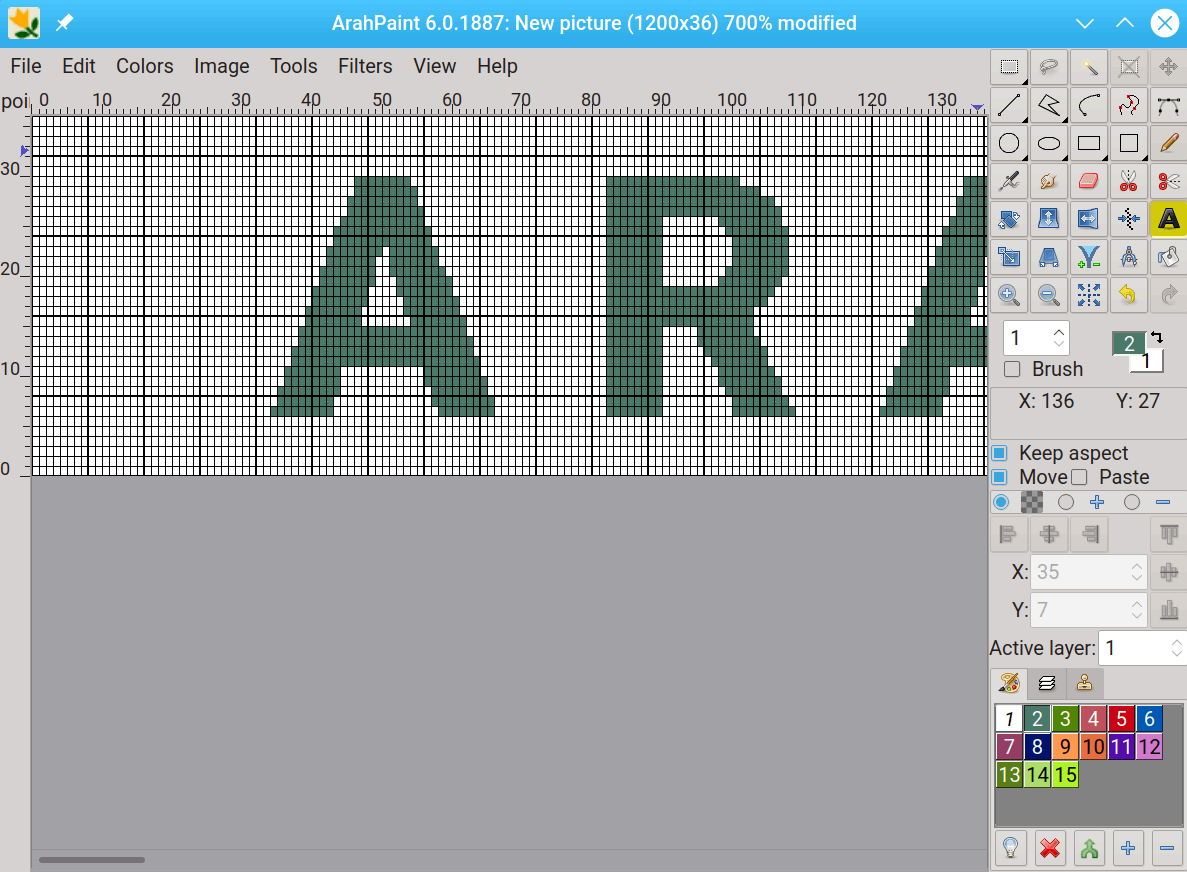
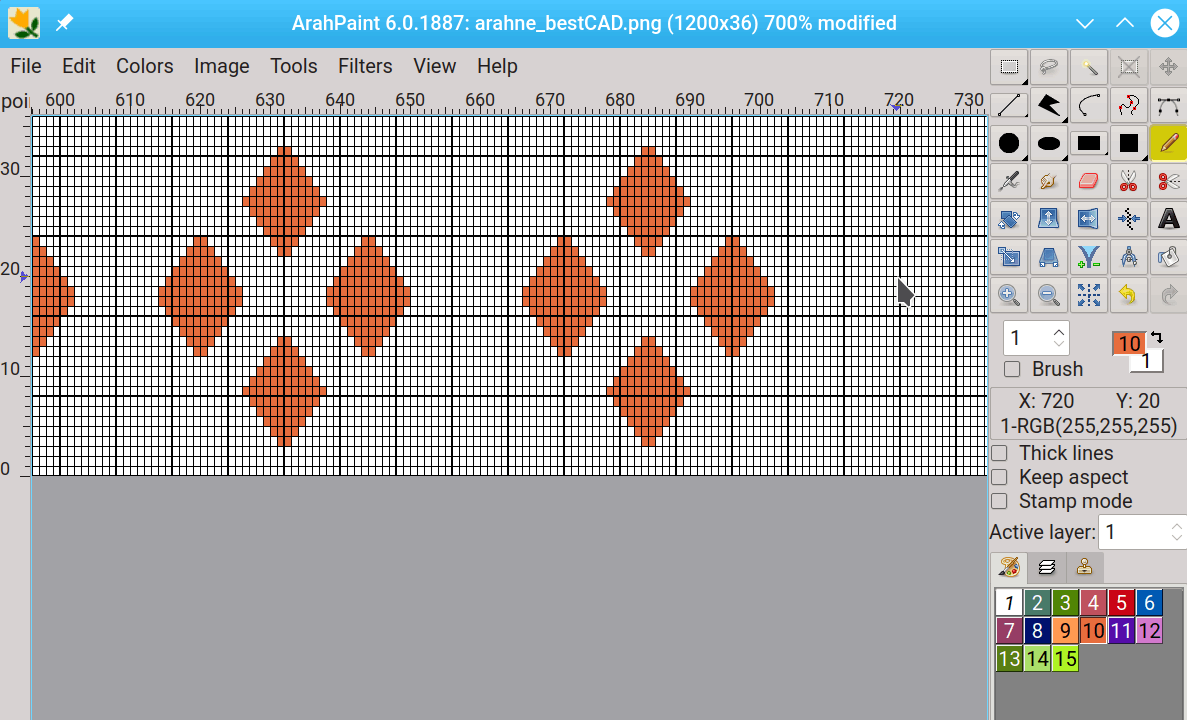
You can draw some additional figuring elements next to the text to enhance the appearance of selvedge. You can read more about ArahPaint’s drawing tools in the manual (https://www.arahne.eu/pdf/apaint4-EN.pdf).
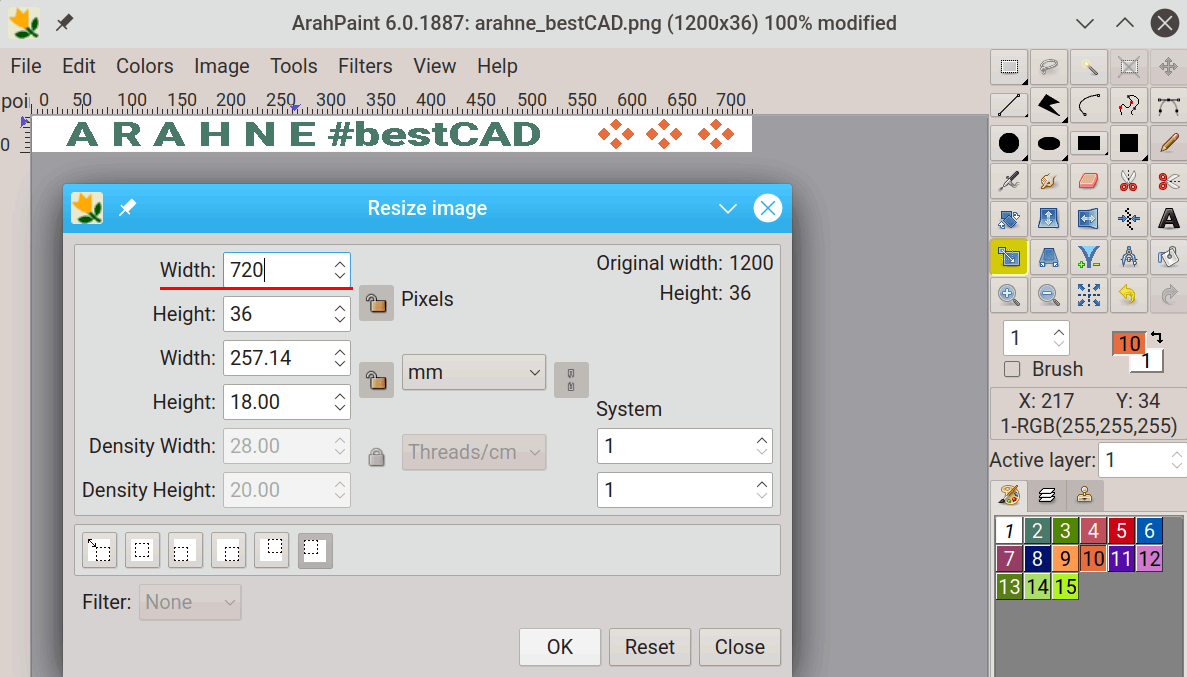
Now we need to remove unused space on the right side of the image. Open the Resize image dialog. The settings of the chain, locks, and scale mode should be as in the image below.
Enter the new width number. This will be the number of picks in one repeat of the selvedge. Click the OK button to confirm the change.
We are using three colors in the image. It means that we can use three different weaves in the final selvedge weave, developed from this particular image. However, we can use the same weave in two different colors, like in green and orange, which will probably be the case in the example below. We just left the ornament in a different color than the writing in case we change our mind and want to put a different weave in it.
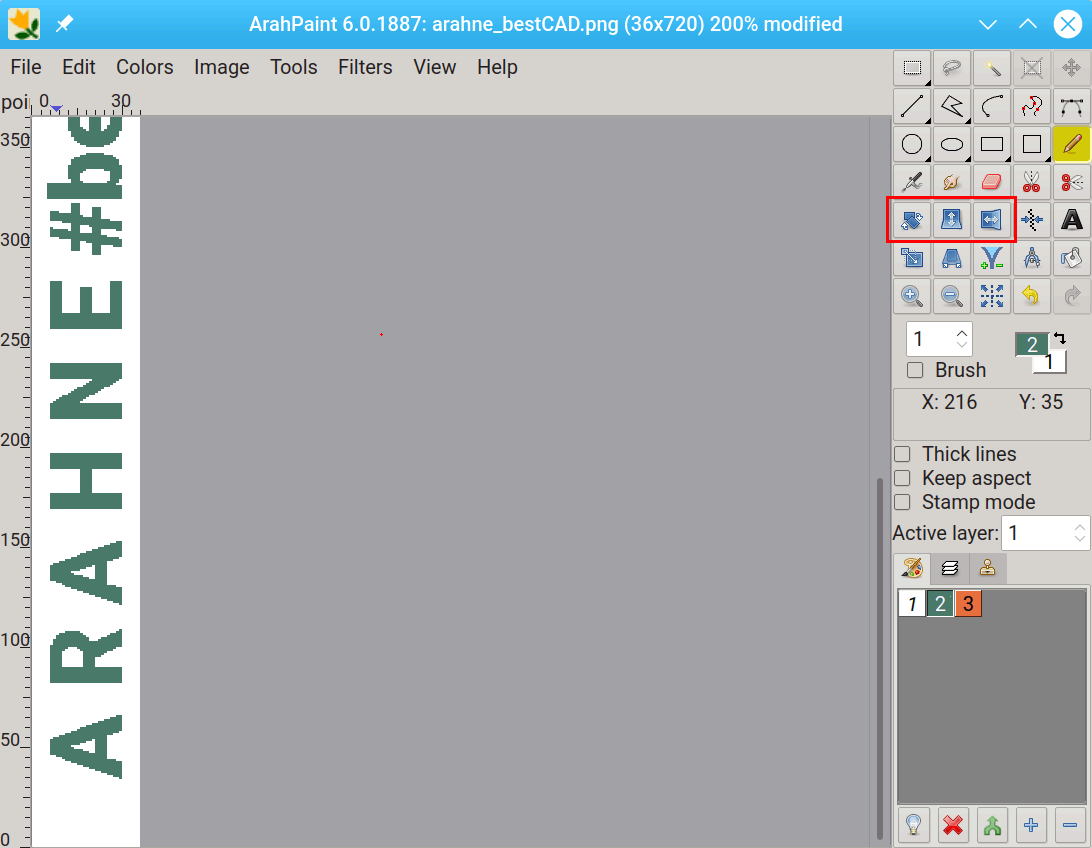
You can use this horizontally oriented image in ArahWeave, rotating it prior to inserting weaves, or you can rotate it here in ArahPaint. Click the rotate 90 degrees icon ![]() , then the mirror horizontal icon
, then the mirror horizontal icon ![]() , and finally the mirror vertical icon
, and finally the mirror vertical icon ![]() . Save the image (File > Save image as…).
. Save the image (File > Save image as…).
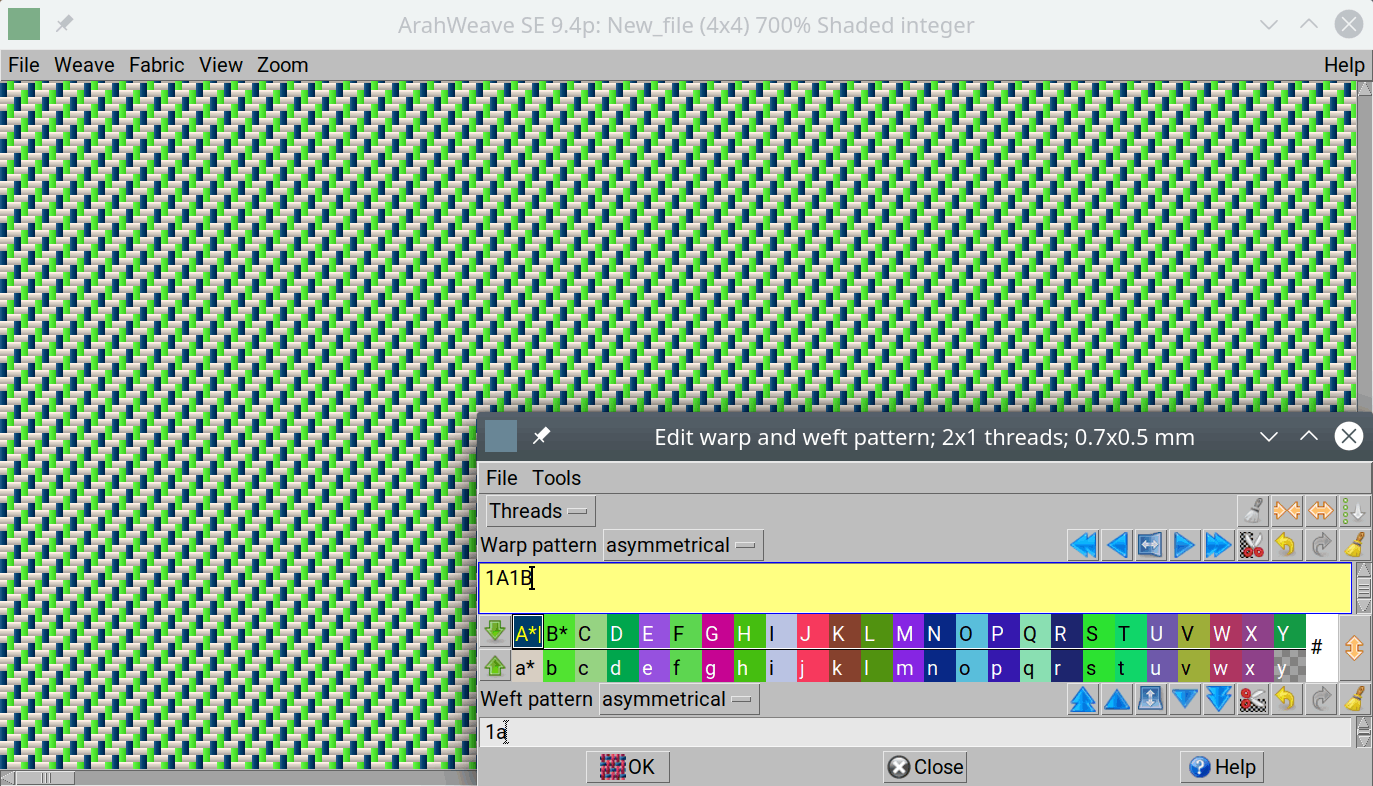
Open ArahWeave and choose Fabric > Thread pattern…
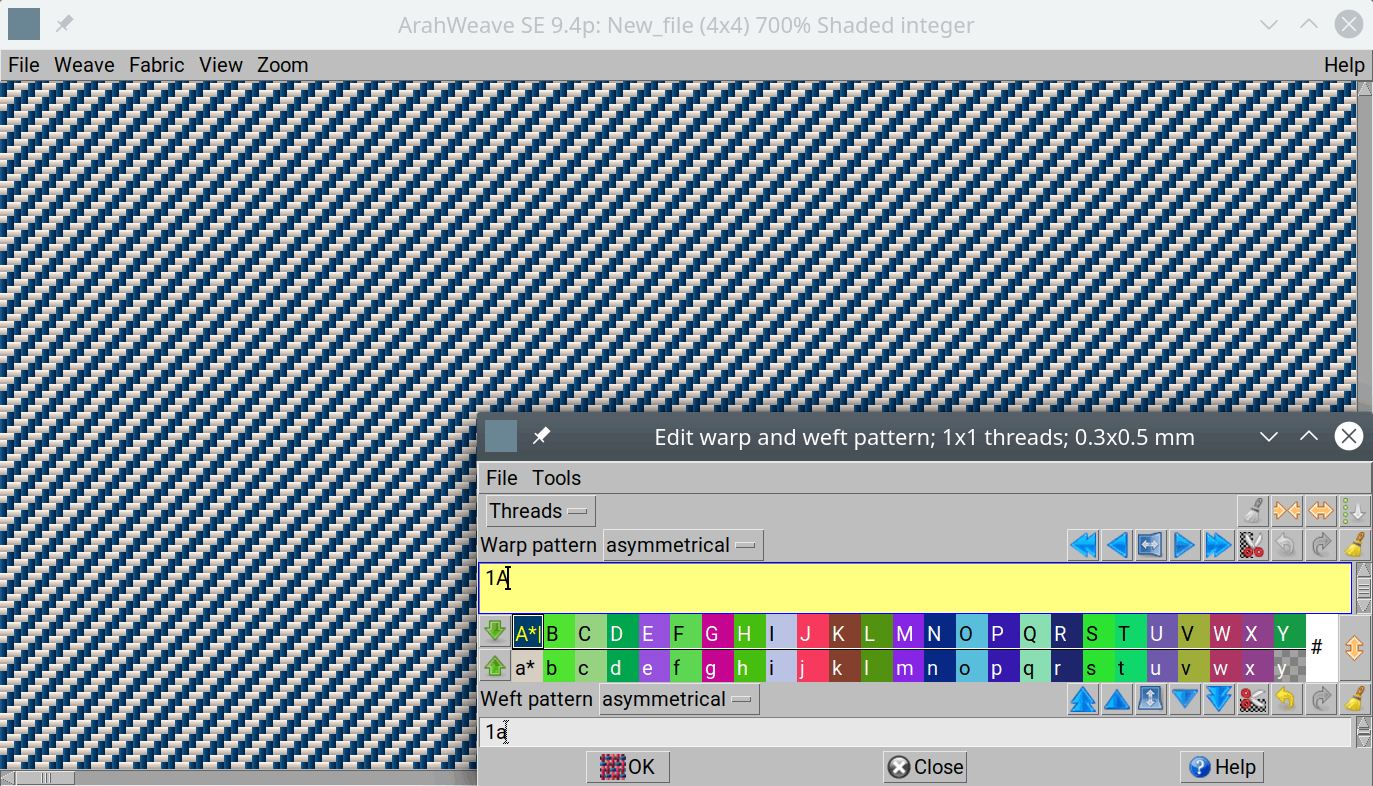
We will use a two-color warp to create a selvedge, so type in 1A1B into the Warp pattern text field. The yarn A will be the selvedge background, while the yarn B will form the letters.
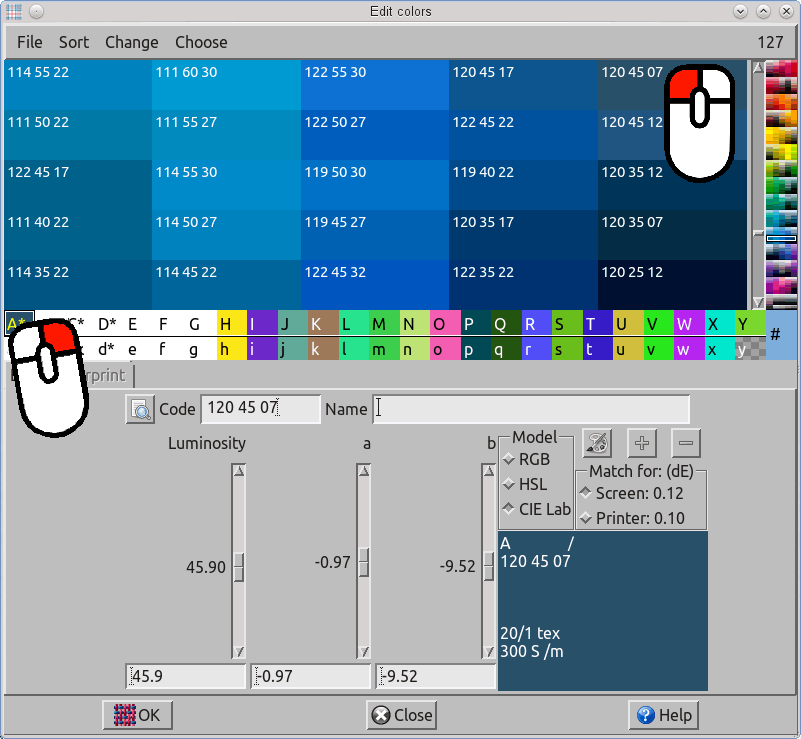
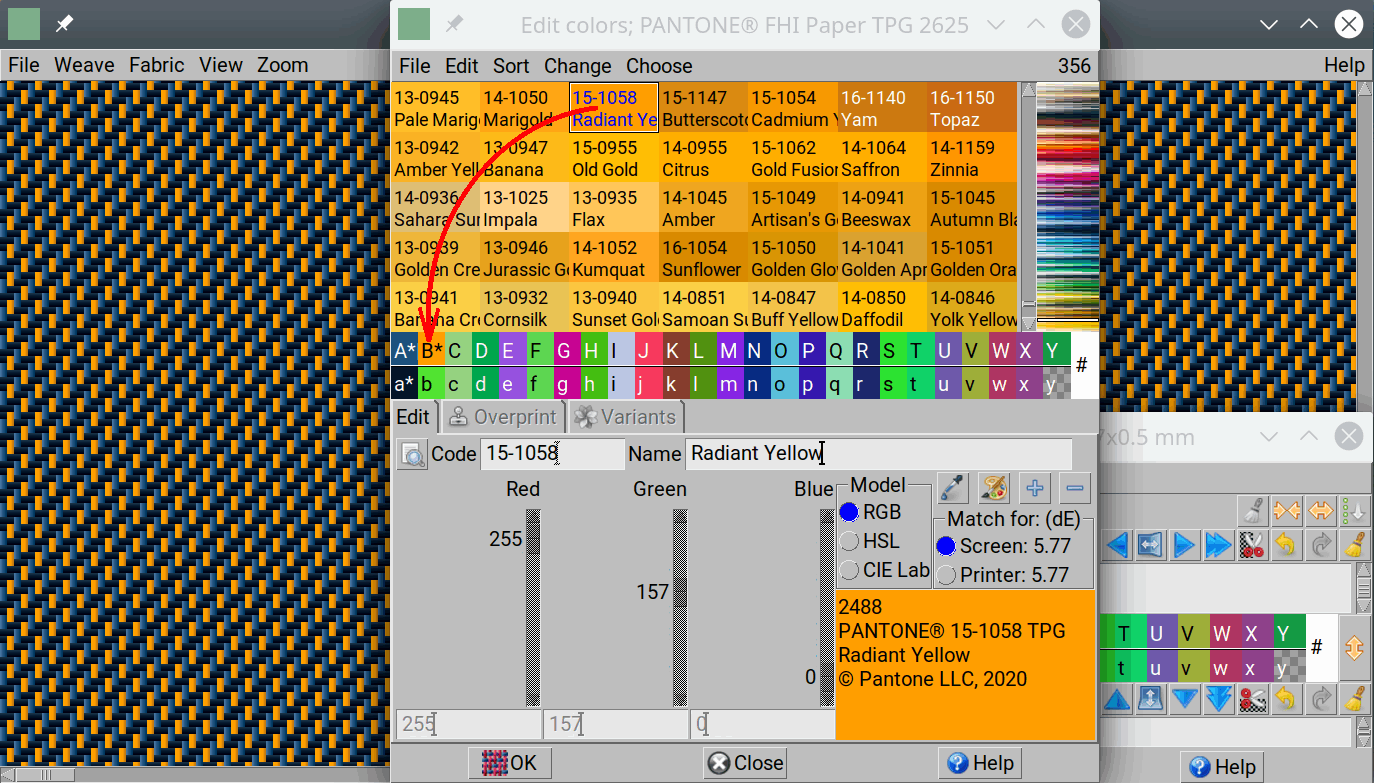
You may change the color of the warp and weft threads. Open Fabric > Colors, and paste a color from the palette into the yarn in the yarn bar below the palette (the left mouse click selects a color and the right mouse click pastes it into the yarn bar).
Choose Weave > Edit…
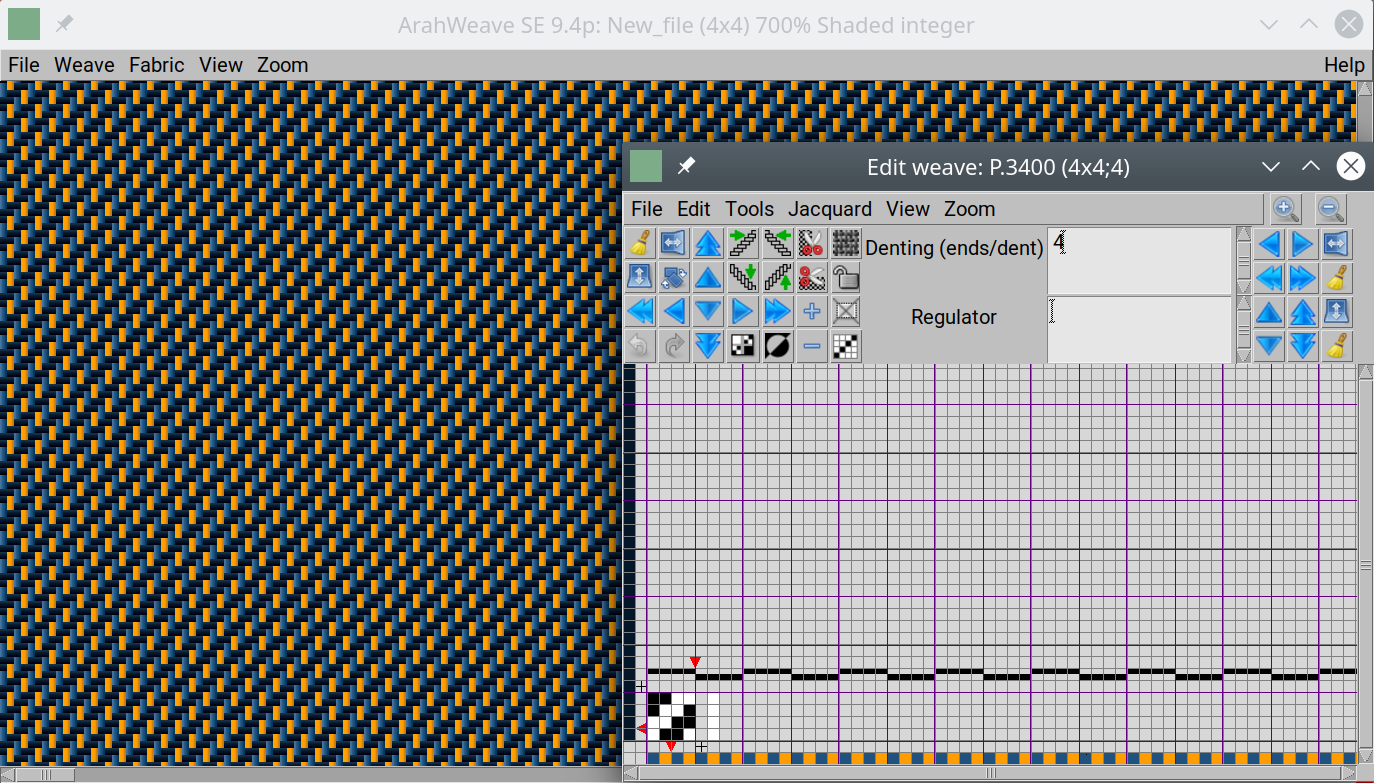
We will show in the next few steps a creation of one of the weaves which we will use in the selvedge. Usually, we skip these steps as we have prepared weaves before and they are already in our weave library.
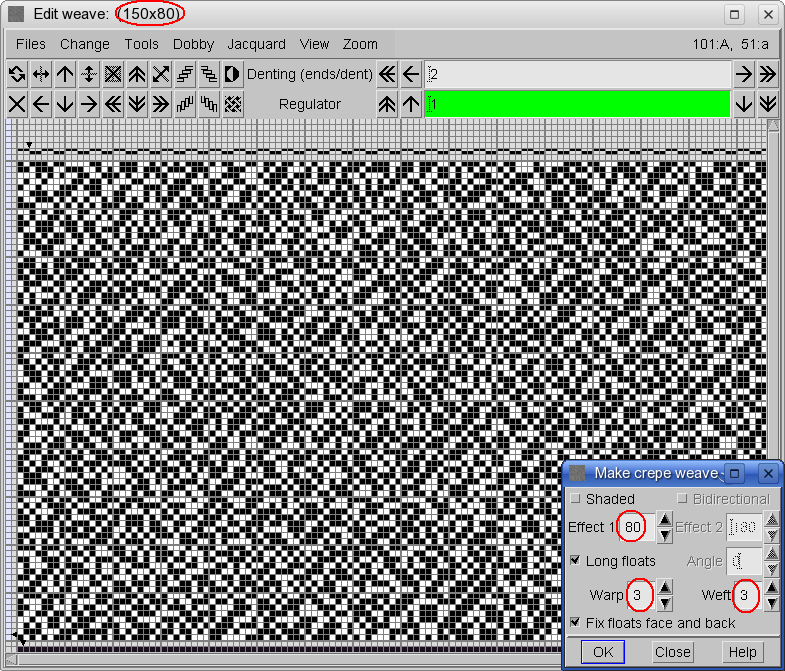
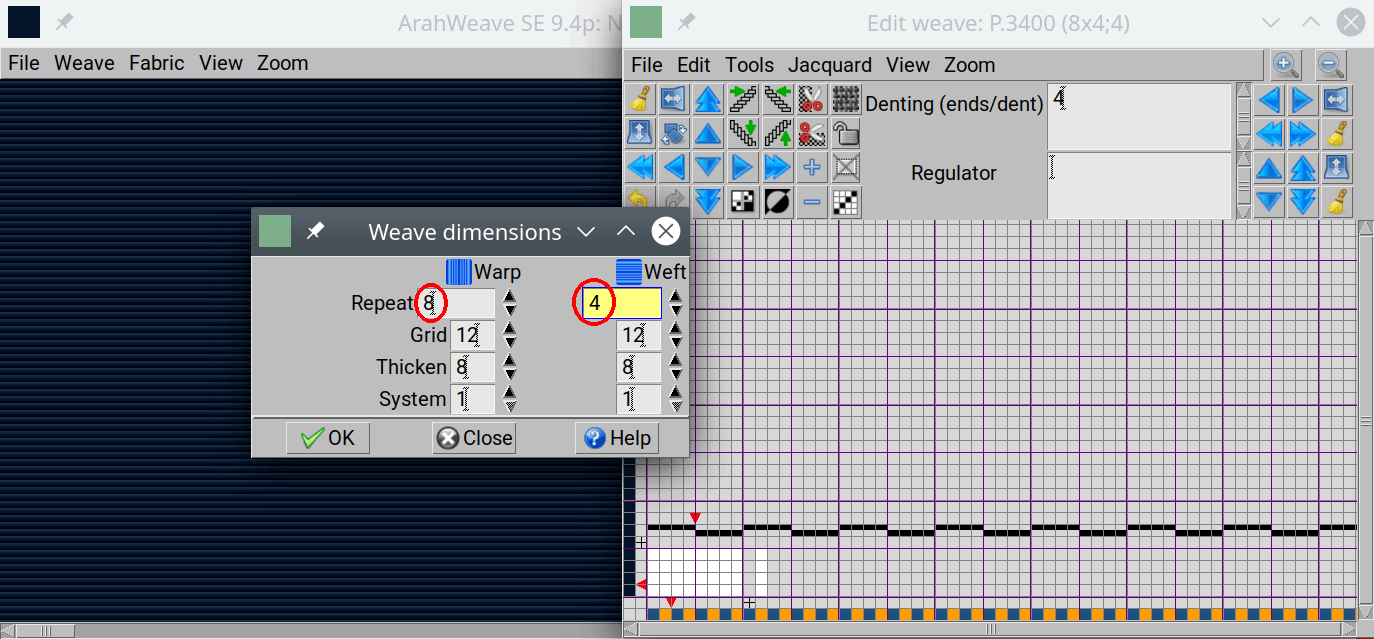
Click the clear icon ![]() in the toolbox to delete the content of the weave editor. Choose Edit >Dimensions… Set the repeat size of the weave you will create: 8 ends in the warp and 4 picks in the weft (the weave we use will have a broken twill of 4×4 size on the face and the same at the back, so the integral size will be 8×4).
in the toolbox to delete the content of the weave editor. Choose Edit >Dimensions… Set the repeat size of the weave you will create: 8 ends in the warp and 4 picks in the weft (the weave we use will have a broken twill of 4×4 size on the face and the same at the back, so the integral size will be 8×4).
Click the Edit decomposed icon ![]() in the Weave editor’s toolbox. This opens the Edit decomposed weave editor.
in the Weave editor’s toolbox. This opens the Edit decomposed weave editor.
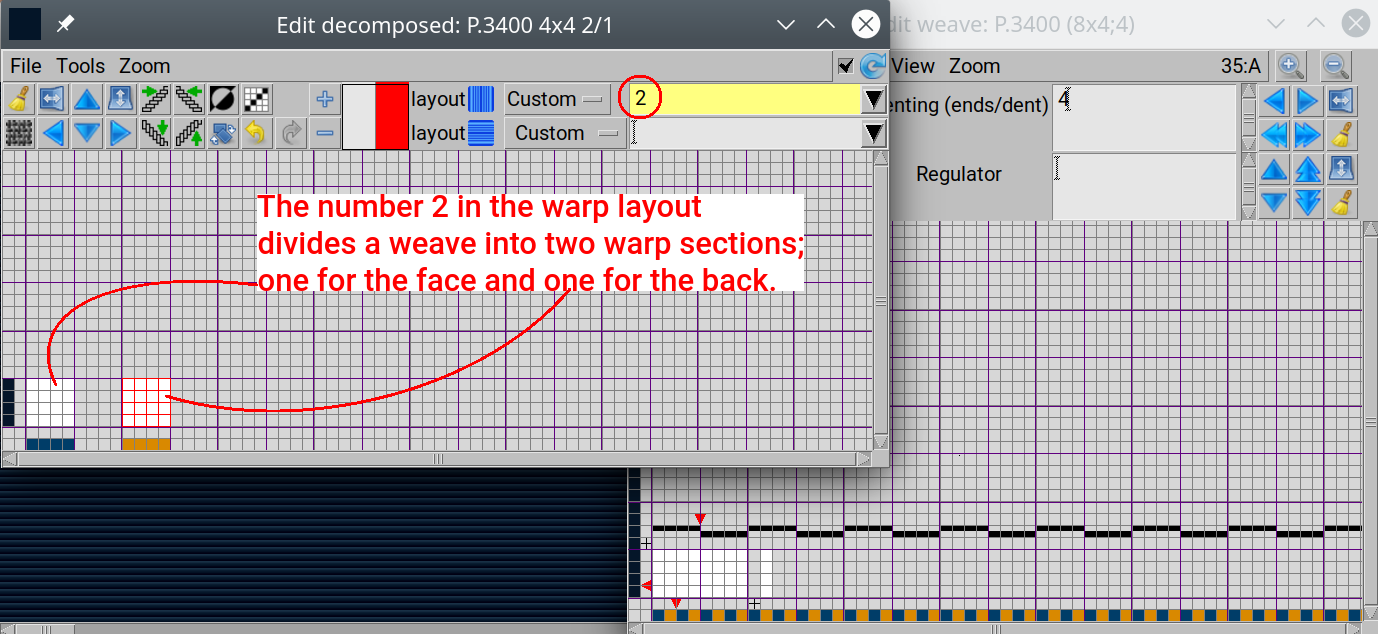
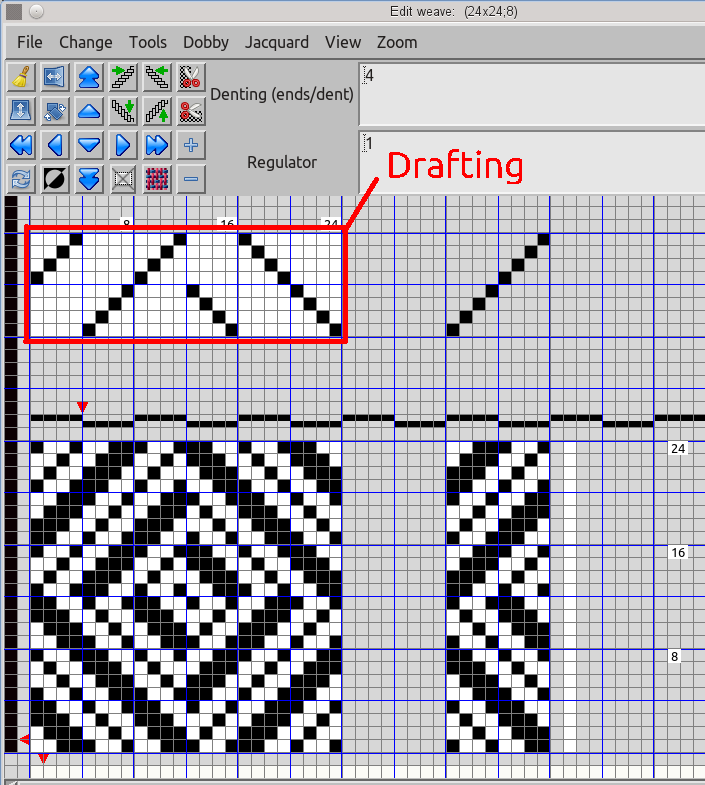
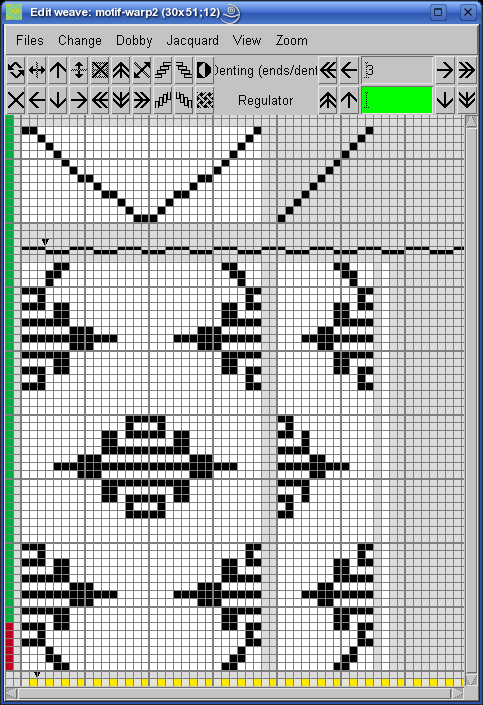
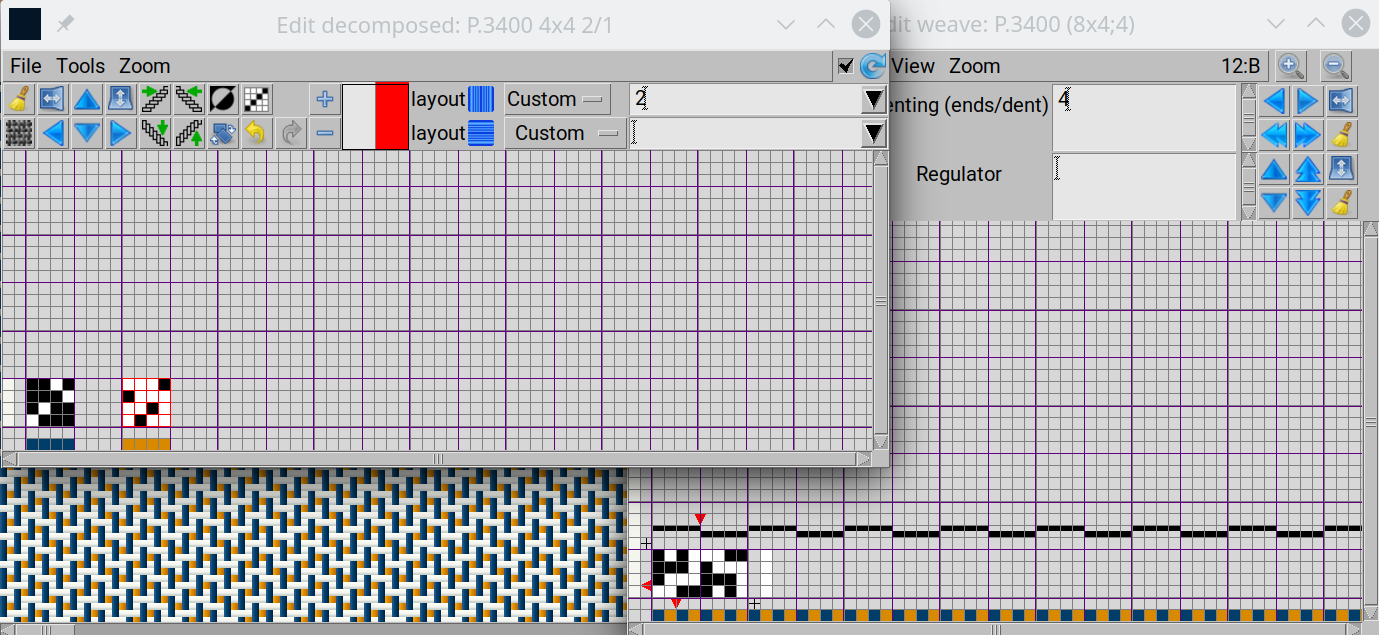
Draw the broken twill weave in the first section (The left-click draws a point, the right-click deletes a point). Draw the opposite broken twill weave in the second section. (Instead of drawing a second weave, you can paste the first weave into the second weave section with a right-click into that section, and then click the Invert icon ![]() in the Edit decomposed toolbox to invert the weave. By using the shift arrows in the toolbox place a weave in the proper position.) The program generates a compound weave in the main Edit weave window. You could draw a weave directly into the Edit weave window, but it is easier if the program does it for us by joining two single-layer weaves. PS: We have changed the color of the weft yarn just before taking a screenshot so you can easily observe the compound weave in the main fabric-view window.
in the Edit decomposed toolbox to invert the weave. By using the shift arrows in the toolbox place a weave in the proper position.) The program generates a compound weave in the main Edit weave window. You could draw a weave directly into the Edit weave window, but it is easier if the program does it for us by joining two single-layer weaves. PS: We have changed the color of the weft yarn just before taking a screenshot so you can easily observe the compound weave in the main fabric-view window.
Now close the Edit decomposed window. Choose File > Save weave as… from the Edit weave window’s menu. Enter a filename and click Save.

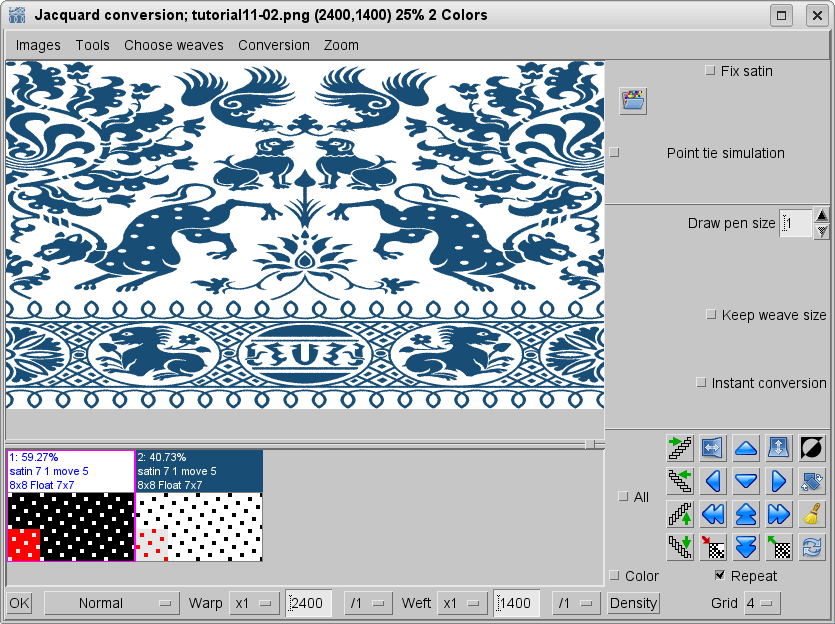
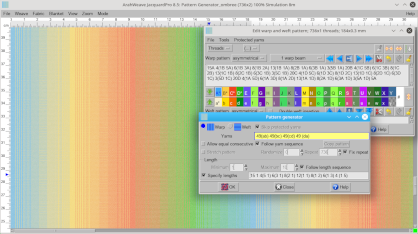
Close the Edit weave window, and open the Jacquard conversion window (Weave > Jacquard conversion).
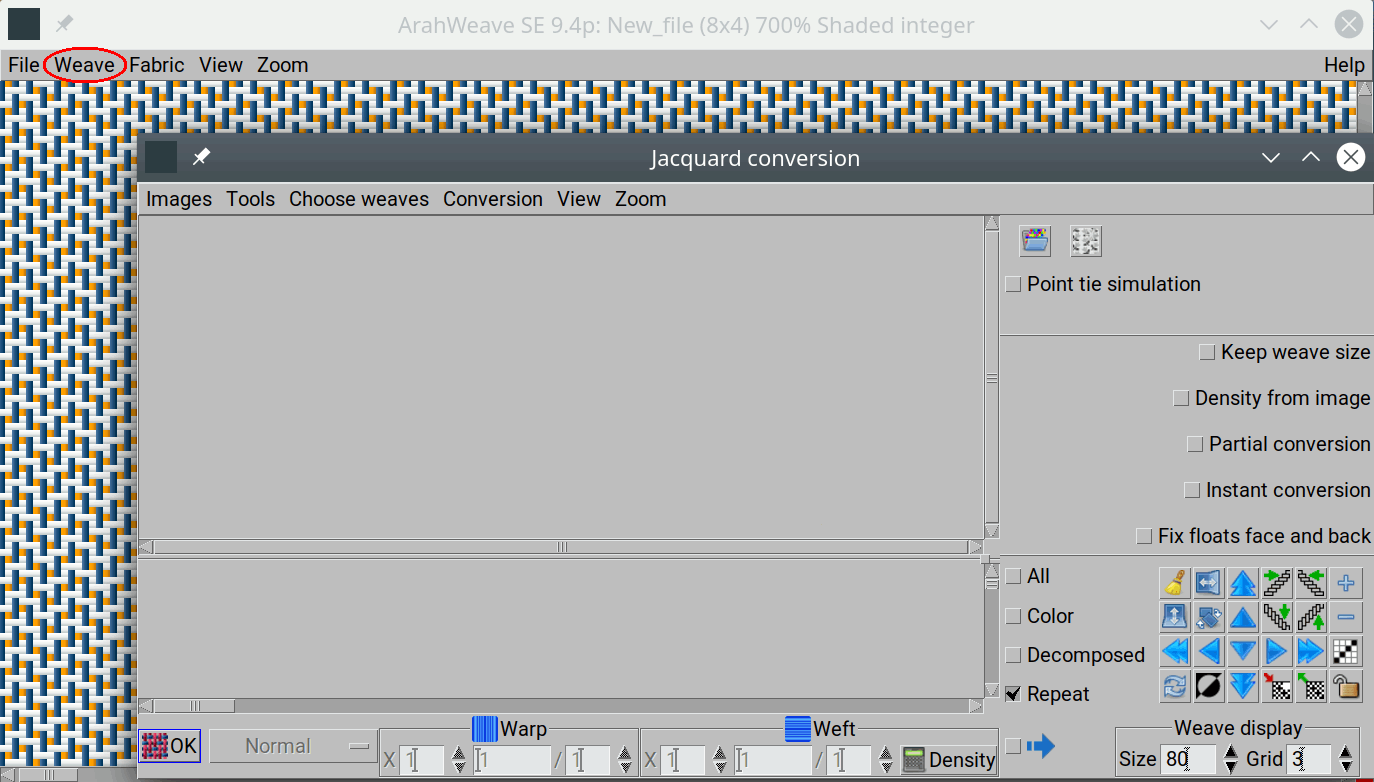
Choose Browse or Load image from the Images menu in the Jacquard conversion window.
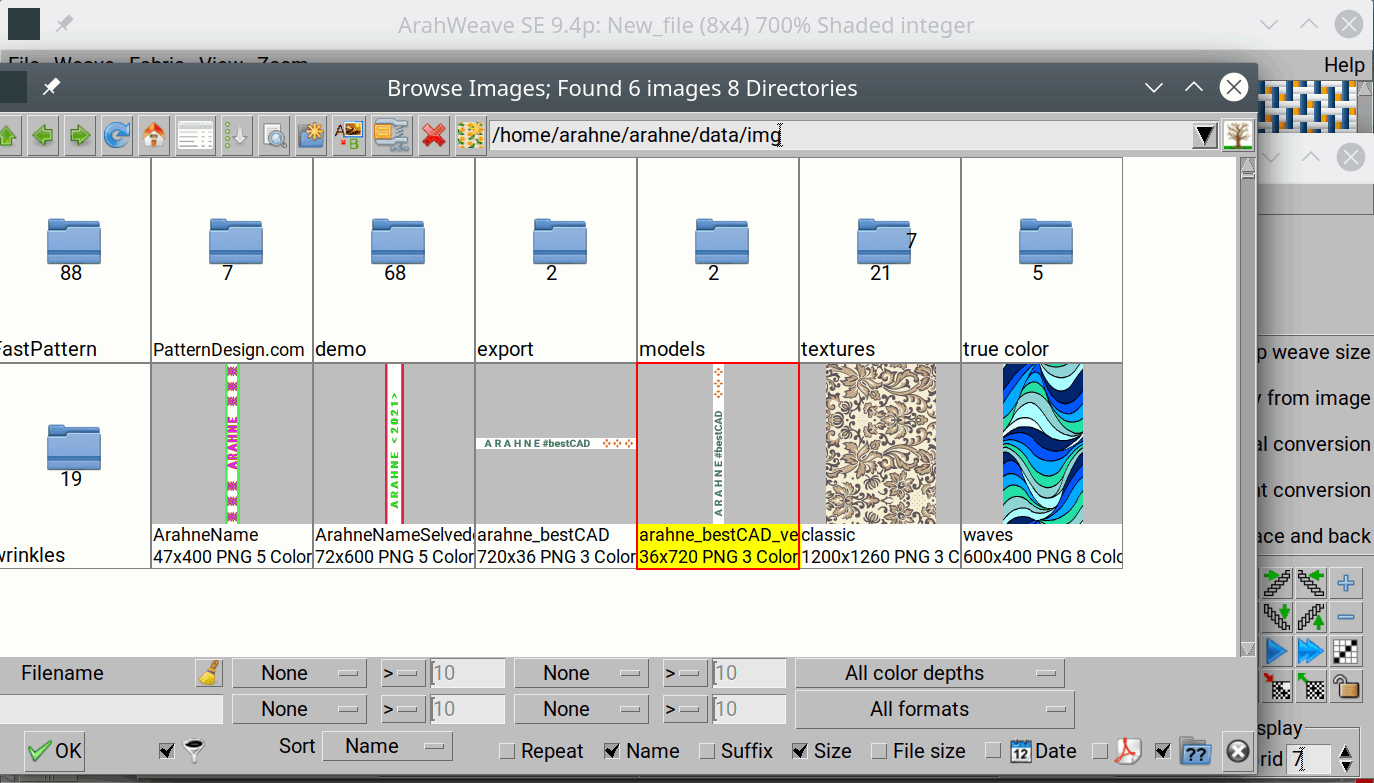
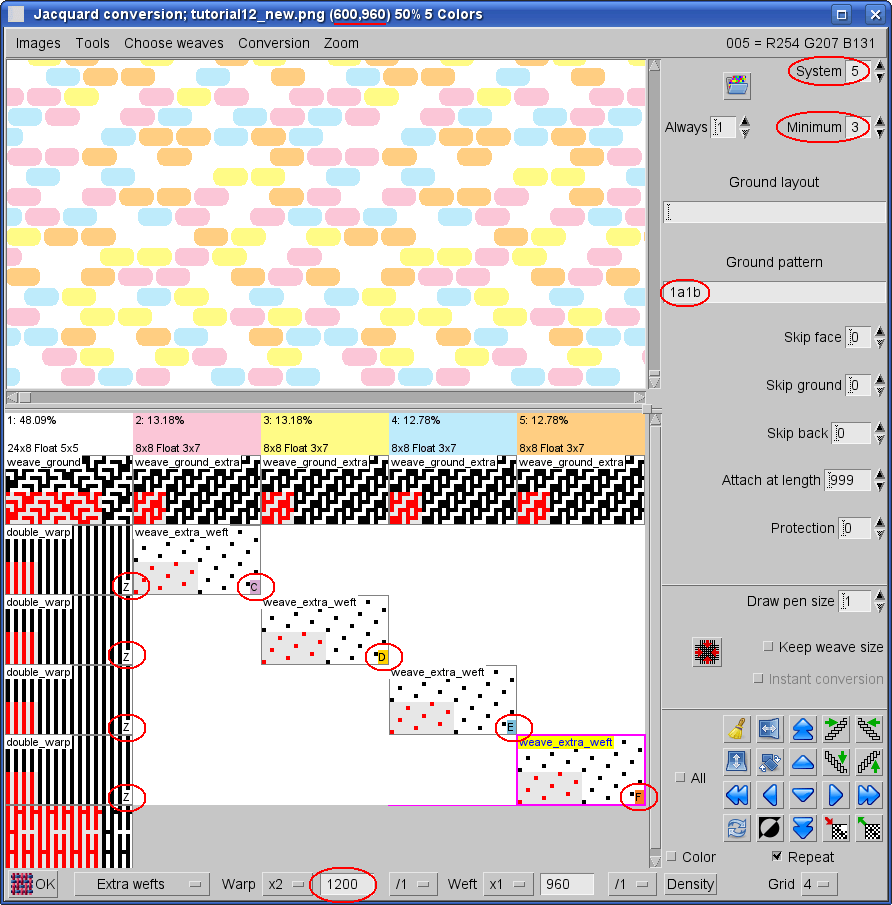
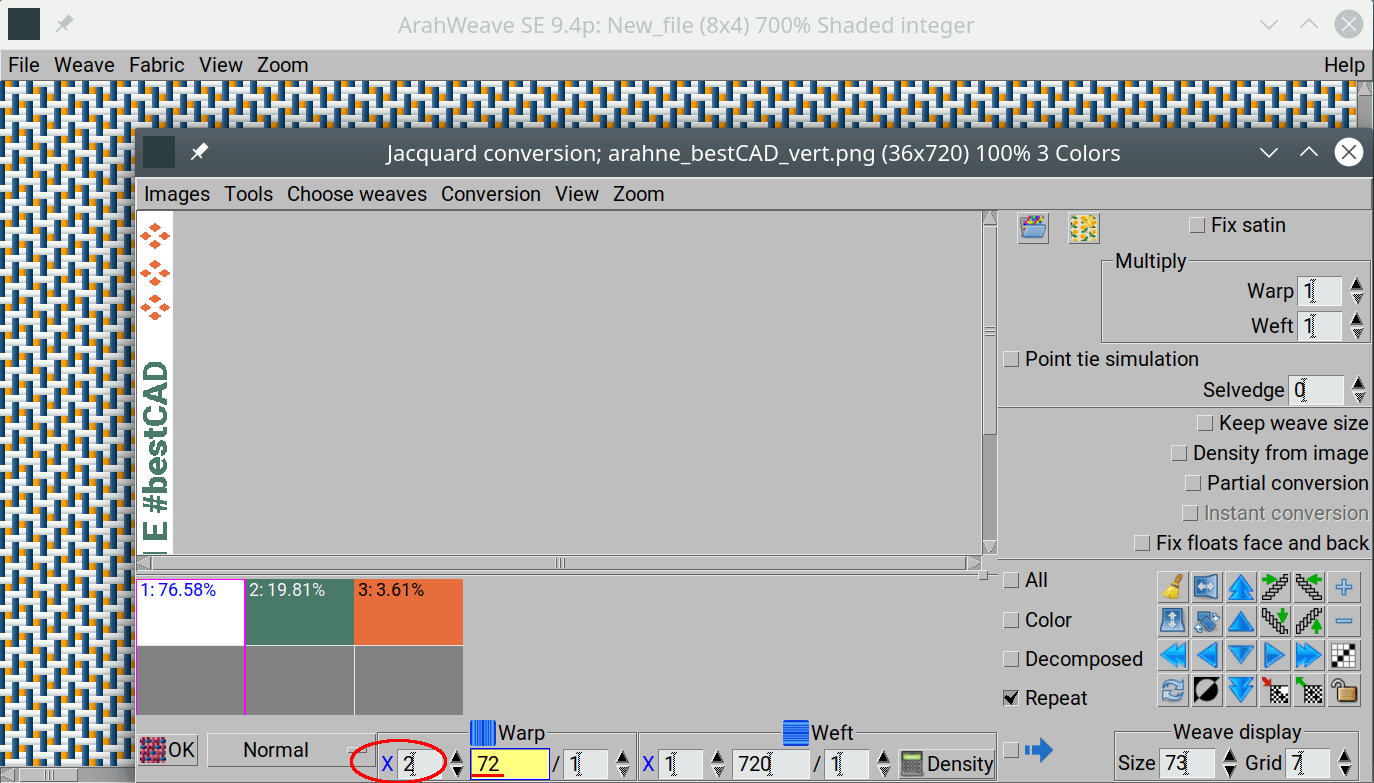
Double-click on the text-image’s icon you have just made to load it into the Jacquard conversion window. The image width (warp) must be multiplied by 2, because we will use double weaves to convert the image into Jacquard weave. You can do it by entering 2 into the field next to X in the warp section of the Jacquard conversion window’s panel, or by entering 72 into the Warp field. Color used in the image are displayed in the color-weave panel below the image section of the window.
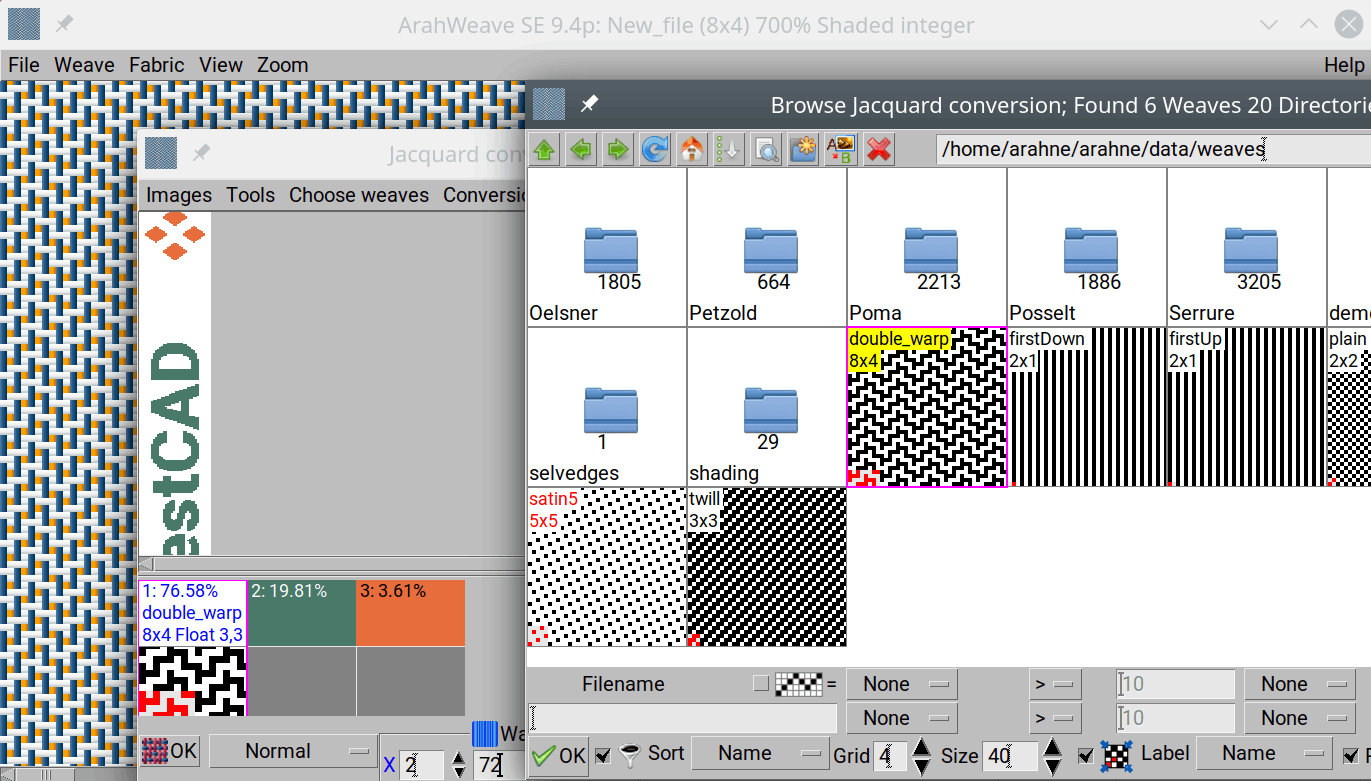
Then select Browse from the Choose weaves menu. Double-clicking on the weave’s icon loads a weave into the selected color in the color-weave panel. Load the background weave into the white color space.
The design warp for the title should be up, so load the proper weave into the green color space. In the weave-color panel, you can paste weave from one space into another by right-clicking. Use this method to paste the weave from green to orange.
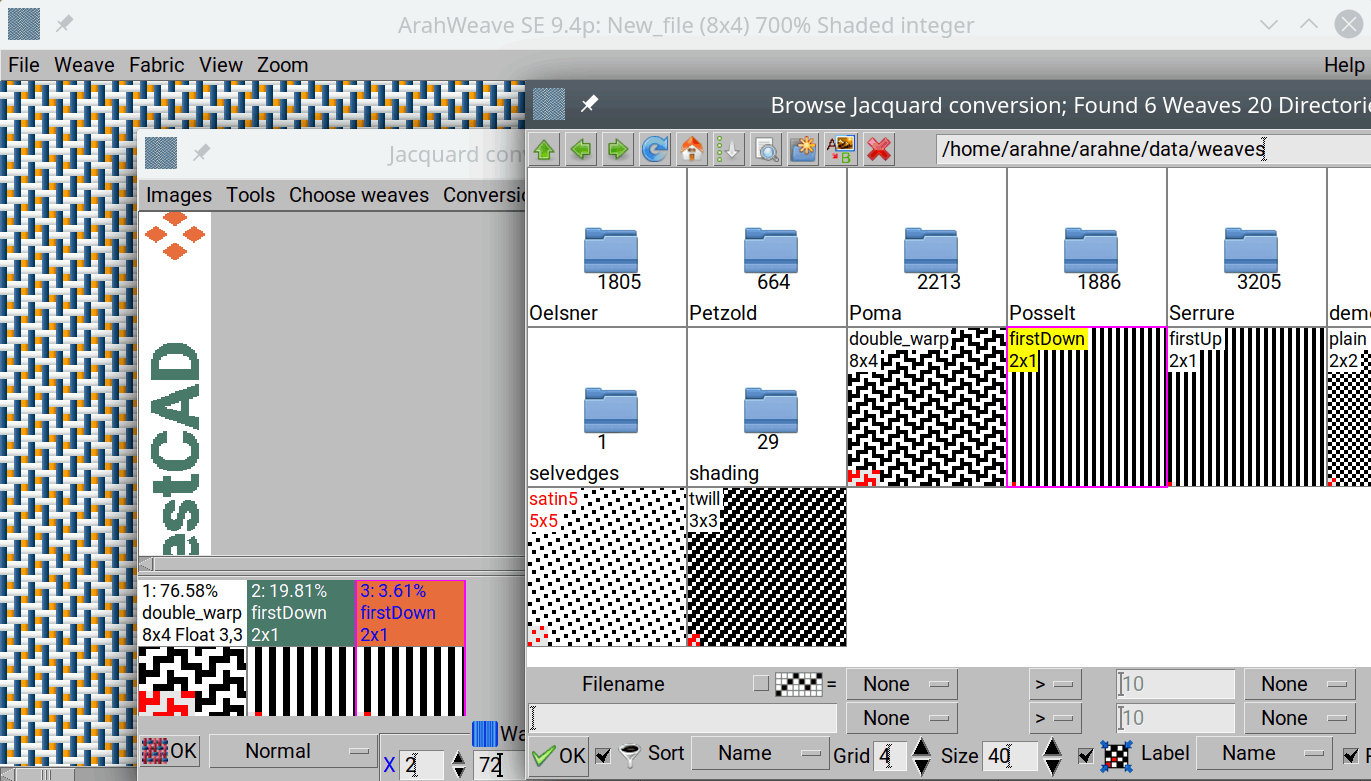
Then click the OK button. The program will replace the color areas in the image with weaves, you have entered into the weave selection panel.
To check only one repeat, choose View > One repeat.
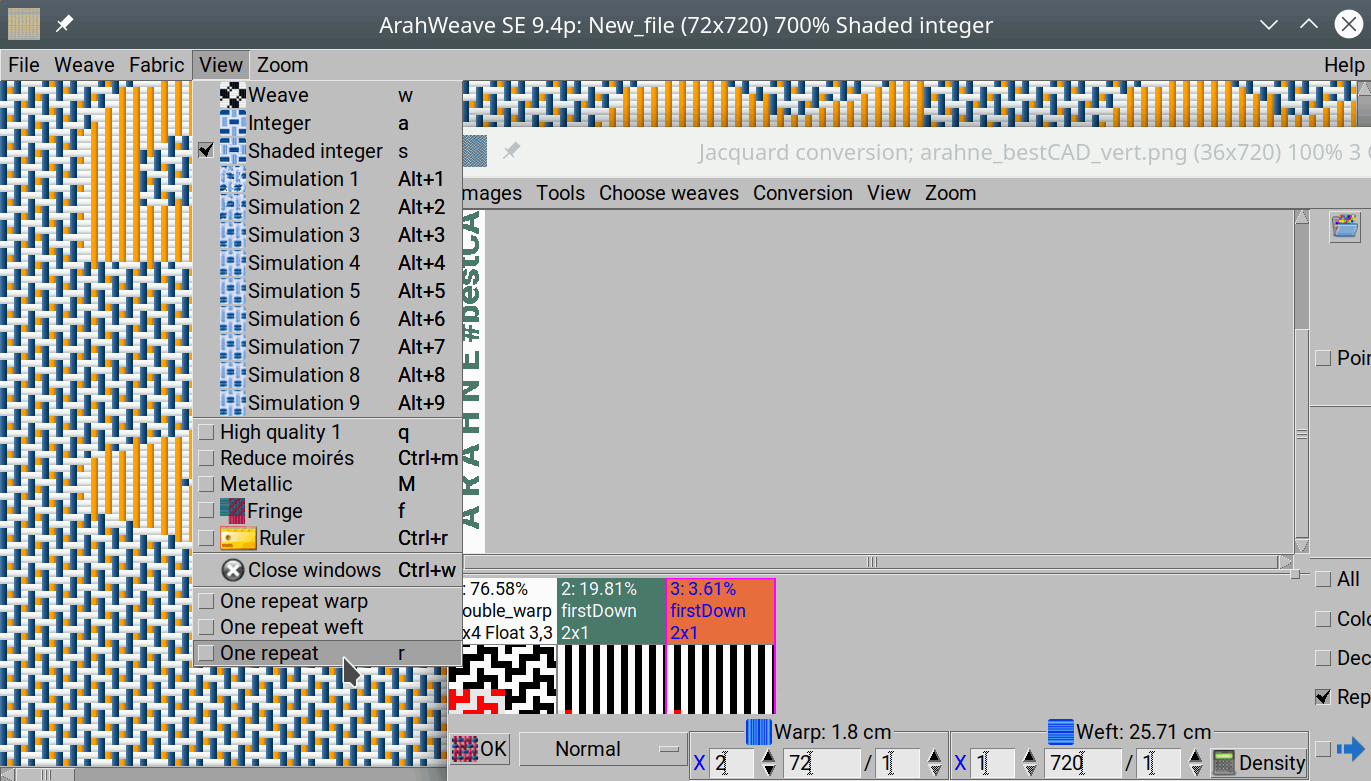
You can observe a fabric in three different view modes:
1. Weave: a fabric is shown in black-and-white weave mode.
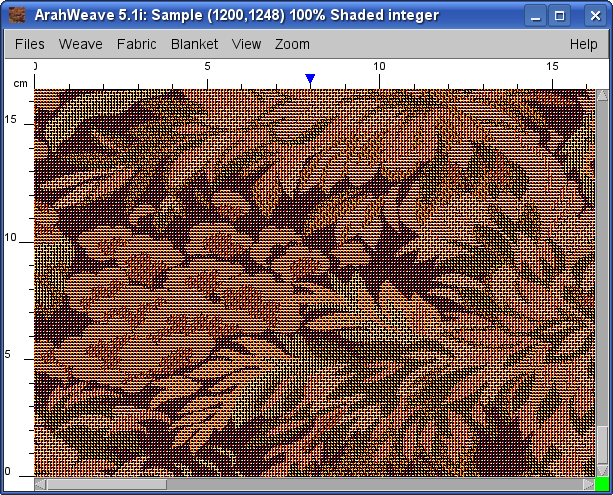
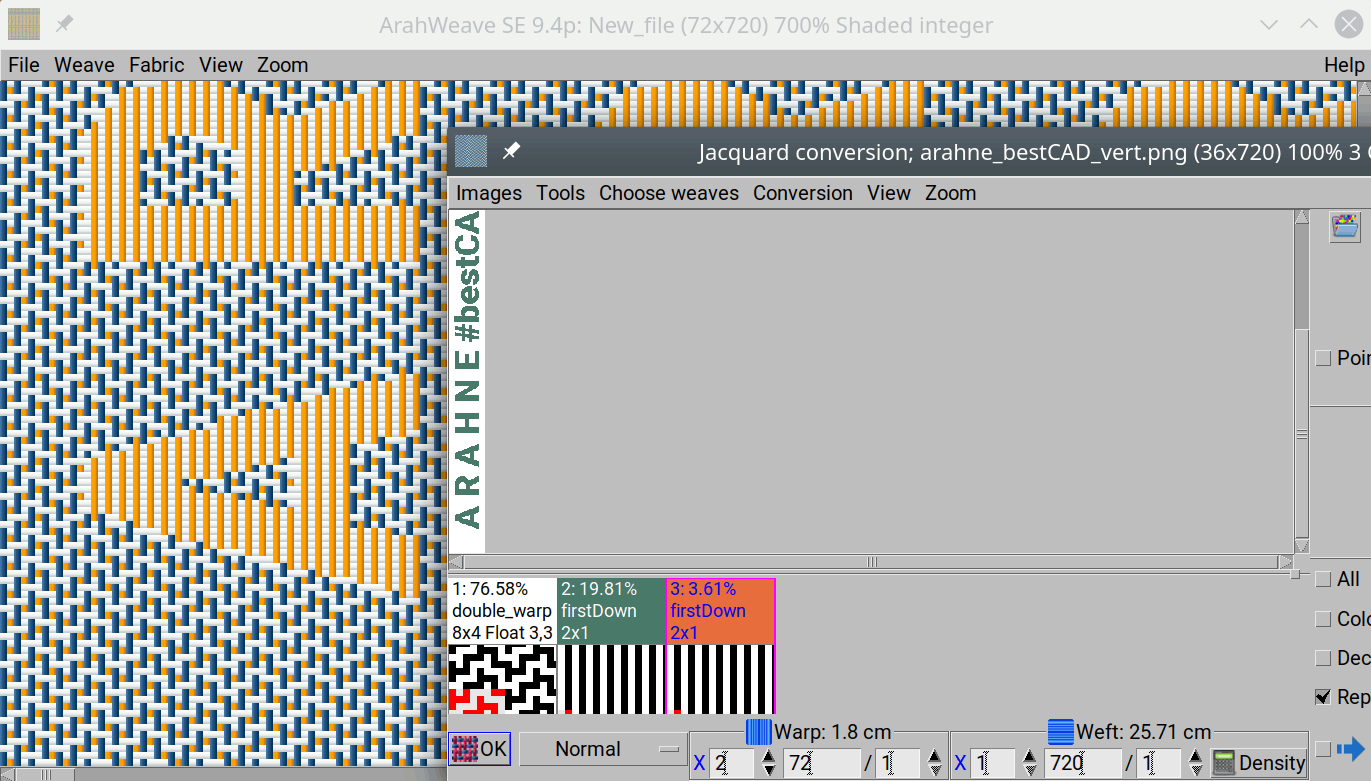
2. Integer or Shaded integer: the fabric is shown as a colored weave in the colors of warp and weft. Yarns are flat-colored in the integer mode, while in the Shaded integer mode they have some shades, which create the 3D impression.
3. Simulation: the threads of the fabric are distributed in the warp/weft density, that you have set in the density dialog. The diameter of the yarn is calculated from the yarn count, which you set in the Yarns window.
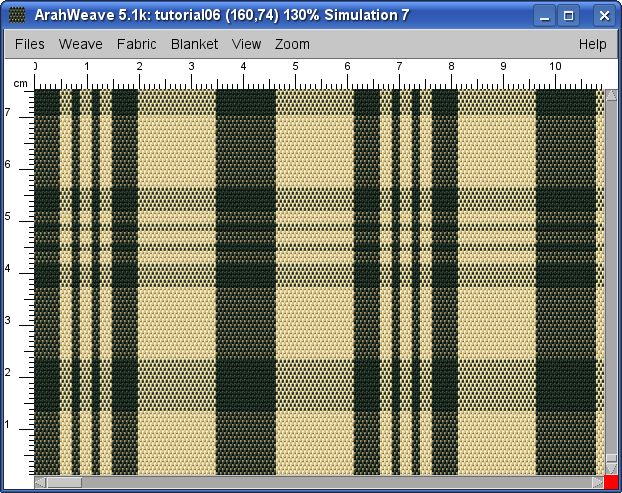
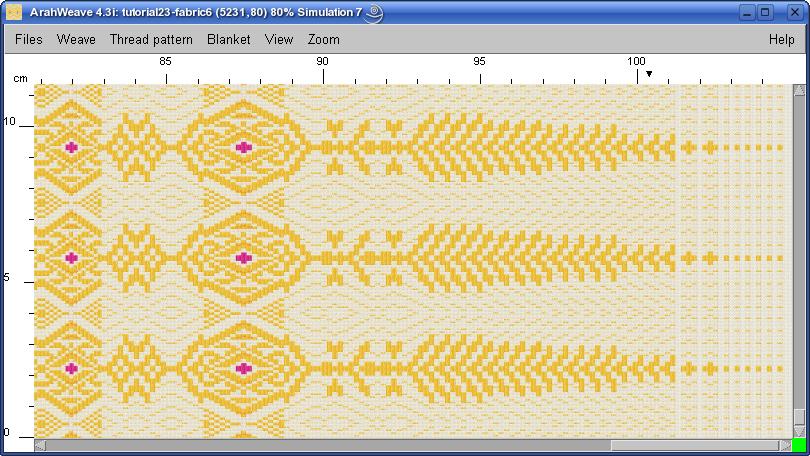
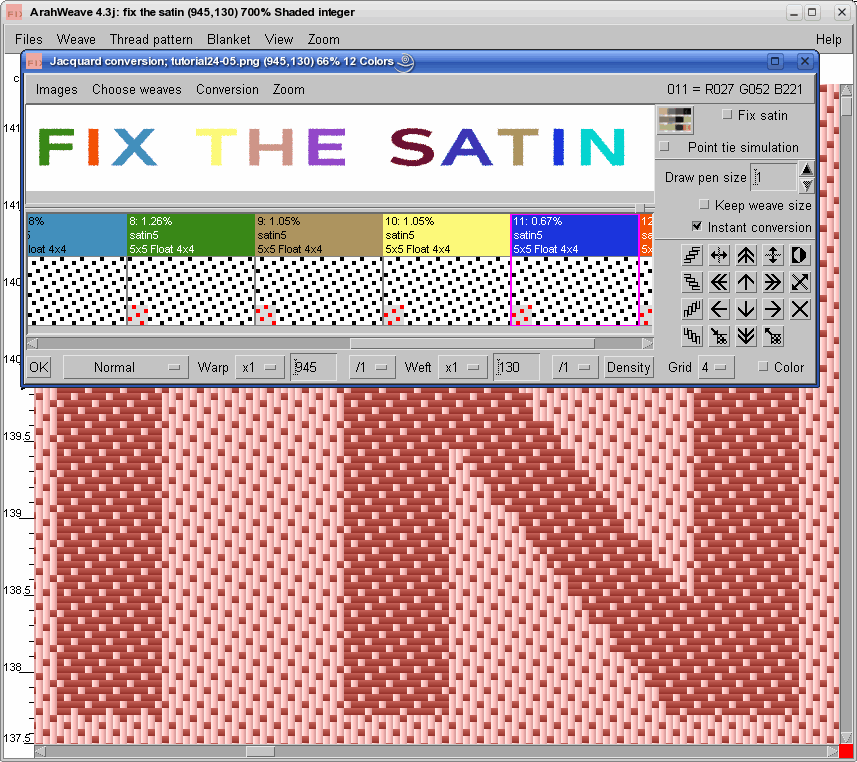
The fabric below is displayed in the shaded integer view.

Here is the same fabric displayed in the weave view.

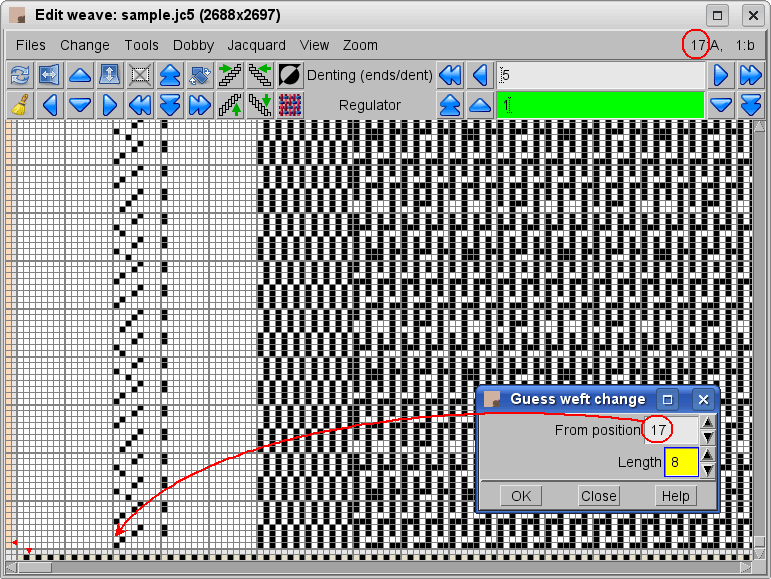
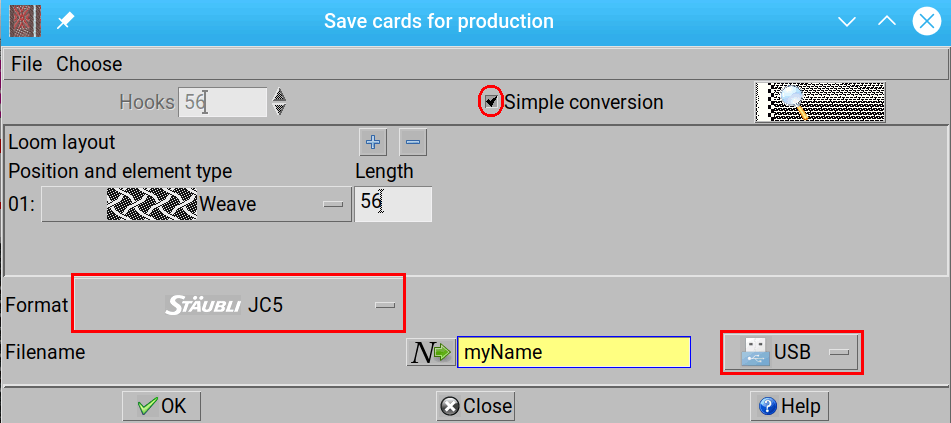
If you find any mistake, or you want to change a weave for a particular color, you have to reload a weave into jacquard conversion and apply conversion again. If everything looks good, you can save a fabric file for future use (File > Save fabric as…), and then proceed with the last step: saving a card file for the Jacquard. Choose Weave > Save cards for production to open the Save cards for production dialog. Enter the number of hooks (or if you check the Simple conversion check-box, the program will set the number of hooks automatically to match the number of ends (width) of the weave), choose a format (JC5), give a filename, choose the destination (USB) and click OK.
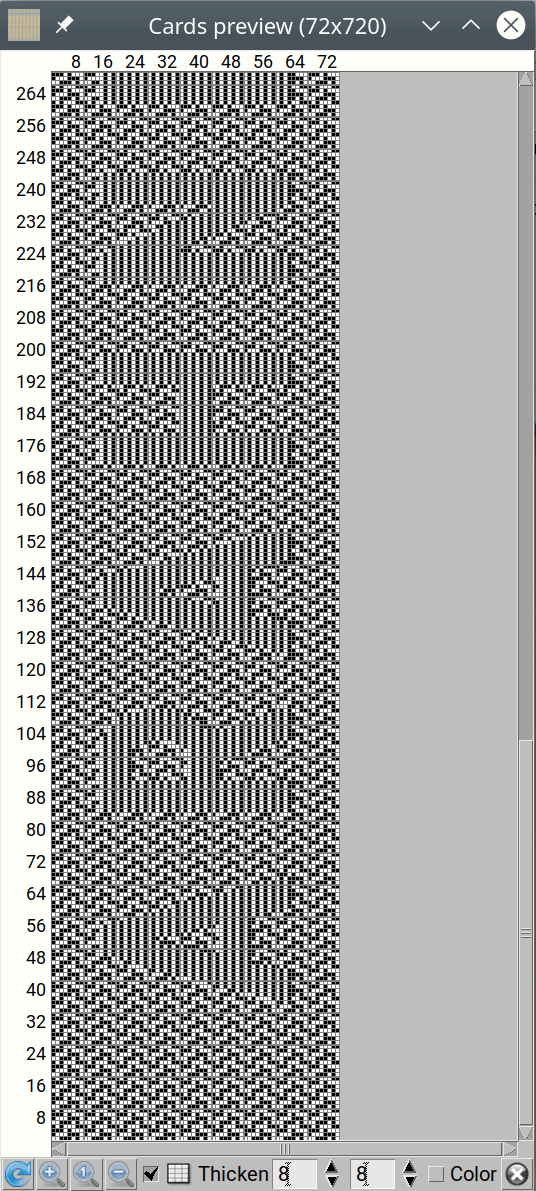
The card preview function allows you to check a card file before saving it.
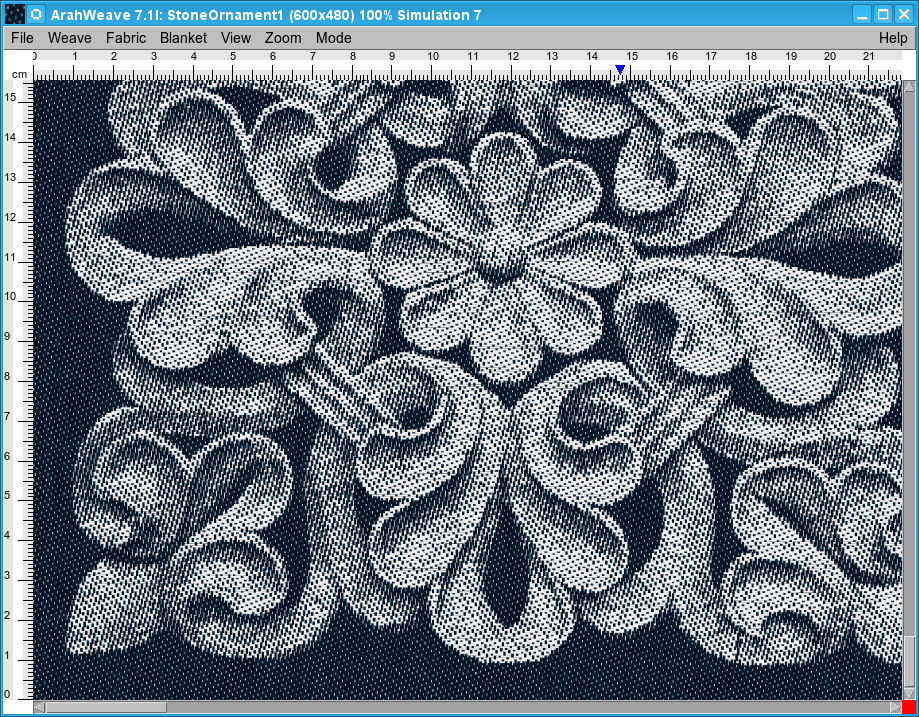
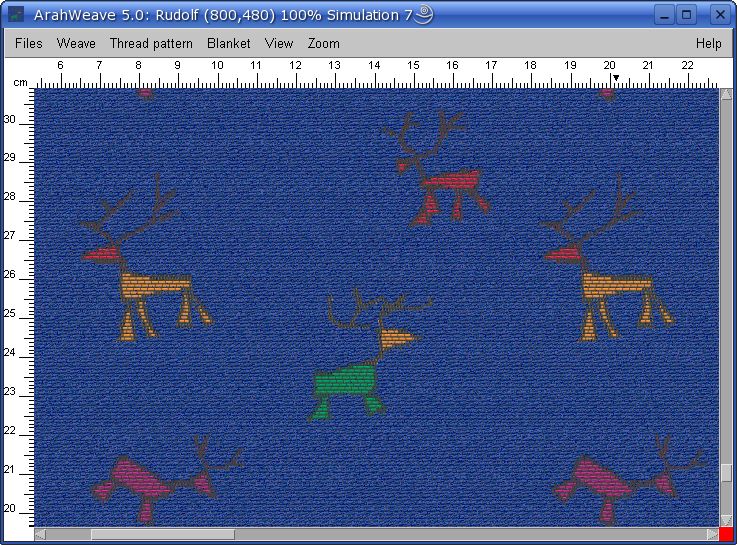
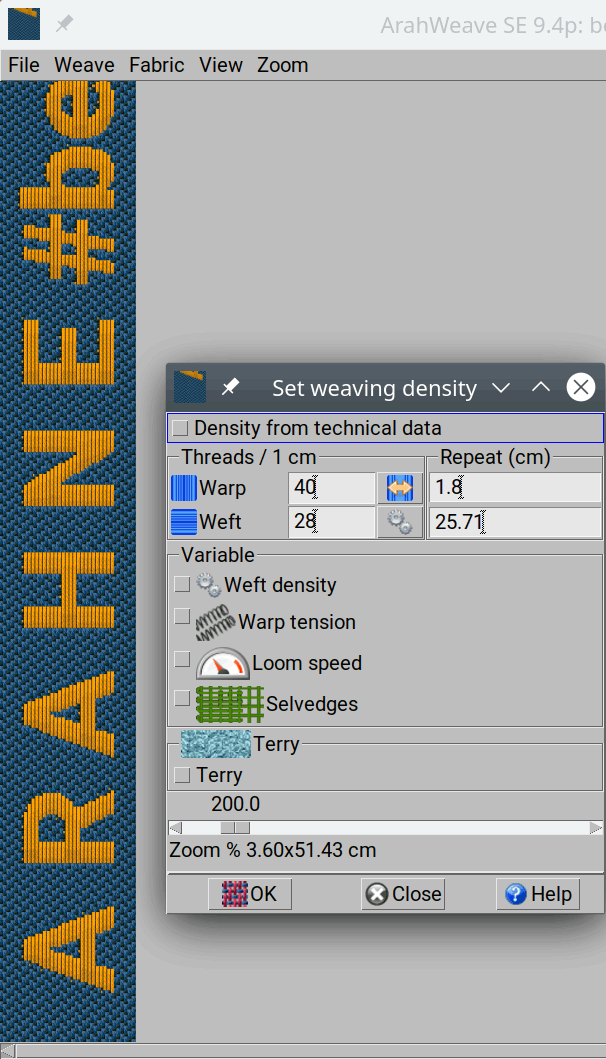
You can also create a fabric simulation, save it as an image, and send it by email to your customer for confirmation.
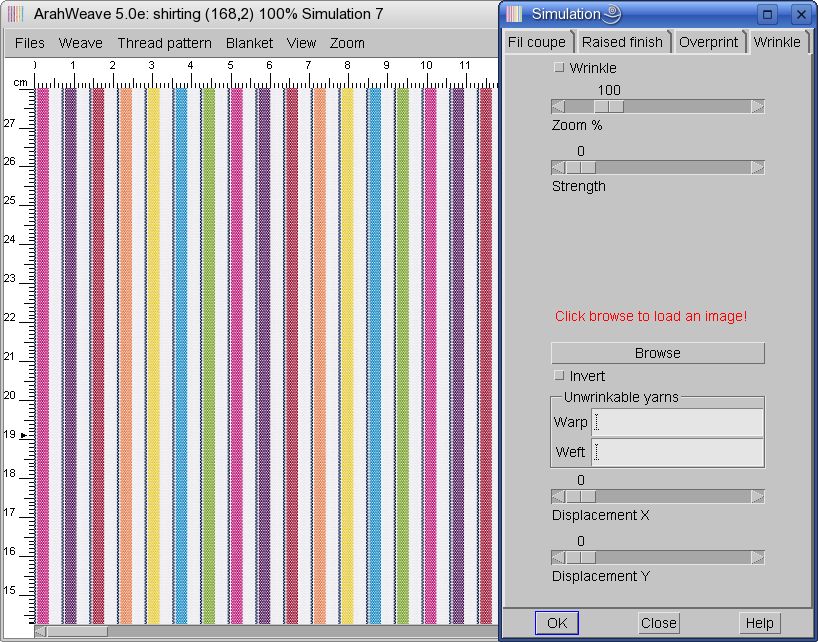
Open Fabric > Density and control… Type in the density of the selvedge (we use here 40 ends/cm and 28 picks/cm), and choose View > Simulation7.
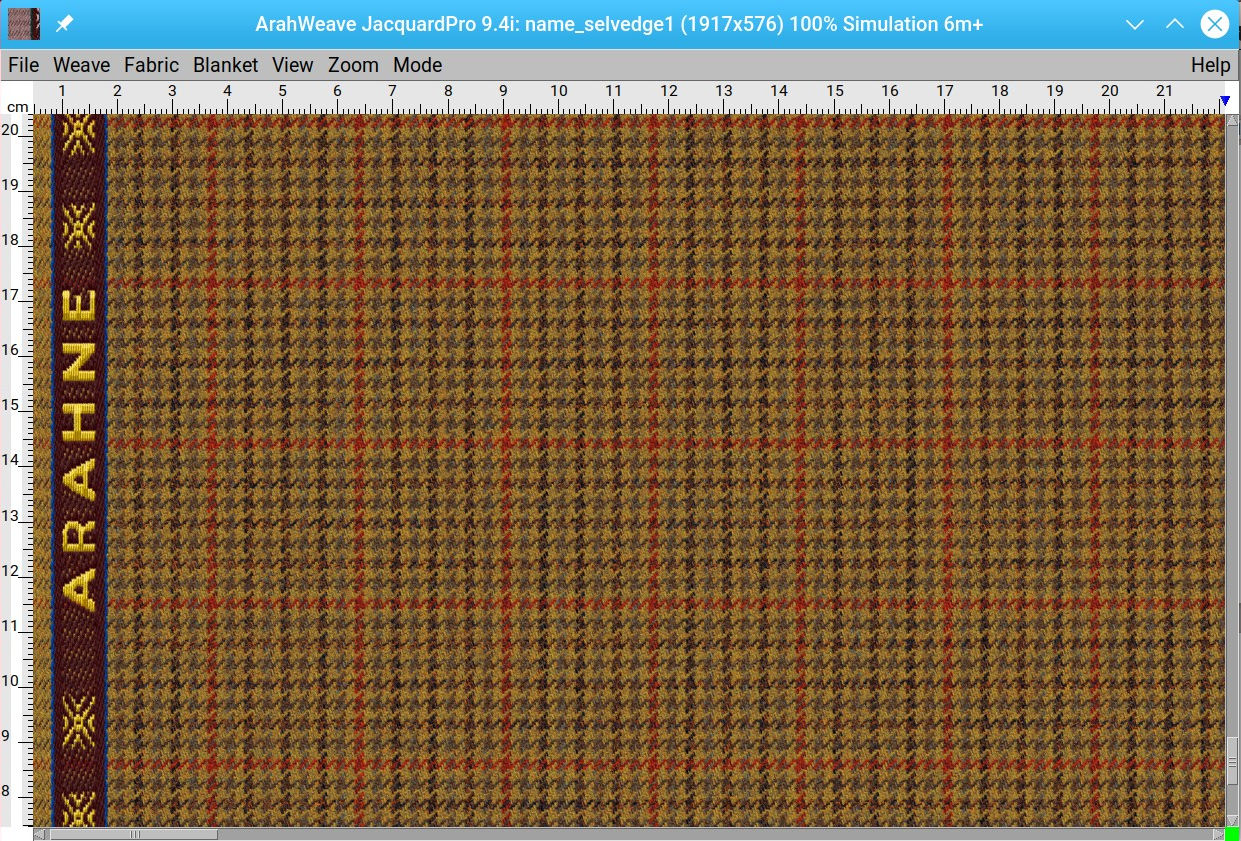
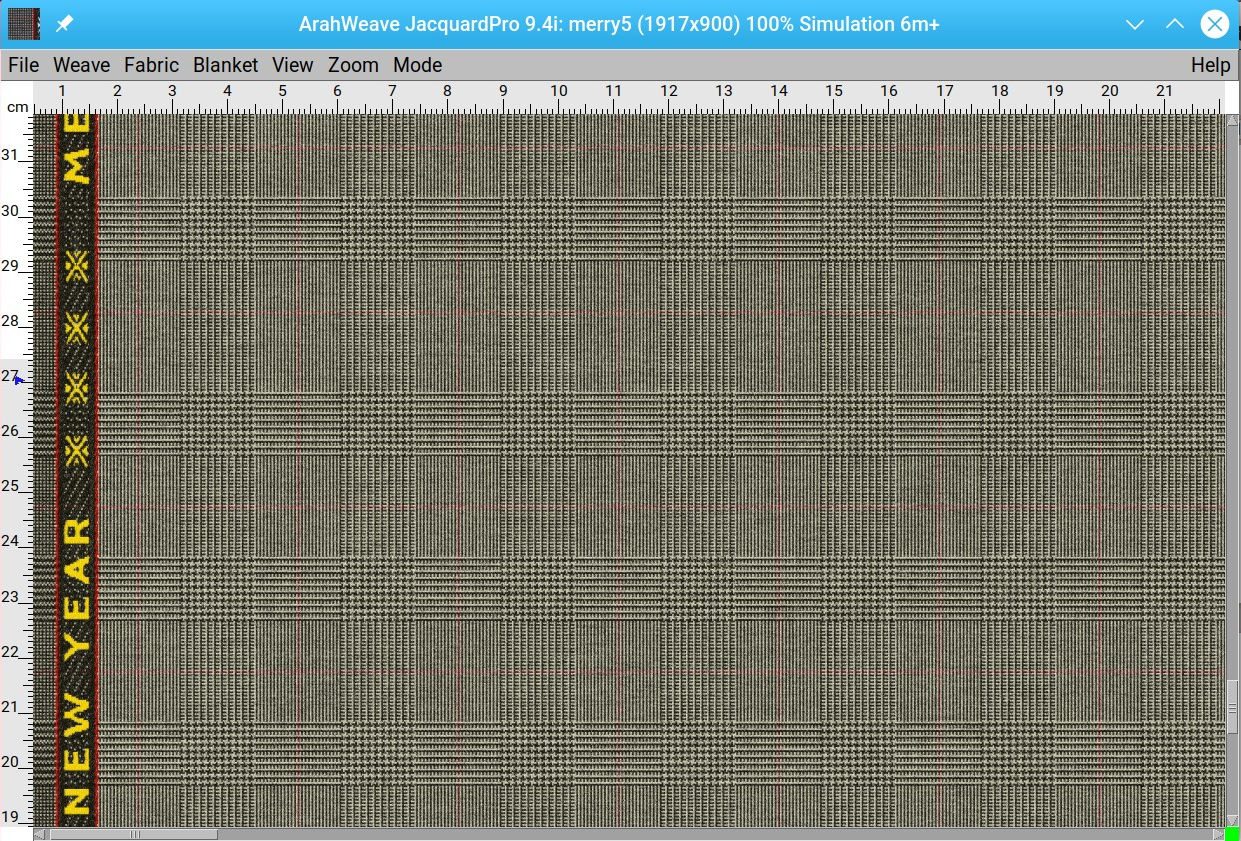
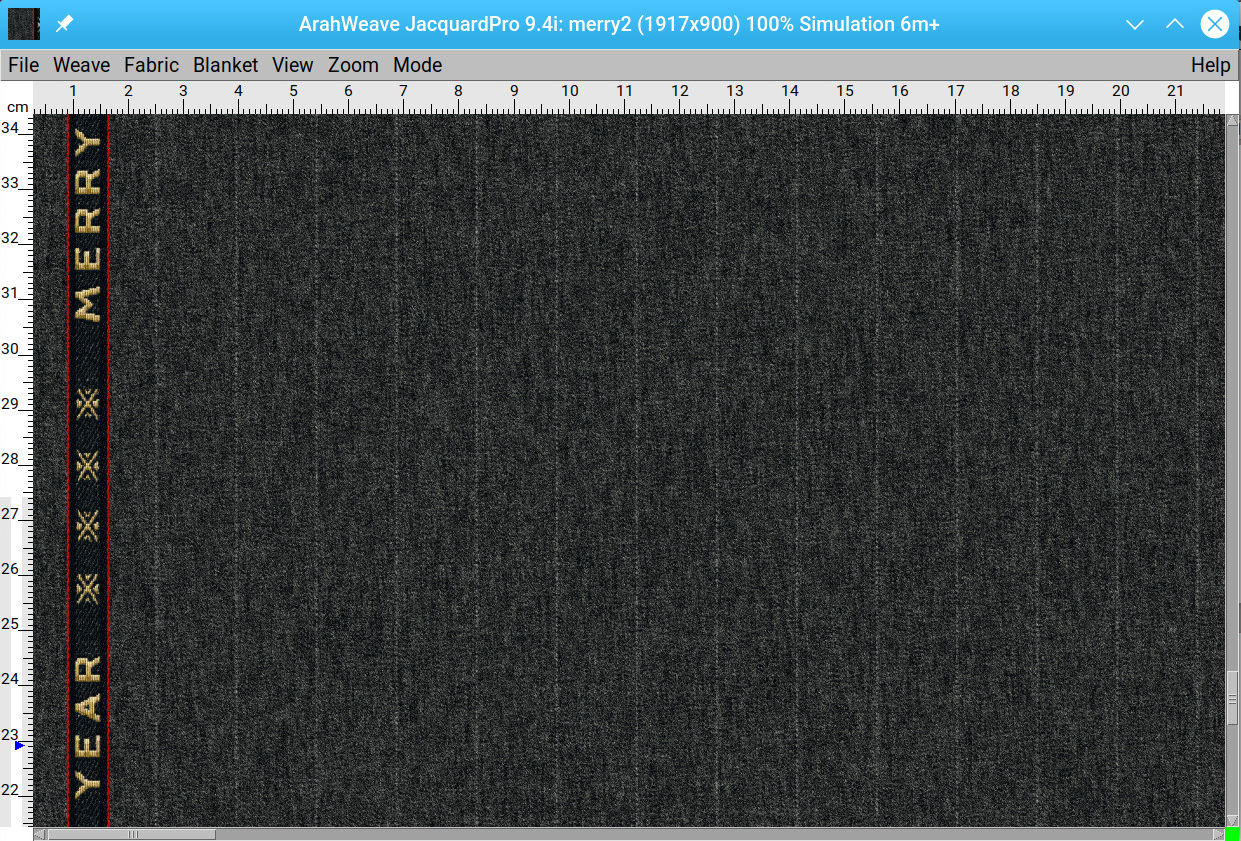
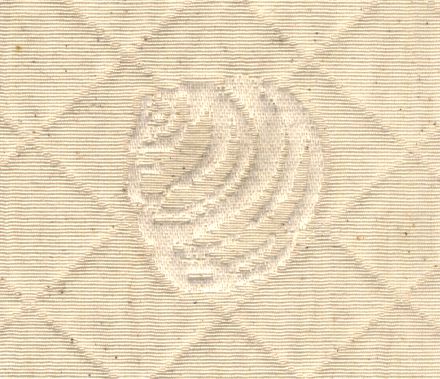
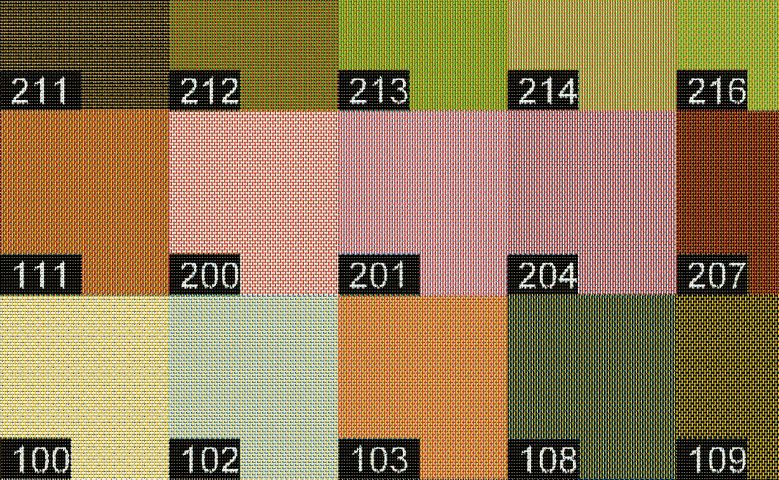
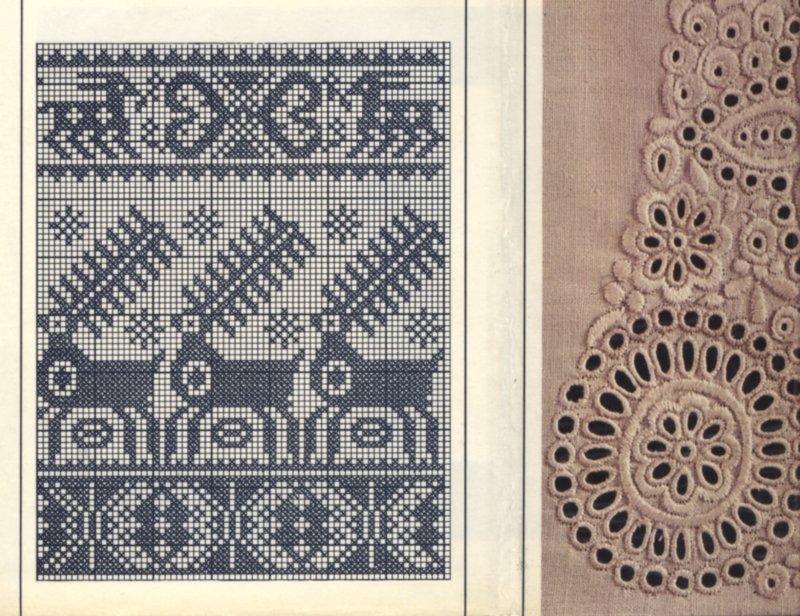
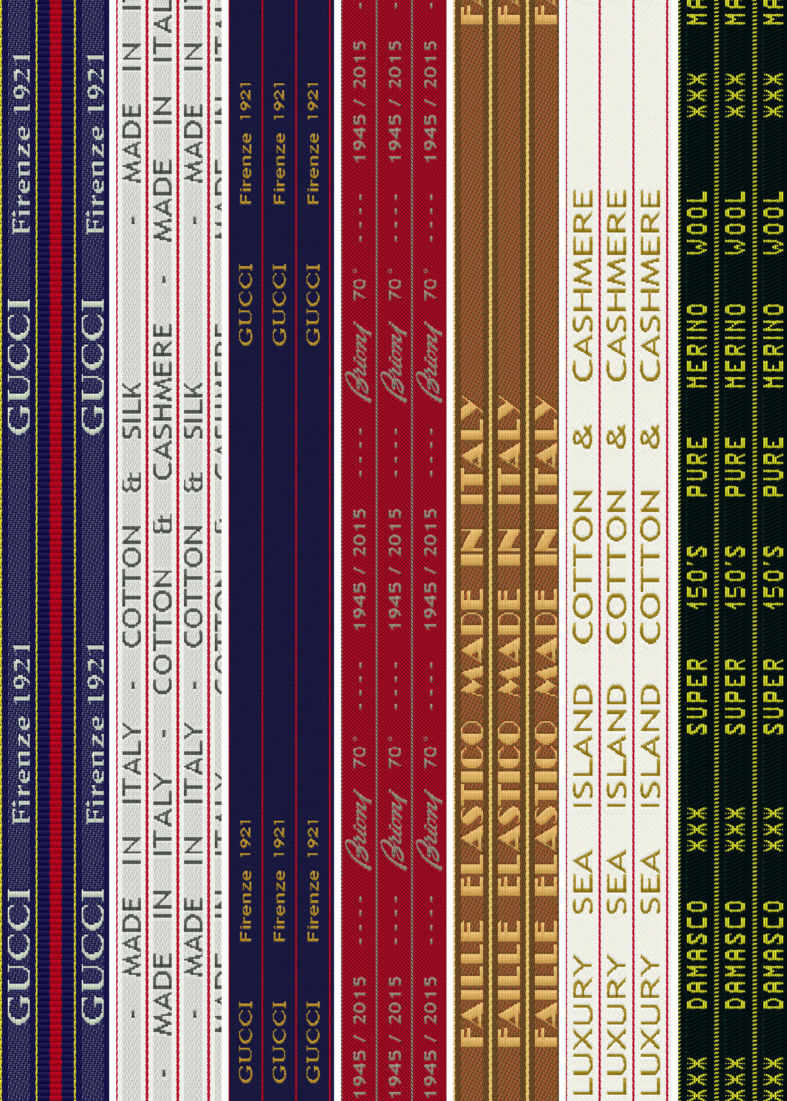
The image below shows a few selvedges created by our customer Zanello, Biella from Italy.
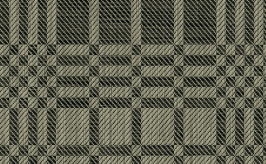
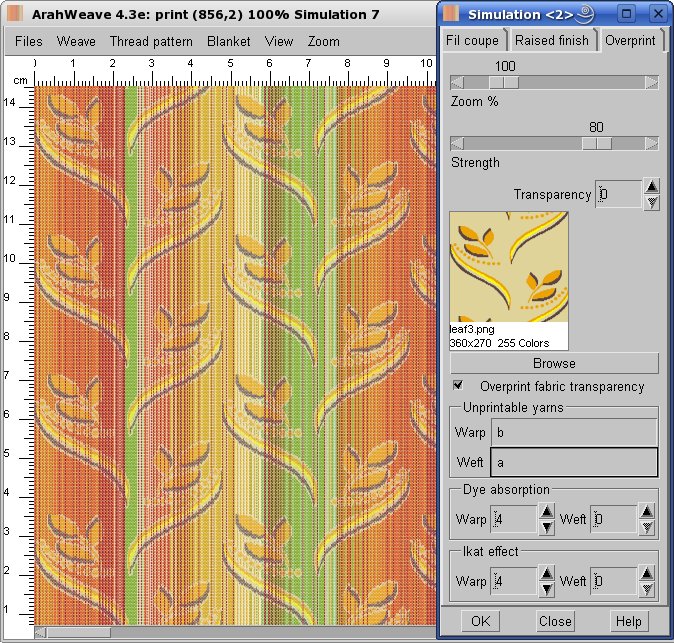
Here are a few ArahWeave simulations, showing selvedges integrated with fabrics.