

![]()

TUTORIALS
Let’s go crazy with fil coupe
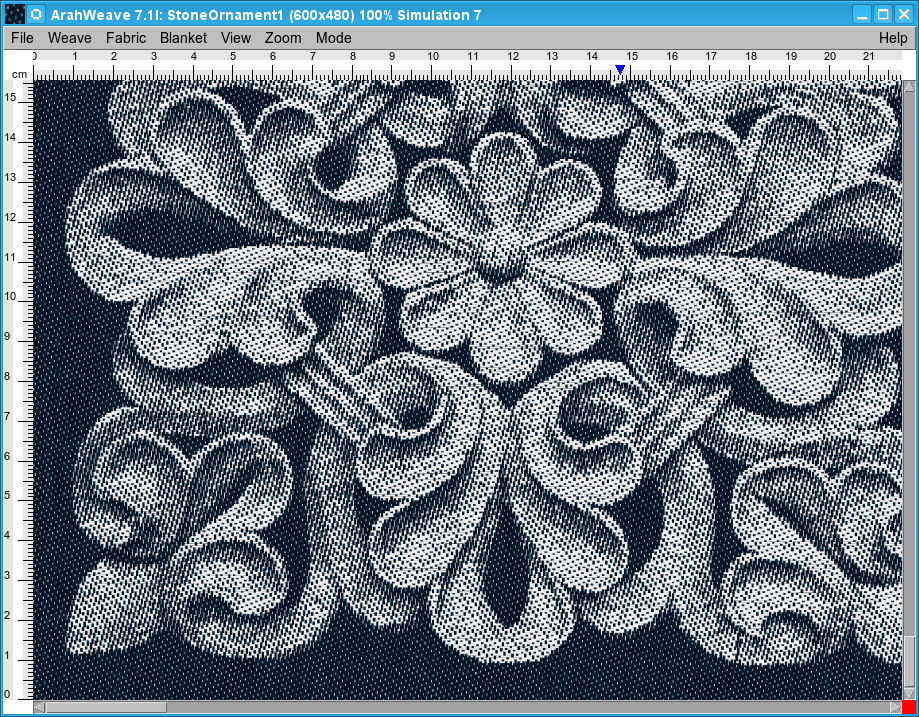
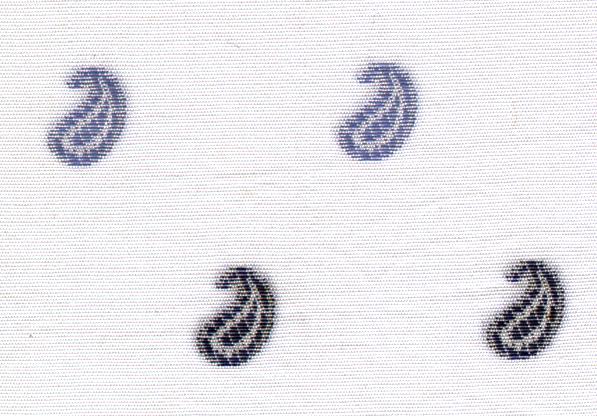
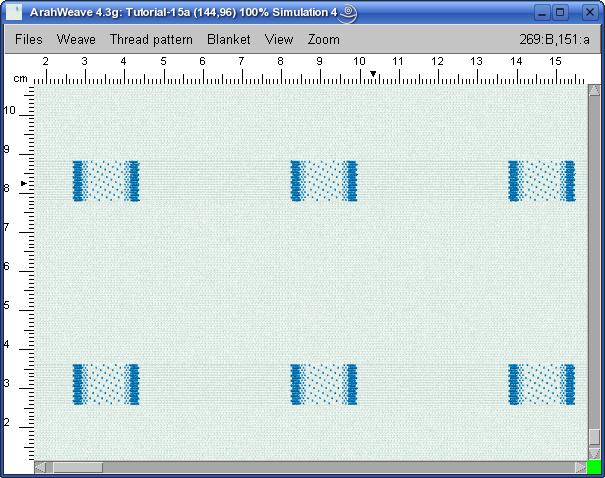
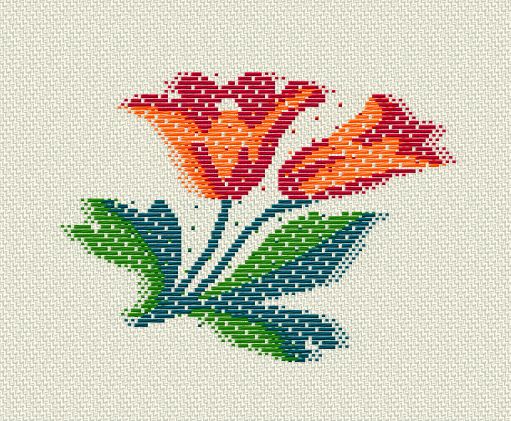
What the heck is fil coupe? Literally translated from the French, it means “cut threads”. Everything will be easier to understand with an example. The sample was designed and woven by G&M Gunetti, Chieri, Italy. This is the face of the fabric:
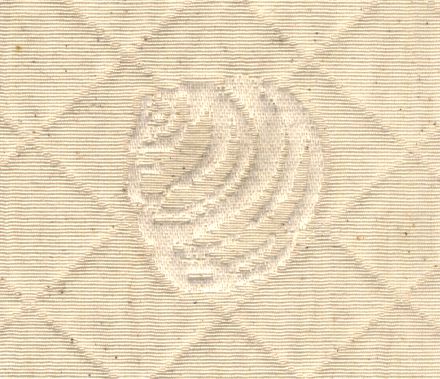
And this is the back side:
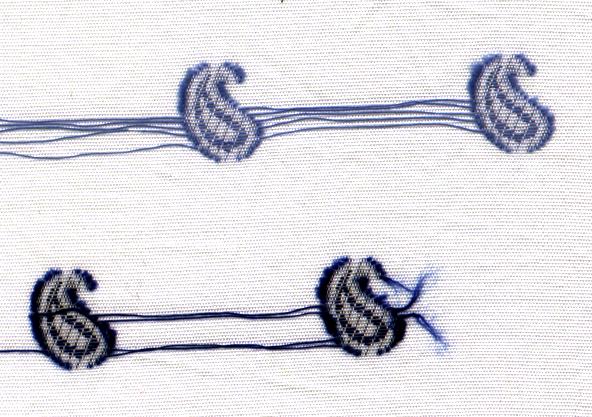
The floats on the back are cut off with a special machine, and on the sample above, you see some threads, which were not cut off yet. Usually the fabric needs to pass through the shearing machine several times, until all floats intended for cutting are removed. At the first look, one is tempted to say: “This is easy – it is a design with extra wefts, and back attachment weave is all floats!”
If you wouldn’t say that, we can already give you the first piece of advice: Whoever doesn’t fully understand extra wefts and regulator, shouldn’t mess with fil coupe. Try (re)reading the extra weft tutorial, if you have any doubts about what does the regulator do. You would be completely puzzled, if we would introduce you to the full complexity of fil coupe in one single example. We will rather explain it step by step, using several different fabrics to illustrate our ideas.
If you really want to be a really good designer, you must not think only of your creative ideas, but also about weaveability. Try treating the plant production manager as your first customer. And the customers are always right. Well… almost. If he/she says that some design is creating problems in production, don’t treat it as a conspiracy of technocrats trying to sabotage your beautiful design. Try to understand the cause of the problem, and be prepared to modify your design, to avoid or alleviate the problem. We will explain several such gotchas in this tutorial, and they are all related to weaveability. We almost feel bad about it, since our customers have taught us these advanced techniques. By explaining them to the rest of the world, we are making their hard-gained knowledge less exclusive, hence making them less competitive. But, on the other hand, Arahne was able to improve ArahWeave and solve many problems in automatic way, so our customers have nevertheless benefited from sharing their knowledge with us.
Back to fil coupe: Why do we do this in the first place? Because we want to have an interesting, colorful, yet lightweight fabric. We are prepared to throw away a lot of yarn during cutting, and risk many production problems, but fabric buyers will compensate us with a higher price of the finished goods. The first trick in fil coupe is relatively evident. The weft effect weave of extra weft is usually quite open, and you run the risk of pulling the thread out of the fabric, during cutting of loose back threads. So we need to put some plain weave (or another tight weave) around the fil coupe weft effect. If you examine the back face of the paisley pattern above, you will see that it does not have the plain weave on the top and on the bottom of the paisley. It is only needed on the left and on the right side of the weft effect. The second question arises immediately: how much plain weave do we need to put on the borders? As usually in weaving, the answer is: depends… Or to put it more precisely: whatever works for you. The cutting is the ultimate test of correctness, and your experience with certain type of yarn (slippiness), density, effect weave and ground weave will determine the correct amount of plain weave. If you are inexperienced in this technique, try weaving a small sample before weaving the full 10.000 meter order.
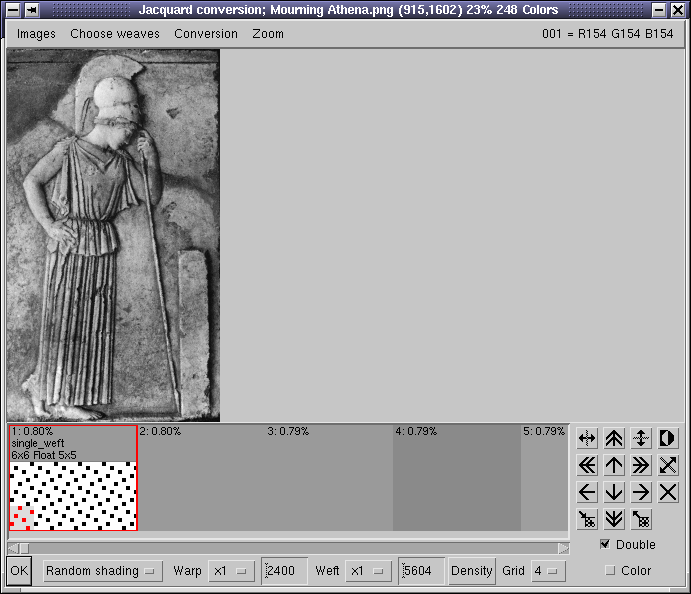
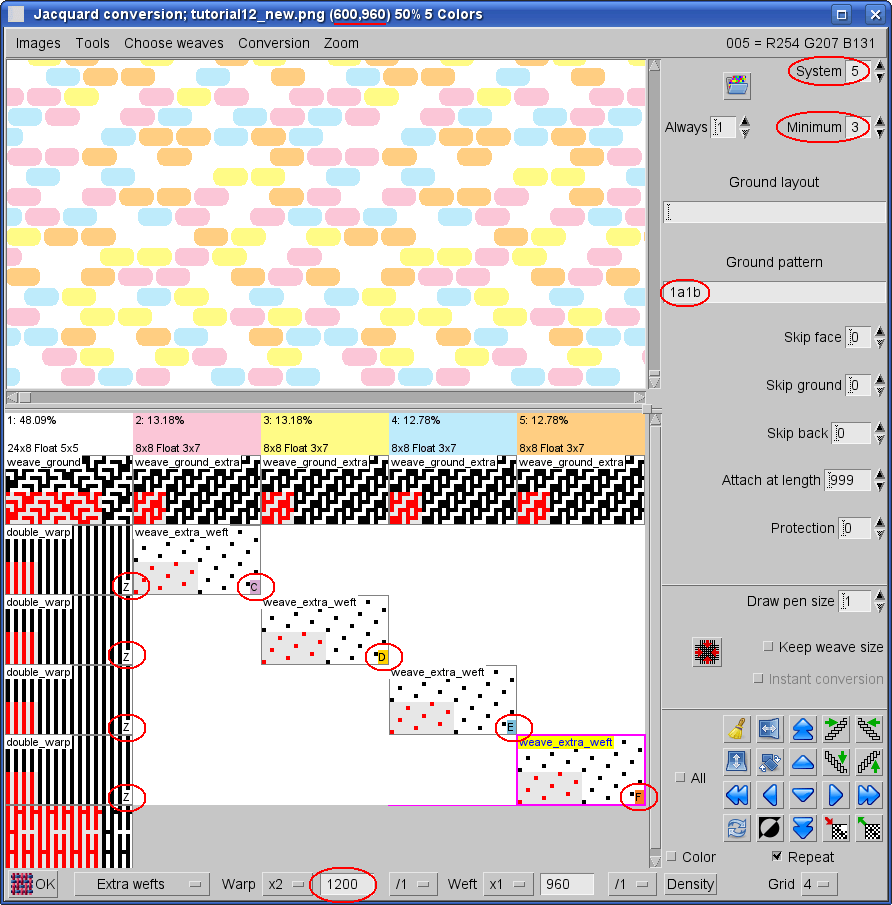
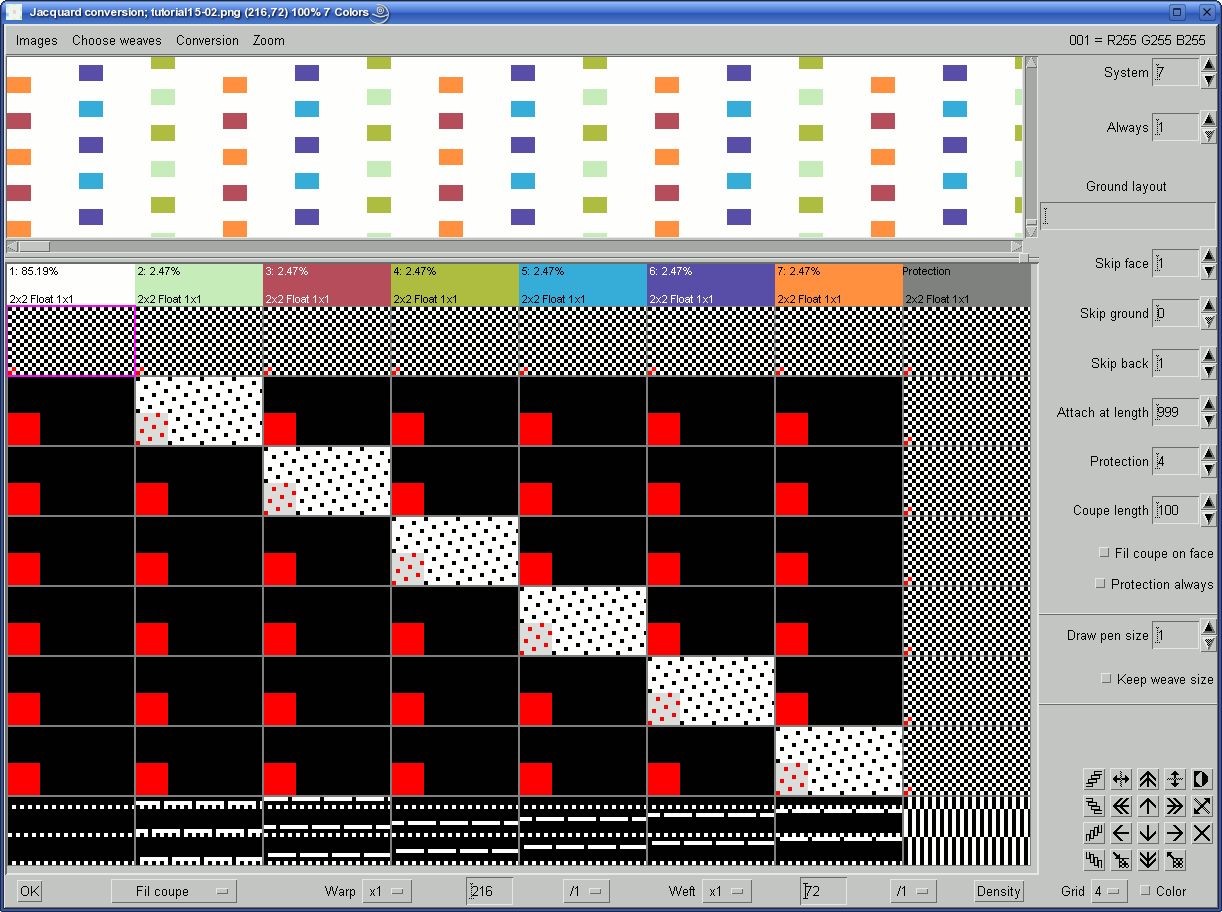
It is time to pass to our first, almost trivial example. We have drawn a small blue square on a white background in ArahPaint. We load this picture into Jacquard conversion window of ArahWeave and set some conversion parameters.
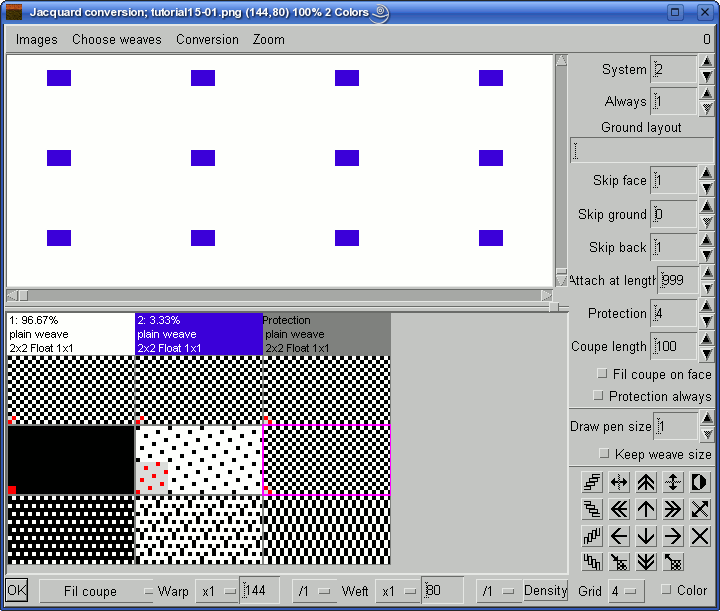
We have already mentioned the similarity between extra wefts and fil coupe, we can almost say that fil coupe is a special case of extra wefts. Many of the parameters to set are equal to extra wefts:
- System: 2; we are making a weave with 2 weft systems
- Always: 1; we only want the first weft to be always present
- Ground layout: empty; we do not need any special layout of ground and extra wefts.
- Skip face, ground, back: 1, 0, 1; computer should not insert weave for extra weft if closer to 1 point from the border
- Attach at length: 999; we put in a big number, since we do not want any special attachments
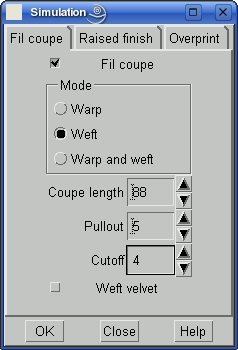
The last two parameters are new or with new meaning: Protection tells us how many points of plain weave should the computer insert on the left and right side of the extra weft fil coupe effect. We will not use Coupe length in this example, so we set it to some large number.
You may have noticed another oddity: We have only two colors in the image, but you need to set the weaves for three colors. Indeed, the last color is artificial; it will always be grey and with label Protection. You use it to specify the weave for the protection area on the left and right of the fil coupe effect. We have set just plain weave for both ground and extra weft. The settings for white and blue color are equally simple: plain weave for ground thread, while extra weft (fil coupe) will have all warp floats on white, and weft satin 8 on blue.
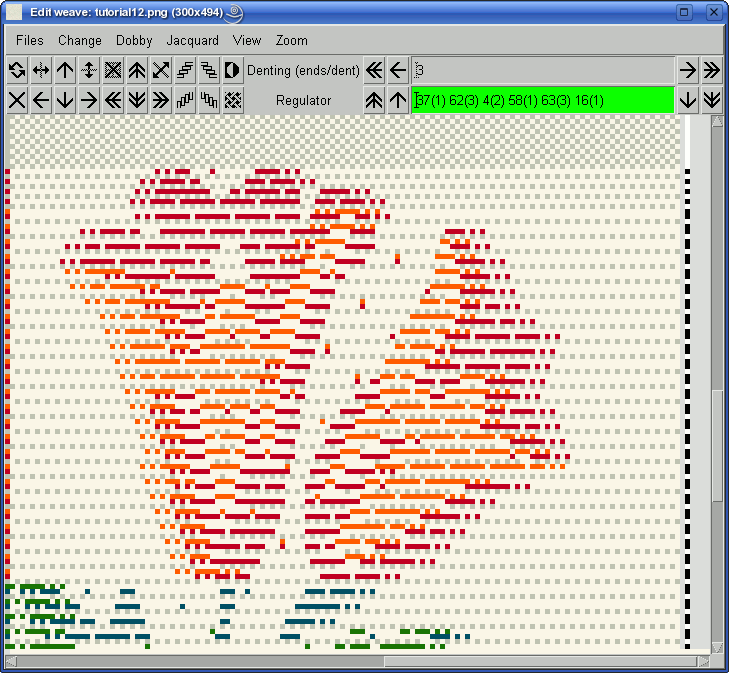
The next picture shows the weave after the jacquard conversion, and after you have removed unnecessary wefts using Jacquard > Remove extra warps/wefts in the weave editor window.
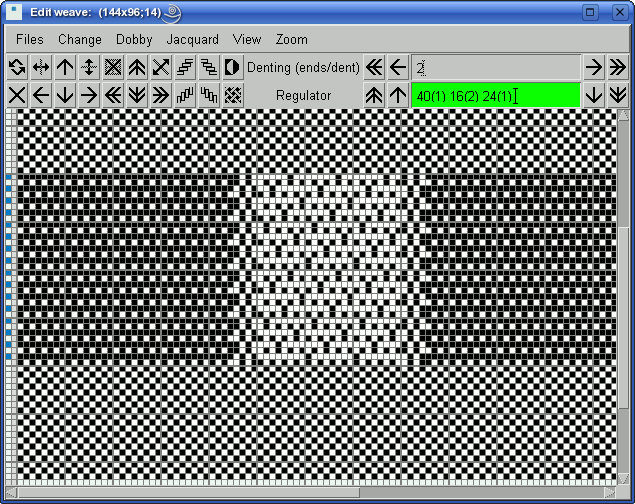
You can easily see that the ground weave is a plain weave on the resulting fabric. The extra weft, if we observe it from left to right, passes from all floats to plain weave, satin, plain weave, and again all floats. Obviously, the regulator will be active on all extra wefts, so we will double the weft density on that area. Since we have entered the same plain weave as protection weave for both ground and extra weft, the resulting weave looks like a reps, if we observe the protection area in its totality. You can count the number of warp points in the reps area: they are exactly 4 on both sides, just like we ordered in the conversion parameters.
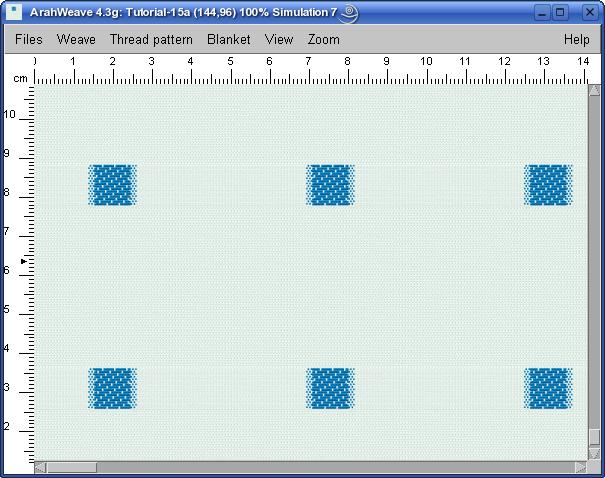
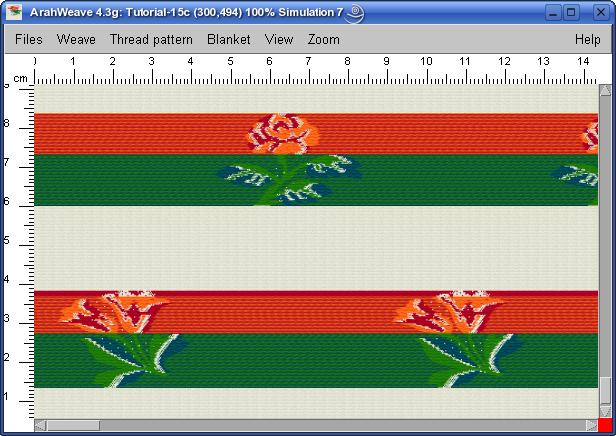
Have a look at the simulation of the finished fabric. Remember that you must set threads per dent, reed number, weft density, and other parameters in Consumption window and enable Density from technical data in Density window, otherwise simulation will not be correct. Obviously, the warp and weft pattern, yarn count and colors must also be adjusted, but you would have remembered that on your own.
You should reverse design before weaving, since fil coupe fabrics are woven with long floats on the top, not on the back. It would be difficult to shear off the floats with shearing machine, if the floats would be on the back of the fabric on the cloth roll. After weaving it will look like this.
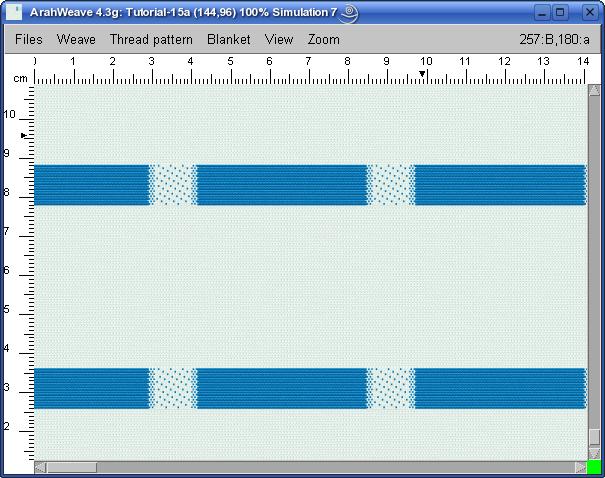
And after cutting the threads will look like this. Yes, ArahWeave can simulate fil coupe fabrics.
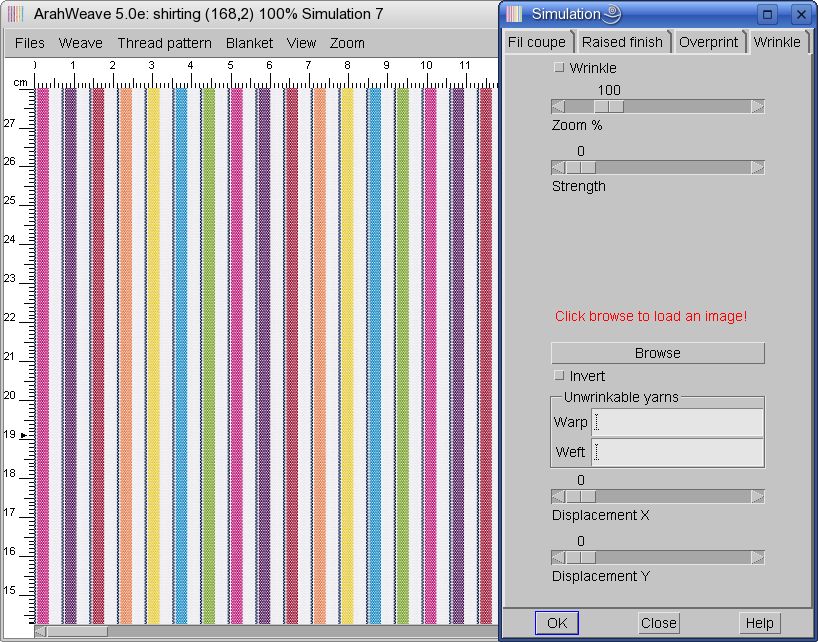
To enable fil coupe simulation open Fabric > Simulation, and switch on Fil coupe.
Having seen all this, you question yourself: “Why all the fuss? I could have easily drawn a square with two vertical border lines in a different color using width of four points, and just insert the weaves which I want.”

You are right. As a matter of fact, we have used this system in ArahWeave a couple of months ago. ArahPaint has good contouring tools, and you can add any number of contour points in any direction. The fact that we can set the width of contours (i.e. the length of protection area), looks like a useful function, but not essential. We clearly achieve a better separation of the design phase (in ArahPaint) from the technical phase (in ArahWeave). It can happen that we need to increase the protection (contour) area from 4 to 6; we are just 3 clicks away from the solution. Again, cool, but we can survive without it.
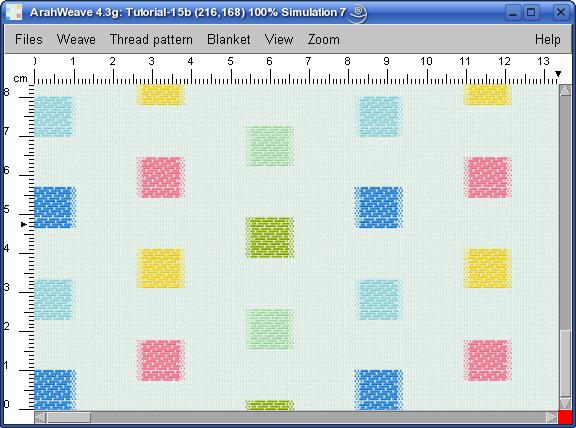
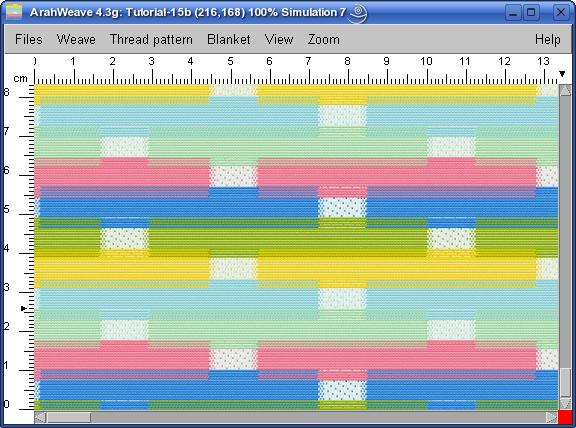
But consider the following example. We go crazy with squares: put them in vertical halfdrop by one third, and use six different colors for squares. It will only take you one minute in ArahPaint. The size of the conversion window looks frightening, but is only a simple extrapolation of the previous example. We use seven weft systems (ground plus six extra wefts), and we simply put the satin on the diagonal of weave squares, and warp float on everything else, with the exception of ground and protection, which are in plain weave.
At first, you may think that you could still use the approach with manually drawing the contours. If you could just use one color to contour all squares, it would be doable. But we need a different weave for every contour color, since we need to attach only one of the wefts but not all the other ones. Even worse, for example, the yellow has an area where it runs alone, an area where it has light blue and and area with green on the back. You would need to separate those cases by introducing additional contour colors. Not an easy task. But luckily, we do not need to do that, since we have ArahWeave.
After the usual steps of removing extra warps/wefts, setting the yarn counts, colors, and weaving density, we can examine the simulation. Not so bad for a five minute work, isn’t it?
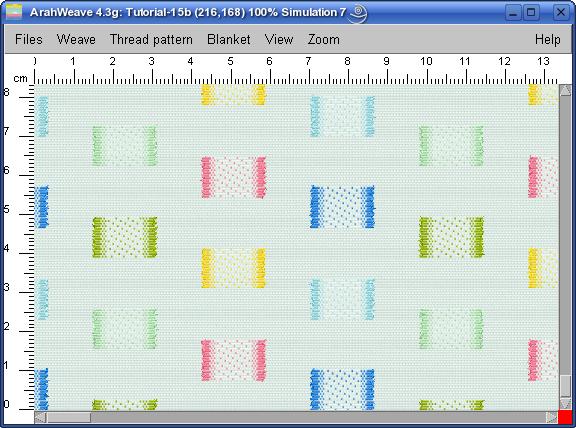
Have a look at the back side. Like we promised, we have a light and colorful fabric. Even the quantity of the yarn, which we will throw away after cutting is not so big, only about 50%. Anyway, you shouldn’t be afraid of throwing the yarn away – the more you throw away, the higher price you can justify. We live in a strange world, don’t we?
And this is the back side of fil coupe fabric simulation. Some stylists actually prefer the back size and use it on the top as a special fabric effect.
We must address another twist in the design process. What if we want some extra weft to float (for fil coupe) in some area, and be normally attached to the back in some other area? This would be in the places, where the float area would be too short for cutting, but too long to be left just floating around. It is better to force the threads into what you want, instead of leaving it to some semi-random process, like the cutting of the shearing machine.
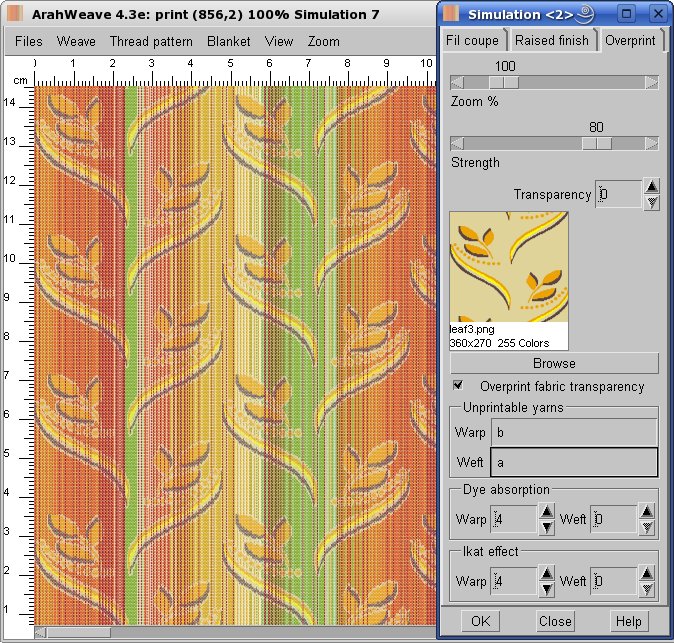
Due to separation of design phase and technological phase, we can reuse the picture from one of the previous tutorials, and weave it in a different technique. The settings of parameters for conversion is the same as in the previous examples, with two exceptions. Instead of setting all warp floats, we use warp satin 32. This is the weave, which will be used as a back attachment. But how do we control which area will be attached, and which will be floating for fil coupe? You set it with Coupe length parameter, which is 100 in our example. This means that areas shorter than 100 warp points will be attached, and longer ones will be left floating.
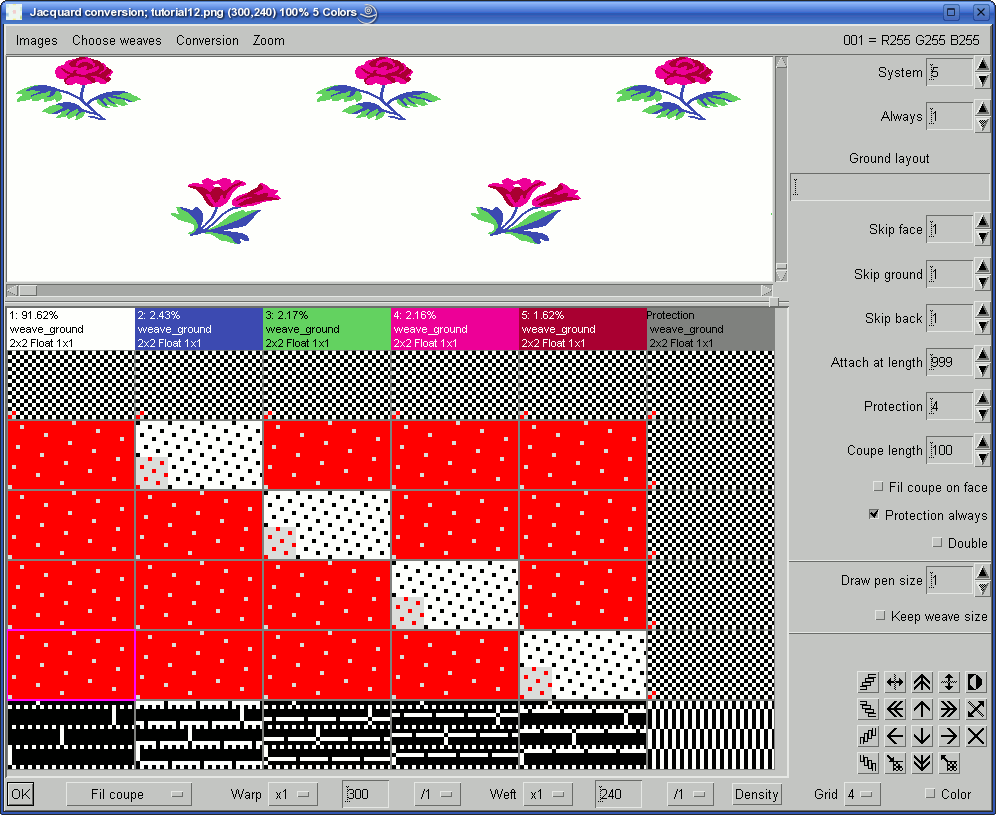
Once again you need to repeat the usual set of operations to get the simulation. You can clearly see the attachment points in the middle the two flowers, and protection area of the plain weave on the outer border of each extra weft effect. By examining the color of protection area weave, you can also verify that only the thread, which ends the weft effect, is involved in protection plain weave, not the other ones. If you would be working with extra contour colors, and you would tie all the extra wefts in the same area, you would face a new problem. The weave would be distorted vertically, since all the wefts would not be able to enter in the same ground area, with a very tight protection weave, like plain weave. By using ArahWeave‘s advanced fil coupe conversion, you avoid this distortion.
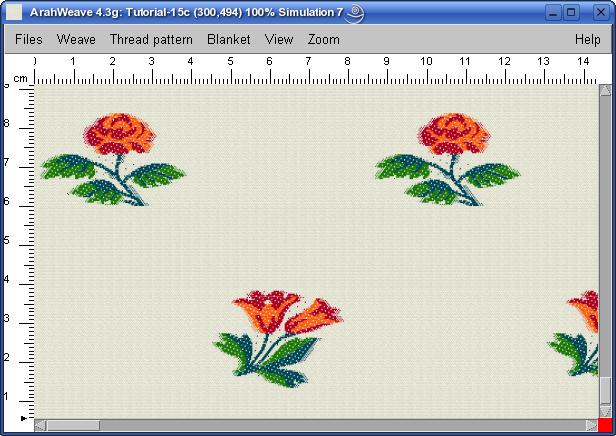
If you remove the extra warps/wefts and zoom out the picture, the fabric will look like this:
And the back side, which of course, will be the top during weaving.
…and after cutting the threads.

A careful observer of the face fabric simulation of on the top will notice, that ground is not perfectly regular. You can see the transition from the area, where you have just ground weft, to the area with extra wefts, and back. This is a “defect” of ArahWeave‘s fabric simulation. If you want to avoid it, you must make the simulation before you remove the extra warps/wefts; then the ground will be perfectly regular in simulation. But there is another reason why we are telling you this. Namely, in some cases, if ground weave is very open (or very dense), the same defect will occur in weaving. The fabric will have these faults of irregular density on every transition from weaving with regulator to weaving without it, and back. Some weavers try to correct this defect by hand. They insert some extra “false” regulator points, and remove some of them where they would be necessary, to smooth out the transition. Sometimes this works, and if you have time and you enjoy experimenting, you can try it.
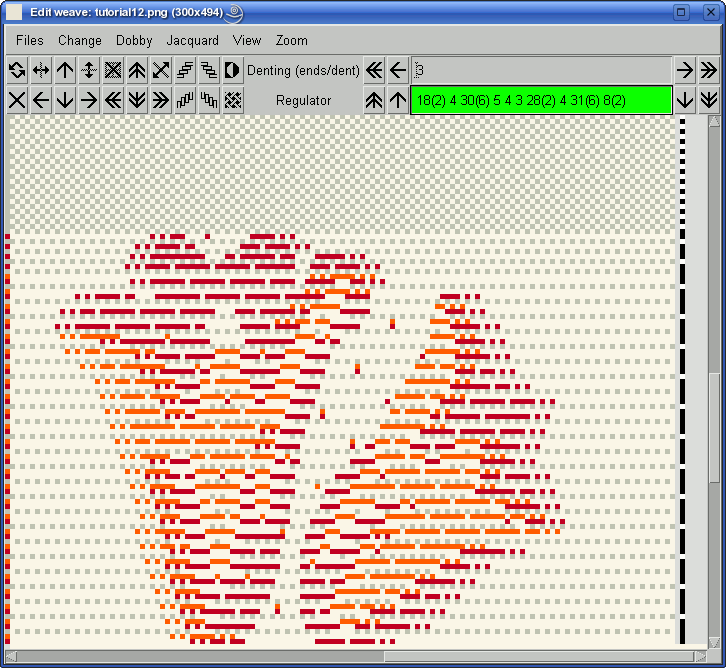
As usual, there is an automatic way to resolve this problem in ArahWeave. We remove the transition from regulator / no regulator altogether. We will have regulator everywhere. In the Save cards for production window you need to set Regulator in ground to 4, 3, 2 or some other value which works for you. The program will take the existing regulator pattern and add the regulator into ground, so you will have regulator everywhere.
The top picture shows the color weave before applying this function, and below you see the result. The regulator is indicated by black points on the right of the pattern. This solution seems strange at first, since these regulators could introduce new irregularities in the fabric. But the threads will move to their desired place after the weaving, and everything will be fine. You must only remember to lower the ground density by 25%, if you put the regulator on every 4th ground weft. By analogy, if you will put regulator to every second ground weft, you need to lower the ground density by one half.
We have almost exhausted our bag of tricks. The one that is remaining is related to selvedges, so we can again examine a typical loom layout. Choose Weave > Save cards for production… from the main ArahWeave menu.
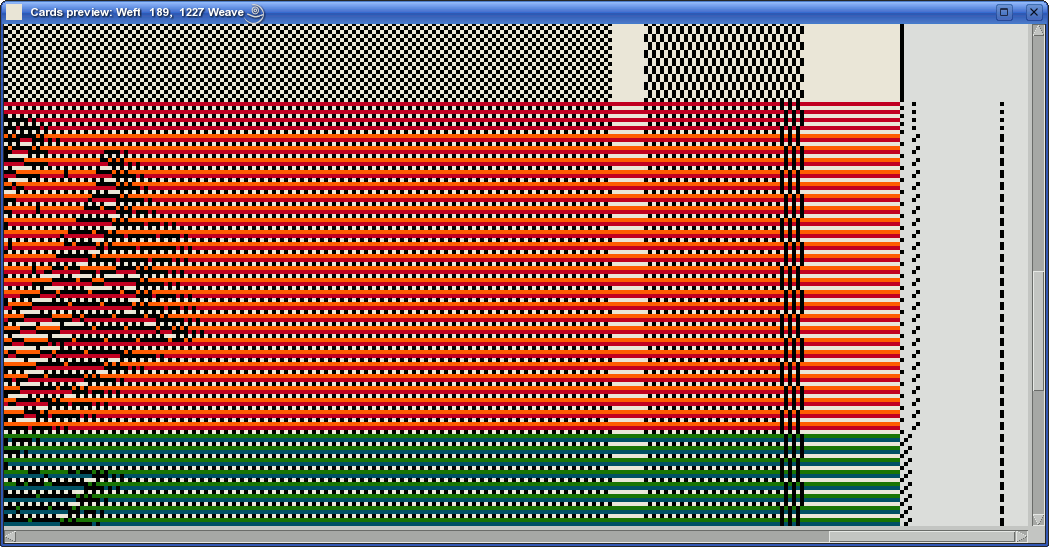
To examine how will the pattern look on the loom, click on the cards preview button.
![]()
Note that the fabric is woven with bottom up; we have used Pattern > Reverse prior to saving the cards. If you examine the cards preview, you see the pattern, some empty hooks, right selvedge, some empty hooks, weft change and regulator. The weft change and regulator are transmitted electronically, without using any jacquard hooks, and the electronic area is indicated by grey instead of white. You may be already familiar with the fact, that selvedges are elongated on the areas, where regulator is active. We must use a more open weave to allow all the wefts to enter. But here the weave for selvedges is missing on fil coupe threads, only the last four warps have the weave as we expect it. Is this a bug?! No, the program does it “on purpose”. If the fil coupe threads would be completely woven in the selvedges, you run the risk of tearing off the selvedges during shearing. No, we do not want that. But we must also not leave them out of selvedges, since the weft change mechanism will most likely mess things up, and the untied thread will fall back in the fabric, and get woven in places where we do not want it. So fil coupe threads are half in, and half out of the selvedges. They should stay in during weaving, but get easily pulled out during shearing.
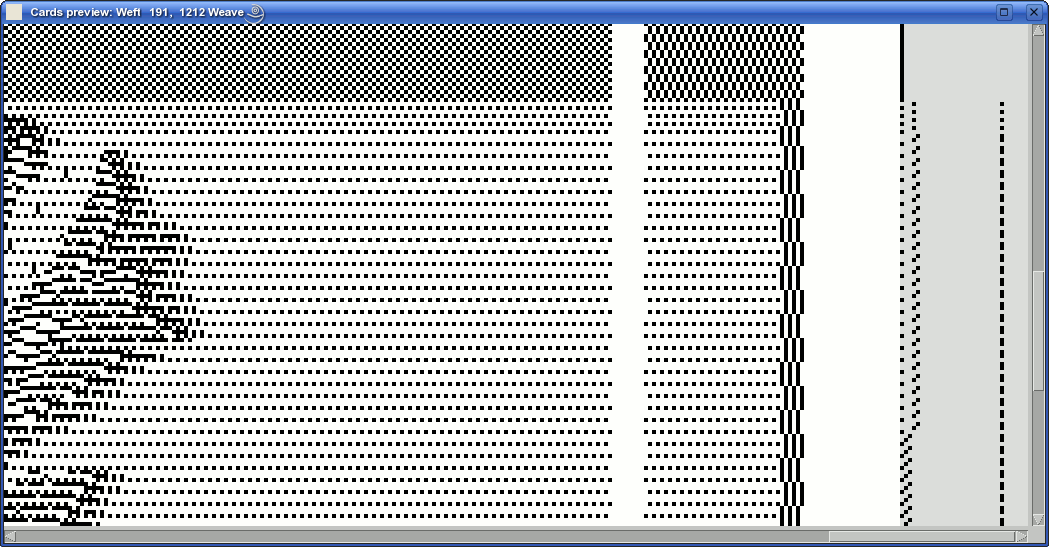
If you press c on the keyboard, you are able to see the card preview in weft colors, so it is much easier to see what is going on.
You will need a shearing machine for the industrial production of fil coupe. If this last finishing operation will be done by an external company, you should be in good relations with them. Weavers say that finishing people will never admit a mistake, and the cutting operation is really delicate. You set your knives too low, you make one pass of shearing too much and your costly fabric will be ripped. To make matters worse, it is entirely possible, that you have indeed caused the problems by improper design or choice of weaves. So it is like one of those cases, when software can damage the hardware. And you can not sell a torn fabric with a discount.
We could say that fil coupe is a kind of woven embroidery or appliqué. Since we are weavers by profession (or spirit), we will promote fil coupe and reject embroidery. The superiority of a fabric, whose threads are assembled merely by a weave, is easy to advocate. We will not allow any needless needles to penetrate the soft tissue of our fabric, only to add some parasitic threads. On the less emotional side, you want to deliver a product with a high added value, not just plain weave.
Now that you know everything about fil coupe, you will be able to make very expensive fabrics, and buy yourself a coupe 😉