


![]()

TUTORIALS
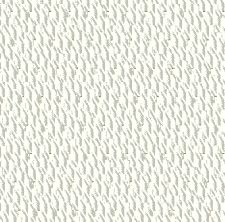
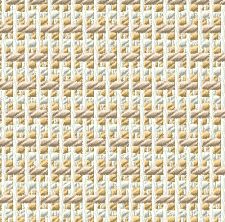
Tessuto matelasse con una conchiglia
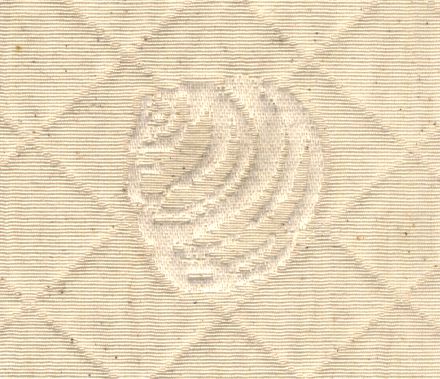
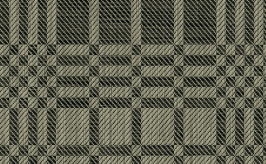
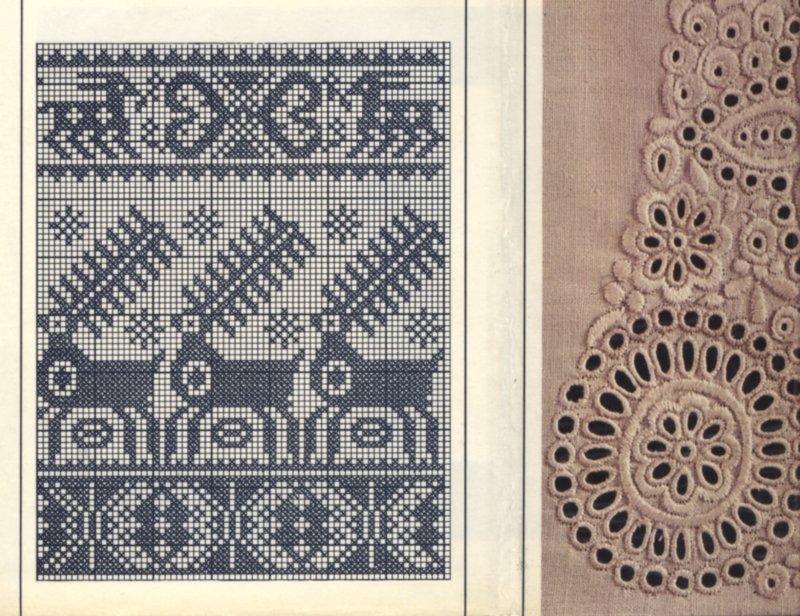
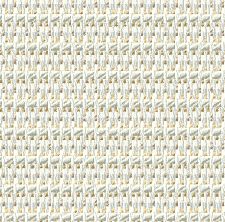
Matelassé is a double jacquard fabric with different proportion of face and backing threads; we hope that you are able to recognize a shell.
This order of arrangement is useful for the cloths where face fabric is very fine, and the backing weft is usually thicker than backing warp. Backing weft is also soft spun, in order to obtain the softness of handle on the underside of the cloth. We will show making of double weave with ArahWeave on the sample of bedspread cloth. It consists of three weaves. Ground weave is formed by two layers, which are joined with the second weave only at diagonal grid pattern and center motif. Third weave is double weave with satin on face and plain weave on back. It is possible that you need two warp beams, because the consumption of the first warp is higher than the of second one. Depending on vertical graphical arrangement of your design, you may also be able to weave it on just one warp beam. If you want to check the evenness of your warp consumption, go to Weave > Edit Weave and then in Change > Information and click on Consumption option.
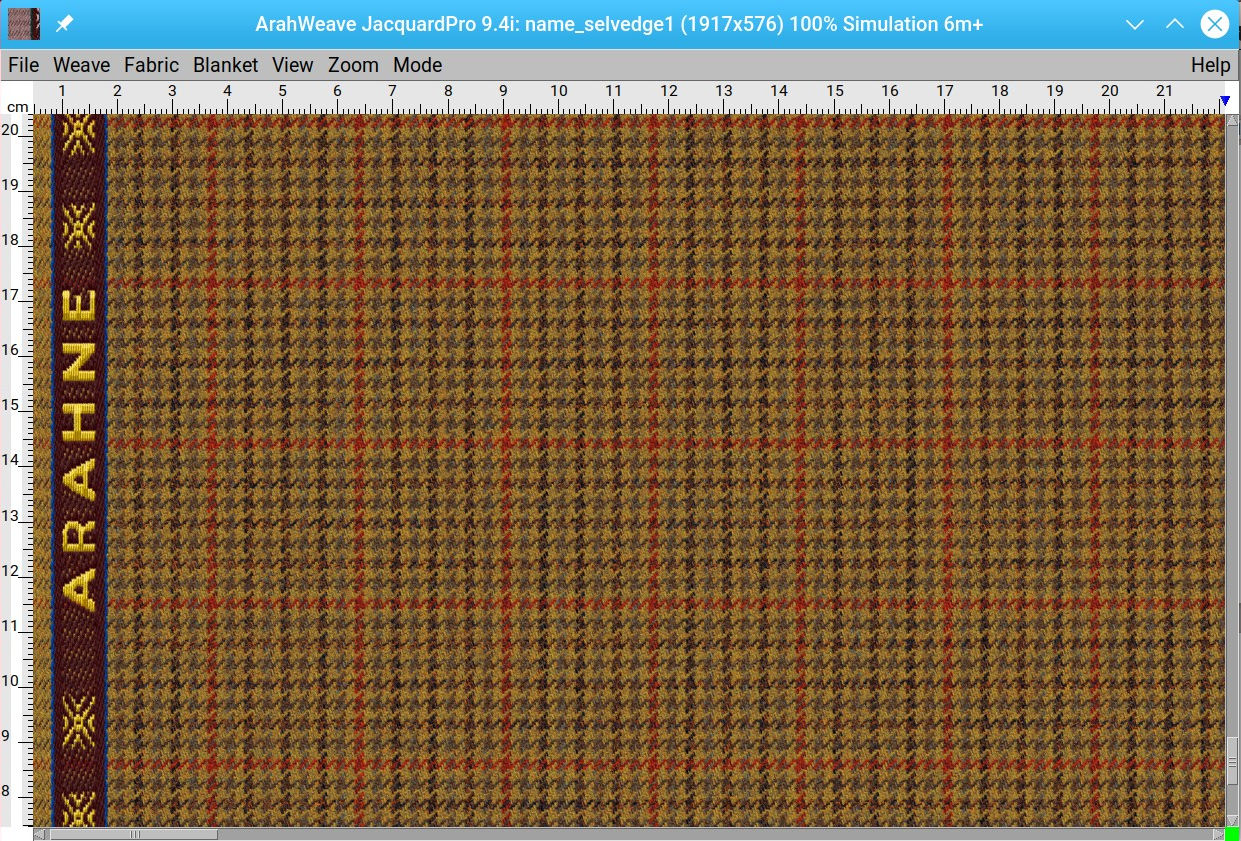
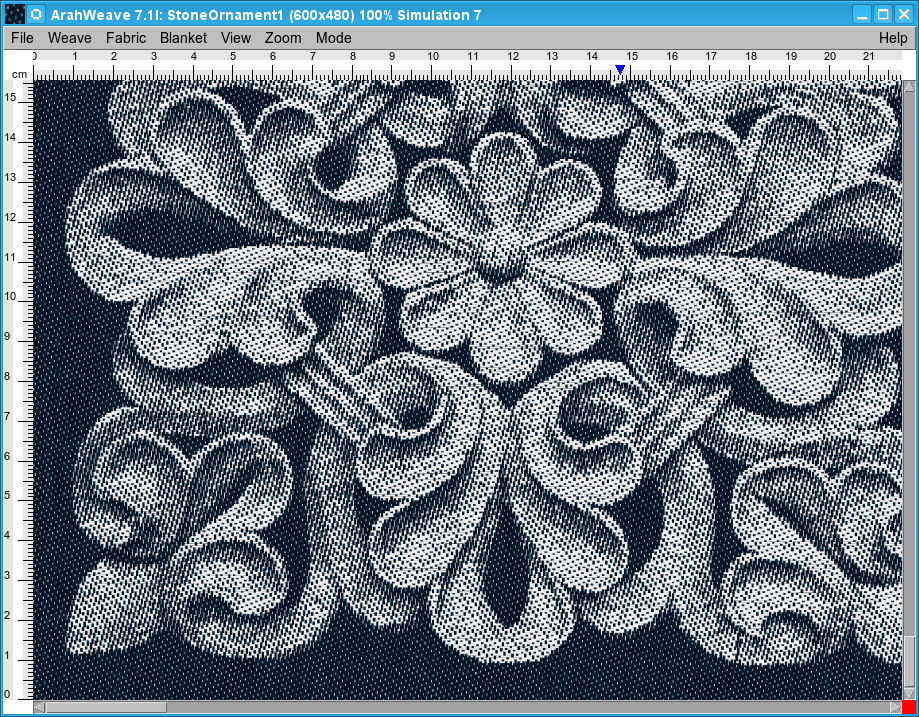
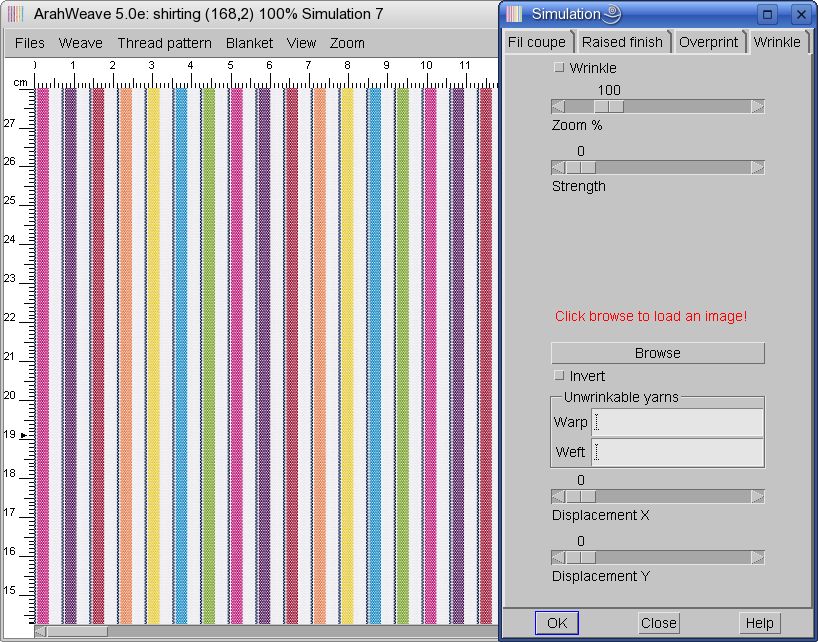
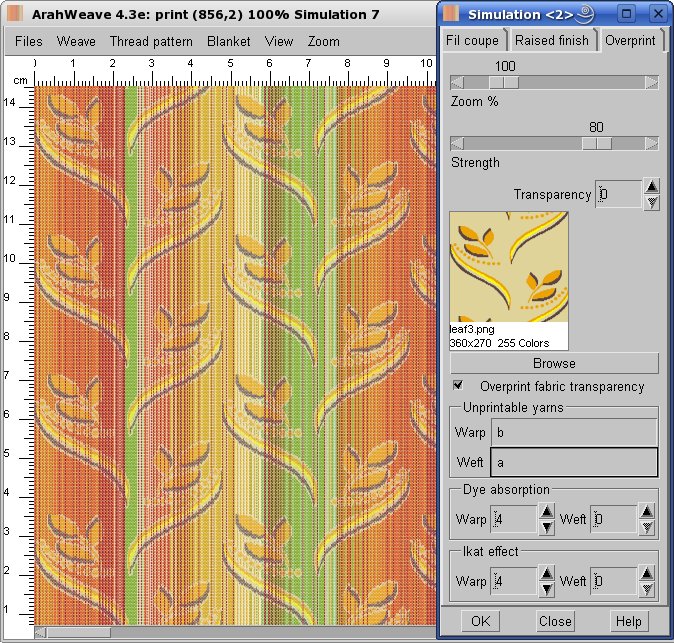
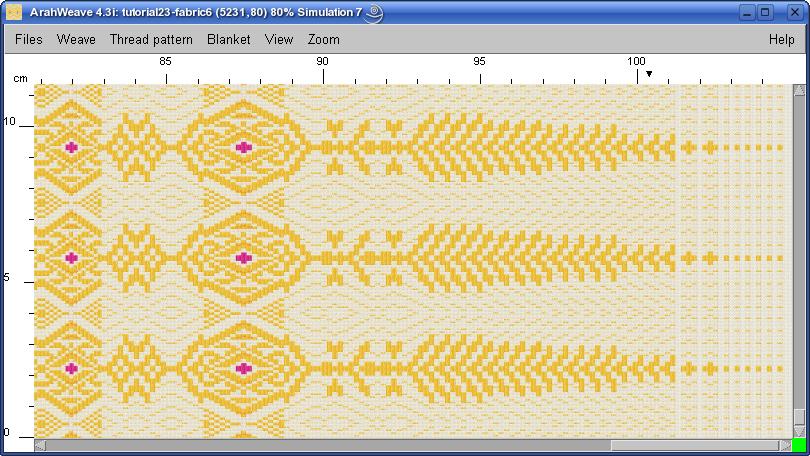
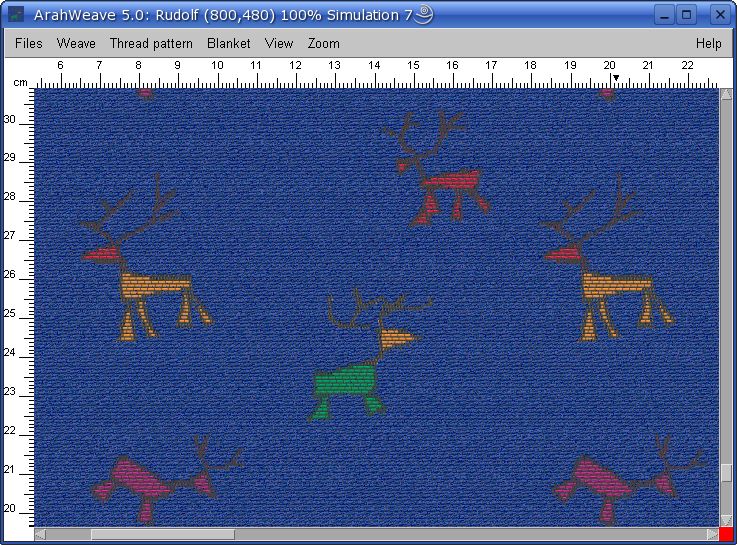
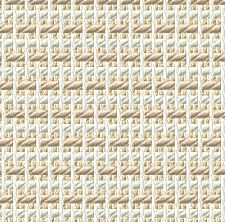
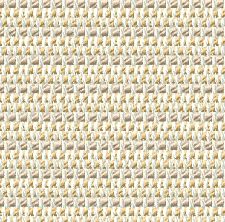
We apologize to the original producer/designer of the fabric on the following picture. We were asked by one of our customers for an explanation on how to make a fabric with similar design and quality, and we did it. This is not copying in strict sense, it is the basic operation of textile design – look at the work of others to make something new.

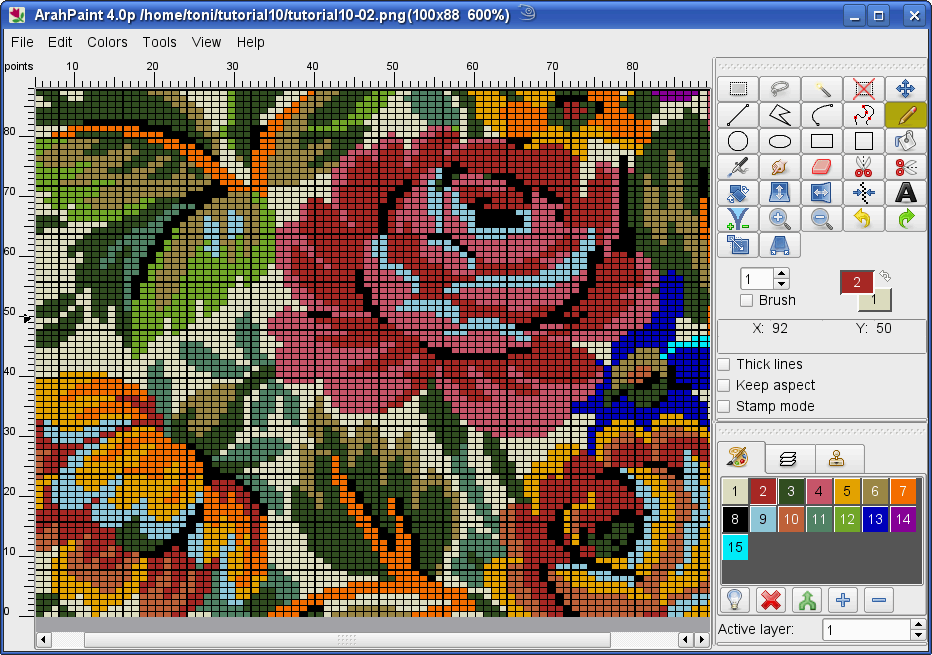
After drawing the jacquard image in ArahPaint (which should be easy this case) open ArahWeave program. Choose Fabric > Thread patternand enter the thread pattern. Three warp threads and two weft threads form the upper fabric, and one warp thread and one weft thread form the lower fabric. We will add wadding (middle) weft thread to increase weight of the cloth, and to complicate our life. The so called wadding threads lie between two fabrics, and are no visible neither on the face nor back. We will use different colors for each of the threads to ease understanding of their purpose. Color A means the first (face) warp, color B means the second (back) warp, color a is the first weft (face), bis the wadding (1) weft, and c is the second weft (back). The warp threads pattern could be also written 3A 1B, but we have improved the regularity of the fabric by putting the backing end in the middle of the repeat. The thread pattern would look like this:
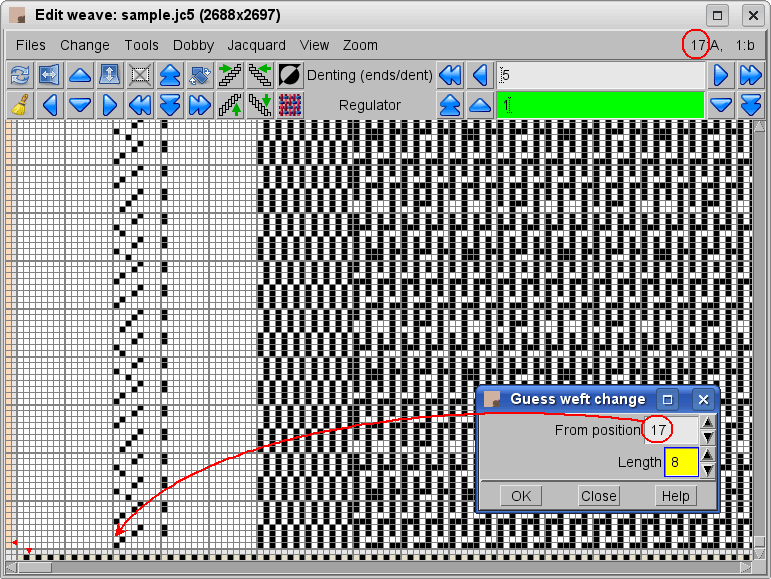
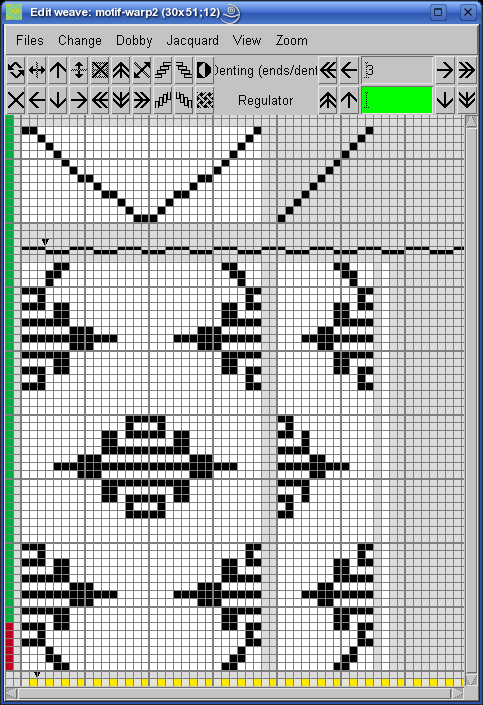
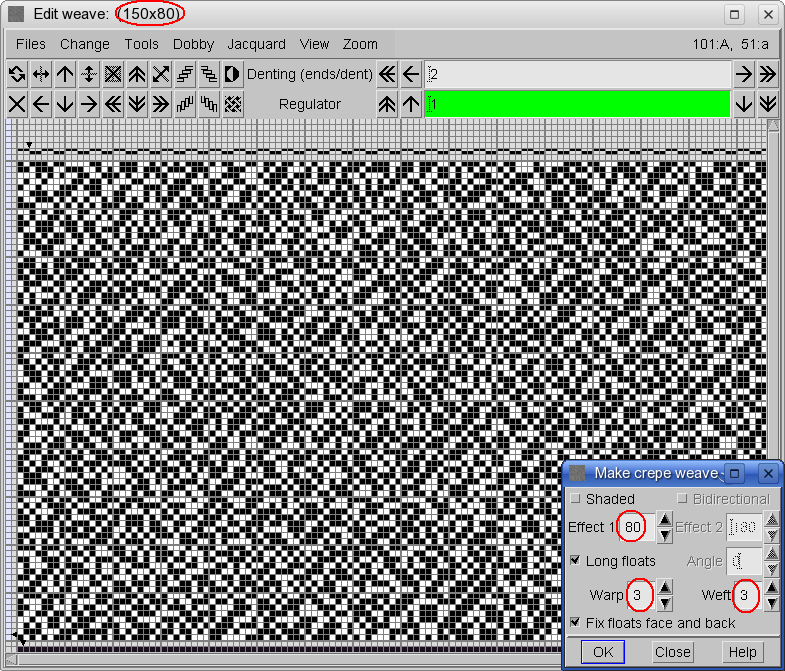
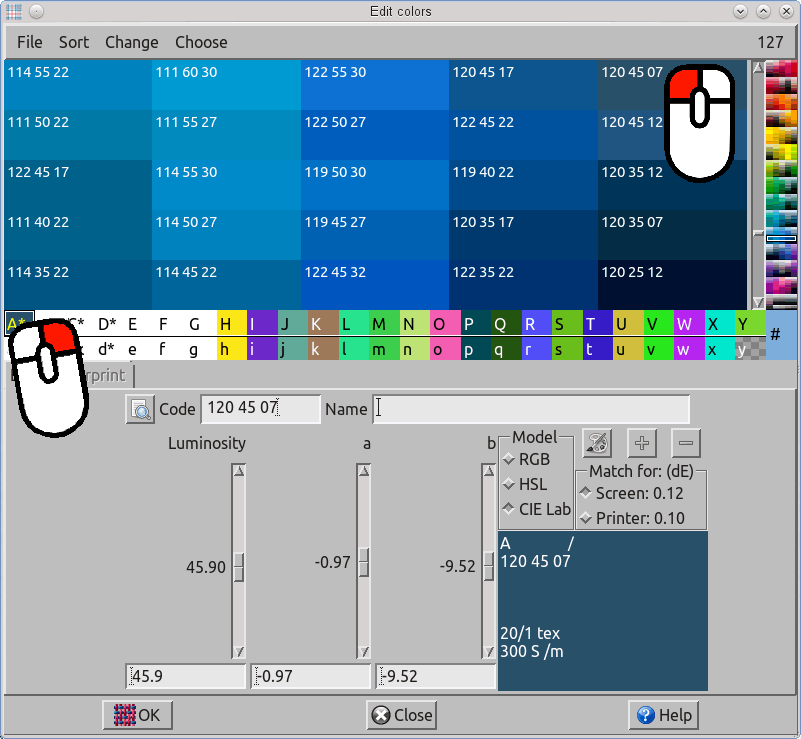
We need three weaves for this fabric. Let’s start with the ground one, that is a double plain weave. Choose Weave > Edit. In Edit weavewindow press ![]() to clear content of weave editor. Then choose Change > Dimensions…. The new window will appear. We need to make a small calculation to to get the repeat size of a double weave. Multiply the number of threads by the least common multiple of the size of the face weave and the back weave. Both top and bottom weaves are plain weaves with repeat of 2 by 2; the least common multiple is 2. The size of weave is 4 (3 up + 1 down) by 2 equals 8 for warp, and 4 (2 up + 1 middle + 1 down) by 2 equals 8 for weft.
to clear content of weave editor. Then choose Change > Dimensions…. The new window will appear. We need to make a small calculation to to get the repeat size of a double weave. Multiply the number of threads by the least common multiple of the size of the face weave and the back weave. Both top and bottom weaves are plain weaves with repeat of 2 by 2; the least common multiple is 2. The size of weave is 4 (3 up + 1 down) by 2 equals 8 for warp, and 4 (2 up + 1 middle + 1 down) by 2 equals 8 for weft.
In Edit weave window choose Change > Edit decomposed to get decomposed weave editor. Enter the warp and weft layout. For each thread you have to specify the fabric block where you want it. For warp we write: 1121- It means first end in face fabric, second end in face fabric, third end in back fabric, fourth in face fabric. Use the same logic for weft, just that we also have the middle weft, so the weft layout would be 1213 – one face, one middle, one face, one back. The weave will be split into 6 areas. Use left mouse button to draw points, and right to erase them. The lower left corner contains the weave for the face (a plain weave). The same weave is in the upper right corner, which shows the back of the whole weave. The weave in the upper left corner shows the combination between face warp and back weft (all up, because face warp is always above backing weft). The lower right corner contains the combination between back warp and face weft (all down, since the face weft is always above backing warp). Two weaves of the wadding weft – left with face warp and right with backing warp are in the middle area of the Edit decomposed window. The warp and weft patterns are also divided into face and back. The thread colors are drawn to the left and to the bottom of the weave, same as in Edit weave window. The decomposed weave window is positioned on the top of the Edit weave window.
To facilitate understanding of the weaves, we also provide shaded integer view and simulation view of the weave, both for the face and the back side.
| shaded integer view | simulation | |
|---|---|---|
| face |  |
 |
| back |  |
 |
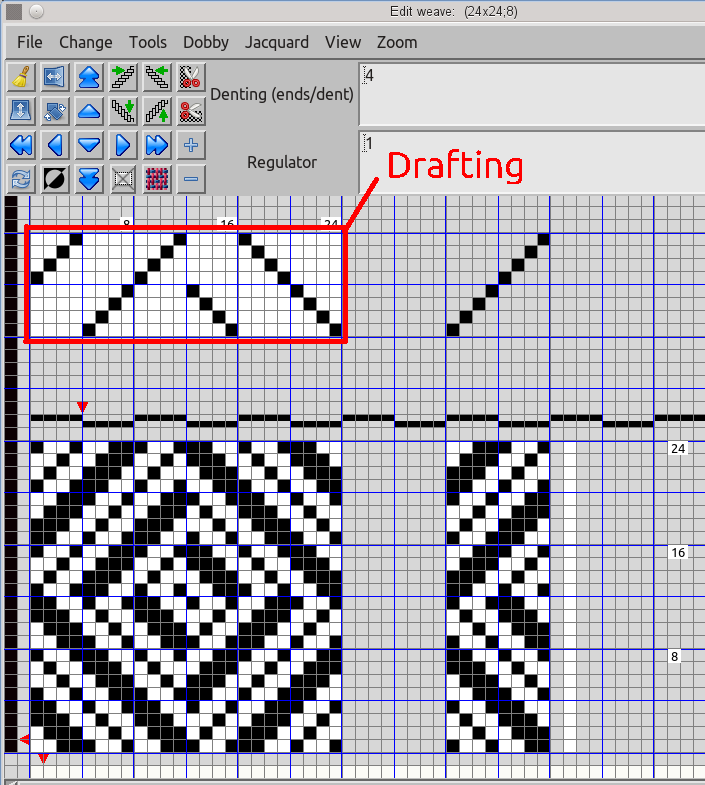
The weave, which is tying both layers together, is a single layer weave (pointed twill 2/1, turning on the first and fifth end). The wadding weft is simply attached to the cloth by warp, which is on the back of the main weave. The size of the weave is the same, 8 by 8, but the arrangement of threads is different. We have just one warp layer, while weft layout is 1211.
| shaded integer view | simulation | |
|---|---|---|
| face |  |
 |
| back |  |
 |
In the third weave is again different, since the wadding weft now takes an active role in the cloth formation. The warp satin weave on the face of the fabric is much more relaxed compared to the tight plain weave, which we have used so far. To make it stronger, we will use the wadding weft as the third weft thread on the face fabric, instead just two which we are using in the first (ground) weave. The calculation of the weave size goes as follows: face weave is satin 5 by 5, back weave is a plain weave 2 by 2; the least common multiple of 2 and 5 is 10; thread pattern repeat is 4 (3 up + 1 down) for warp and 4 (3up+1down) for weft; the repeat size of the complete double weave is 4 by 10 equals 40. The face and the back fabric are not tied together; the face warp is always on top of the back weft, and the face weft is always on top of the back warp.
| shaded integer view | simulation | |
|---|---|---|
| face |  |
 |
| back |  |
 |
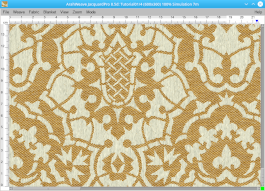
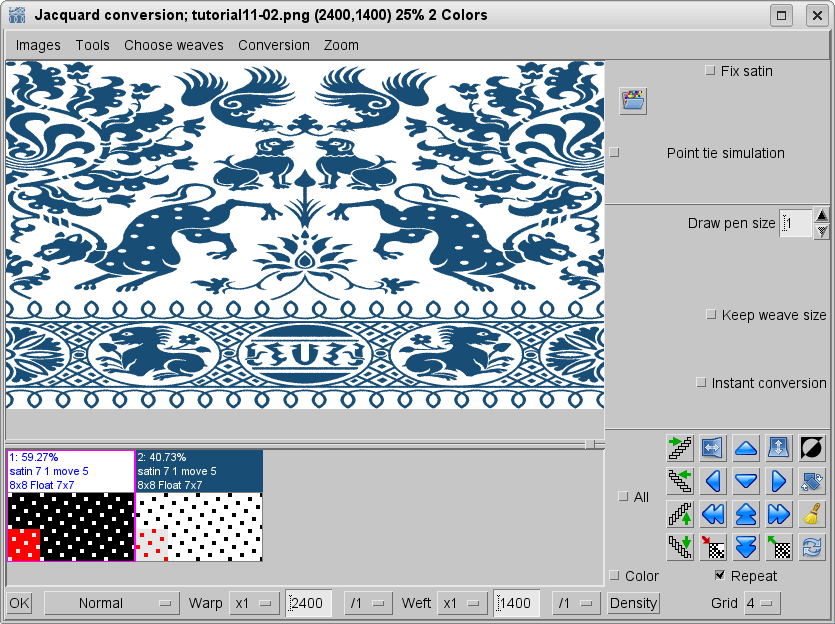
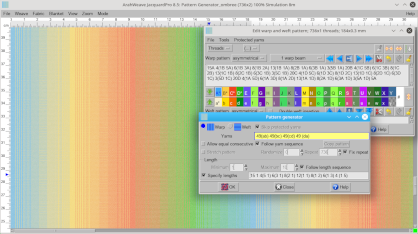
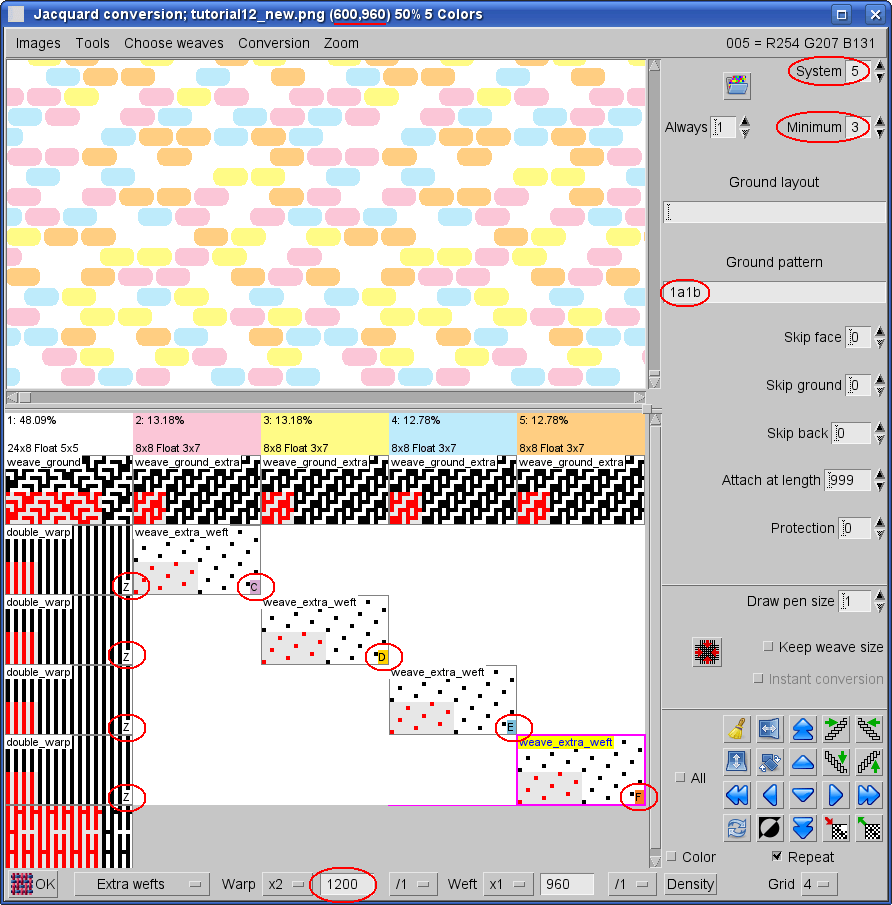
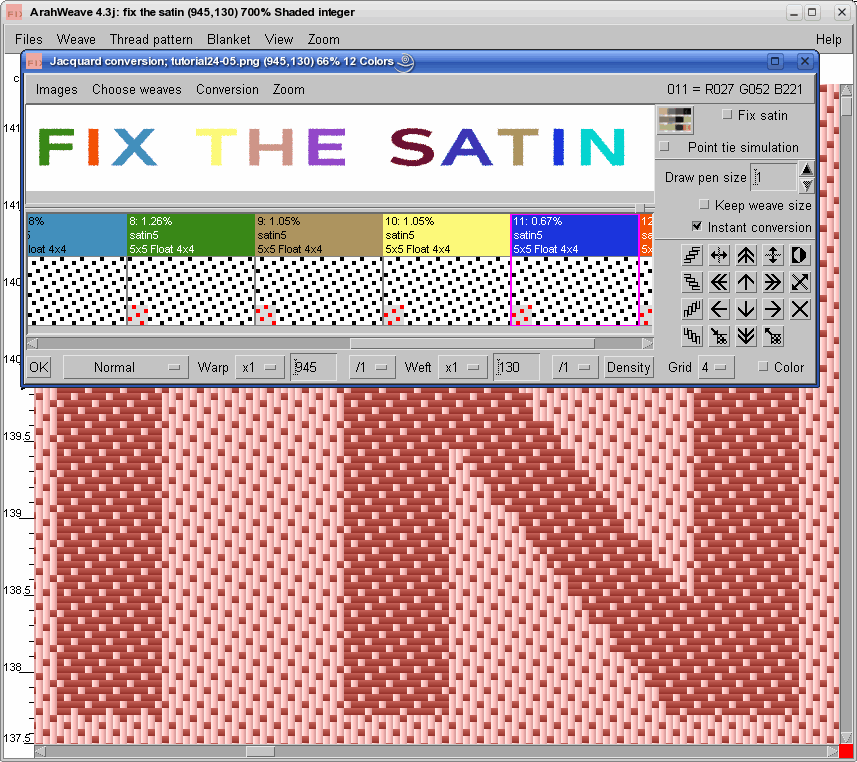
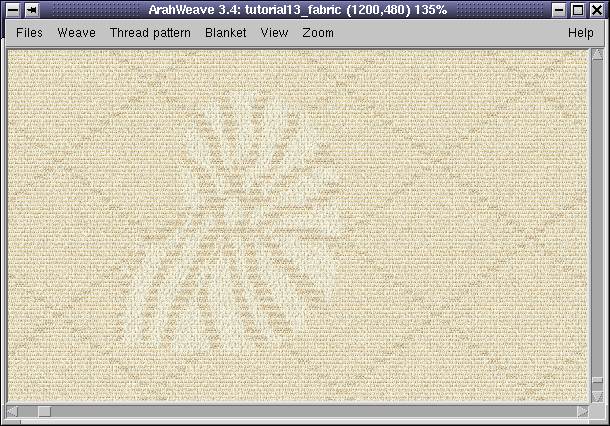
We have drawn all the weaves and we are ready to transform our image into a jacquard weave. Choose Weave > Jacquard conversion. Load the image in Jacquard conversion window using Images > Load image. The picture size is 300×120 pixels; it is displayed on window title, together with image filename, number of colors, and current zoom level. You need to to set the desired jacquard weave size according to number of warp (4) and weft (4) threads. Enter these new numbers at the bottom of the Jacquard conversion window for warp (4×300=1200) and for weft (4×120=480) or simply click on x4 for warp and x4 for weft. When you are drawing pictures for multi-layer fabrics, you should always draw smaller picture and then multiply the jacquard weave size by the weave system, since you will not lose anything on the fabric precision. But you will gain better weave junctions, less float errors, and you will not waste your time drawing details, which will not be visible in the final fabric.
Now you should load the proper weave for each color (white – ground weave, brick – stitching weave, ebony – satin) and press OK.
The program will replace colors with selected weaves and generate the jacquard weave.
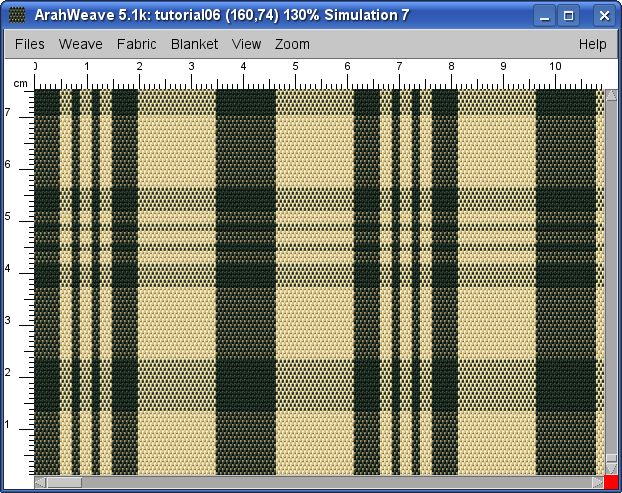
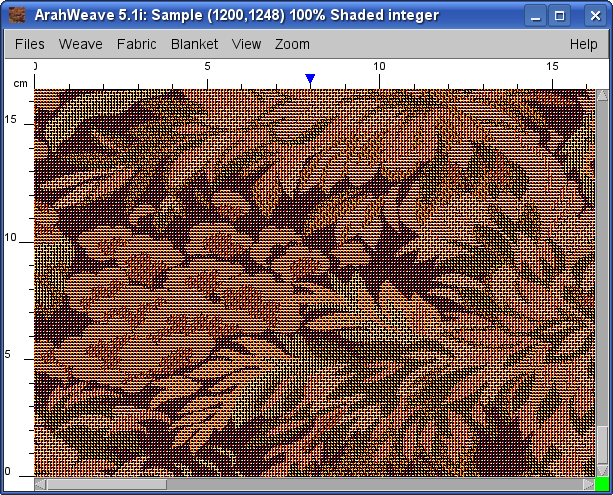
We have already explained in other tutorials how to make the simulation. Remember the three basic properties: density, yarns and colors.
In some cases, when weave choice and construction are good, we do not need to fix any long float errors. But you should make a habit of checking them every time.
To actually produce this fabric select Weave > Save cards for production; you have to insert the layout according to your jacquard and loom. Be sure to set the correct number of hooks and Weft bytes according to the specifications of your loom. Once you enter the layout, you can save it, so you will not need to enter it again next time. If you always use the same setup, you can also go to Files > Save defaults and your current loom layout will be loaded automatically the next time you start the program.