

![]()

TUTORIALS
Il tessuto tradizionale Thai, due orditi extra
In the previous tutorial, we have developed a Thai fabric with one extra warp across the whole fabric width. Actually, it was a fabric with two warp beams, where odd warps were on first warp beam, and even wefts were on second warp beam. This is necessary in weaving, since the warp threads (ends), which weave with a very different weave, also have very different warp consumption. In such cases, as you weave on, the differences in warp consumption begins to build up, and you are unable to weave, if you have all the threads on the same warp. The threads in first warp beam weave in plain weave, while the figuring threads in second warp beam weave with much longer floats, especially in the back, so they consume less yarn.
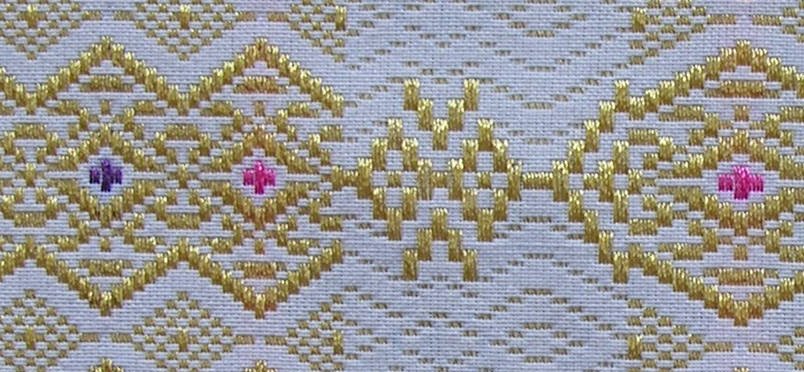
The second Thai fabric, which we will explain in this tutorial, has three warps: one is plain weave, second is figuring warp in gold, and the third one is extra warp in various colors. First warp can be prepared on one warp beam, and the other two warps can be together in the same warp beam, since their warp consumption is not so different.

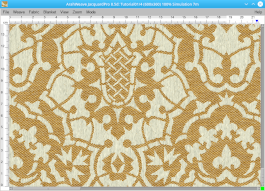
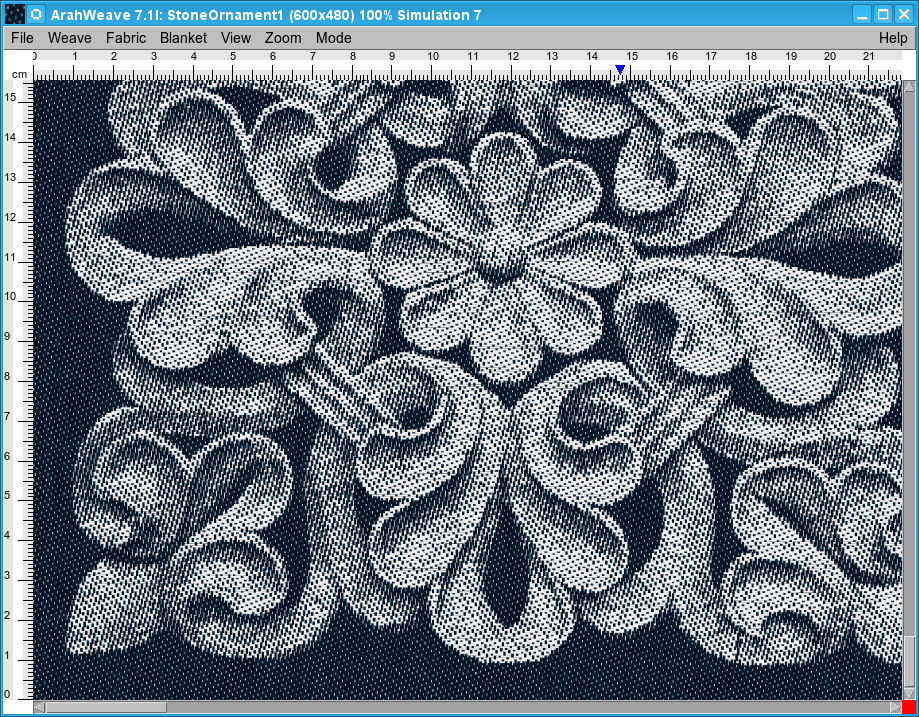
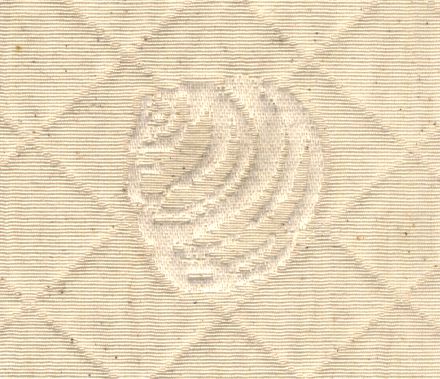
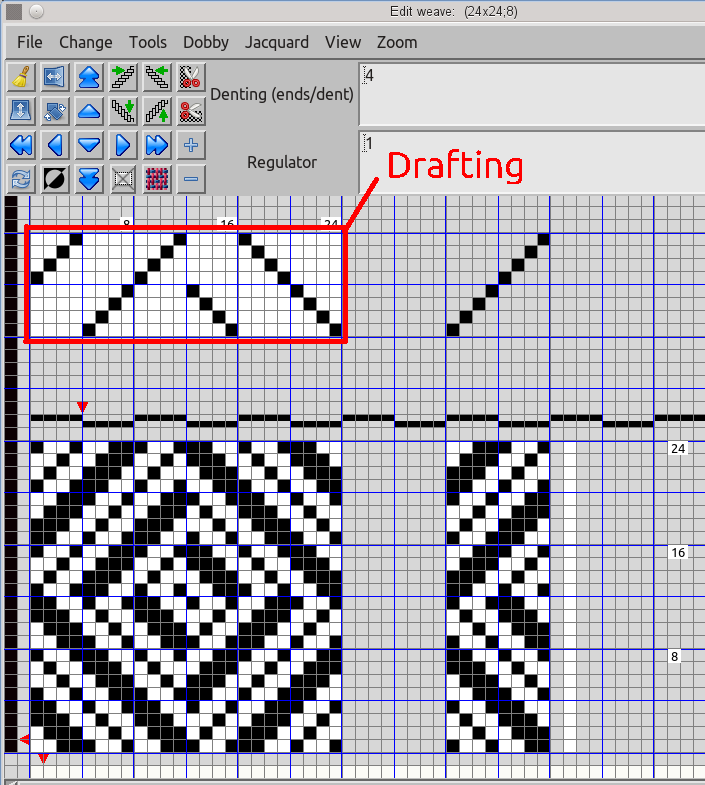
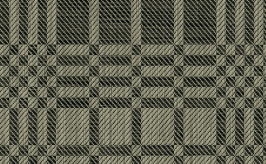
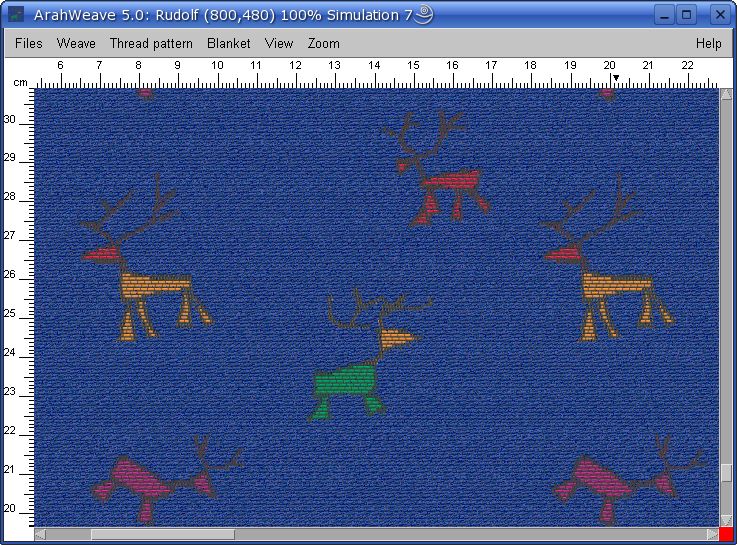
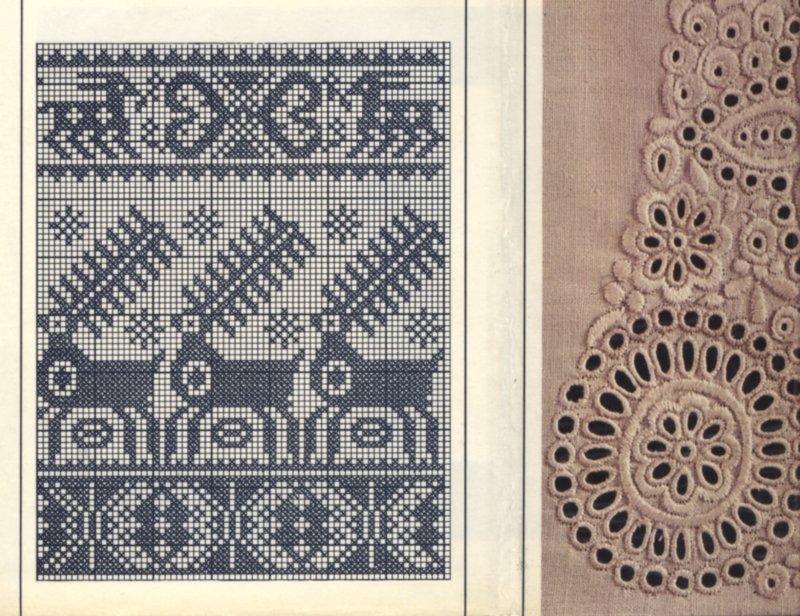
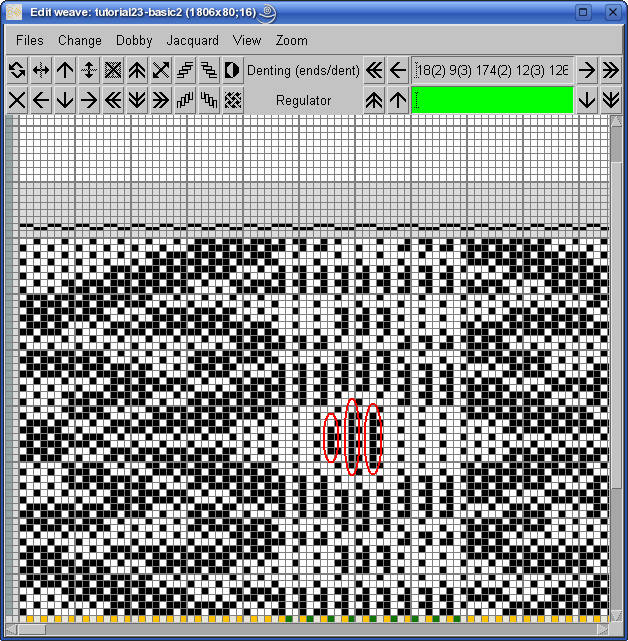
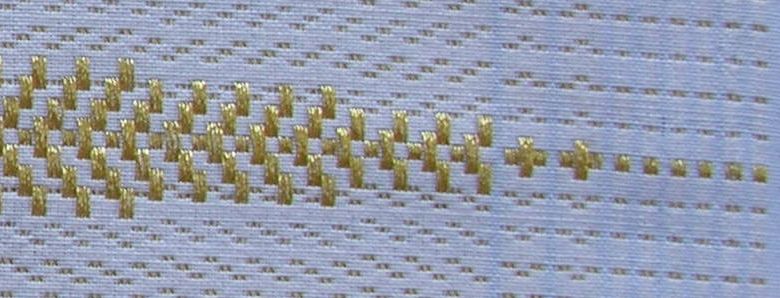
The fabric on the above picture is slightly rotated and wrinkled, so you will know that it is not an ArahWeave simulation 😉 A detailed look below will help you in understanding the fabric structure. The red rectangle in the previous picture indicates the position of the zoomed area on the next picture.
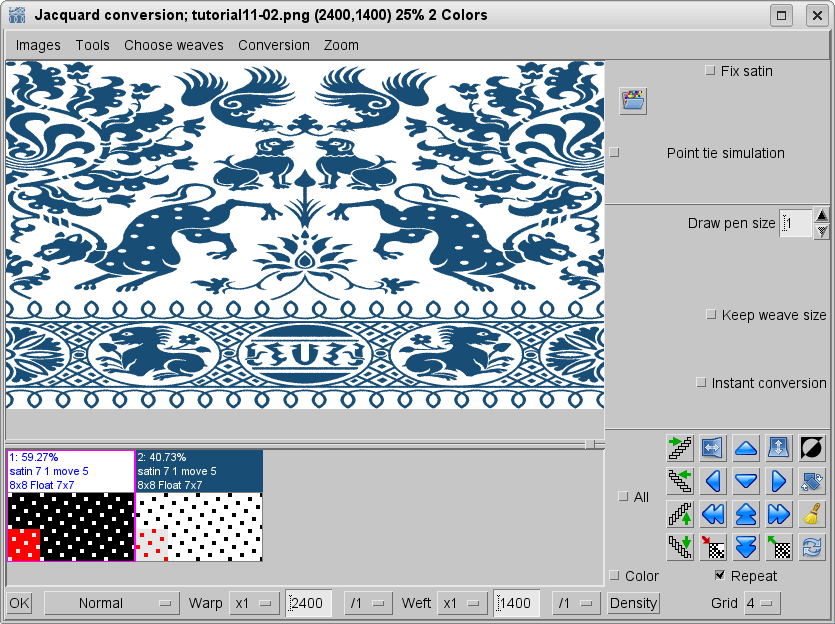
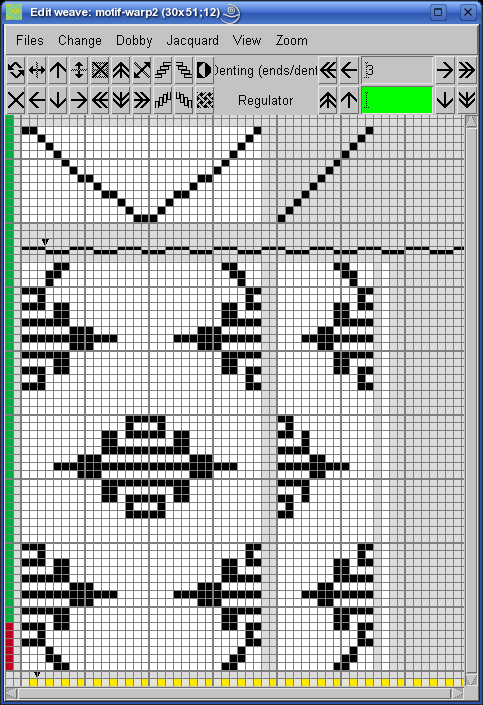
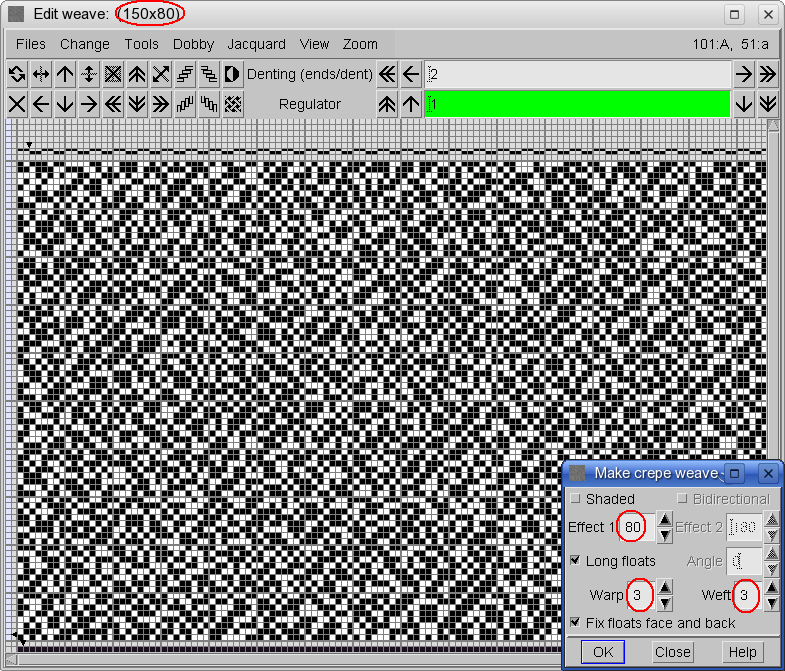
Open ArahWeave software for weaving. We again start with a base design, which actually depicts the pattern of second (gold) warp. The easiest way to draw it is to use ArahWeave‘s weave editor. You can first draw the dobby card, since this gives you total control over the number of shafts, and then make a weave by drawing the drafting.
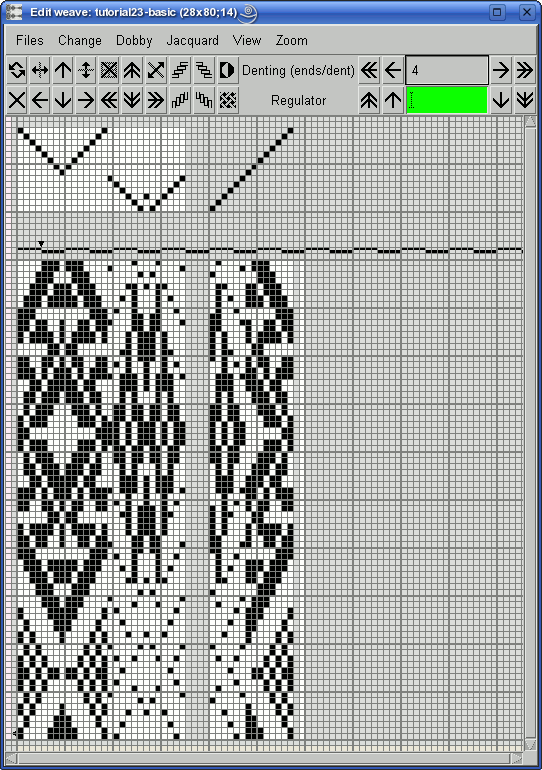
Then you can extend the design by drawing the drafting, using only 14 shafts and your imagination.
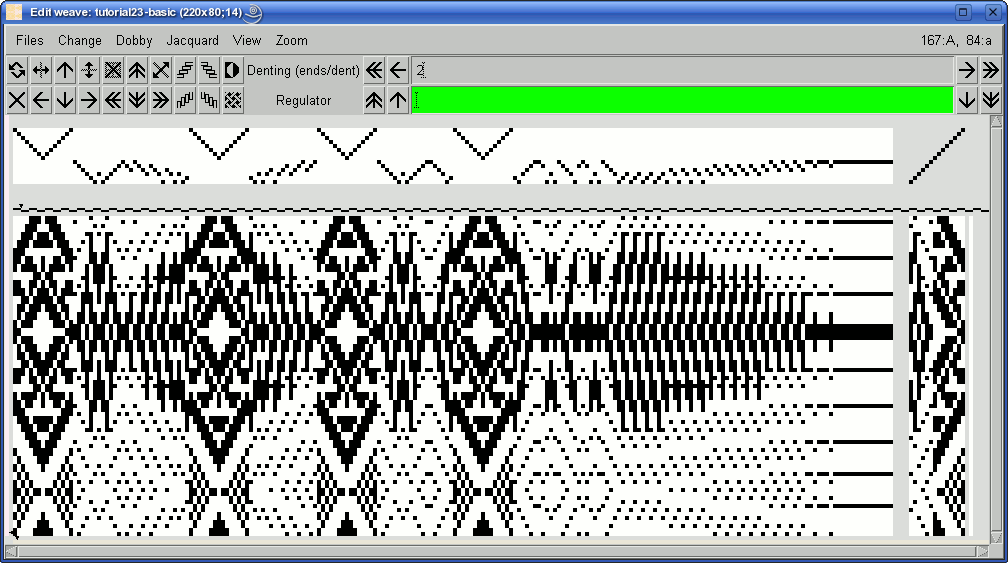
In this kind of fabric, three or four warp threads usually weave in the same way, so that we can get a bigger repeat without increasing the number of shafts. In this example, we need to multiply warp points by three in some areas of design, and multiply by four in other areas.
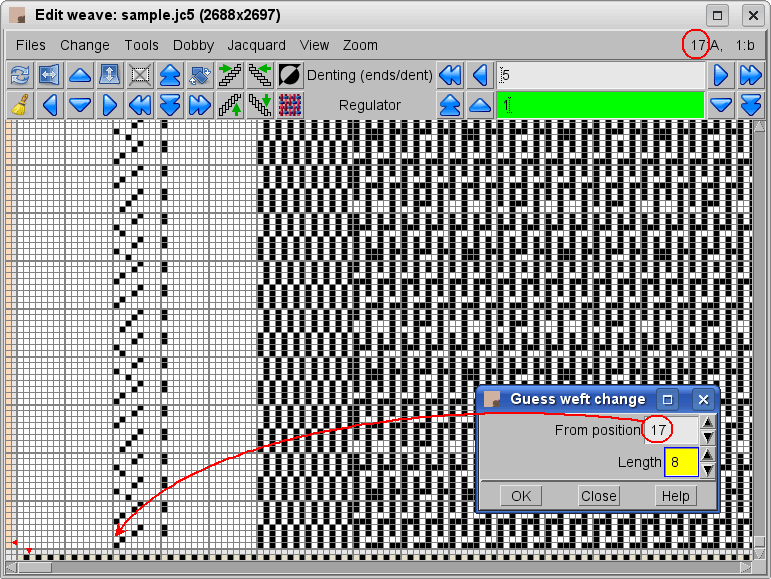
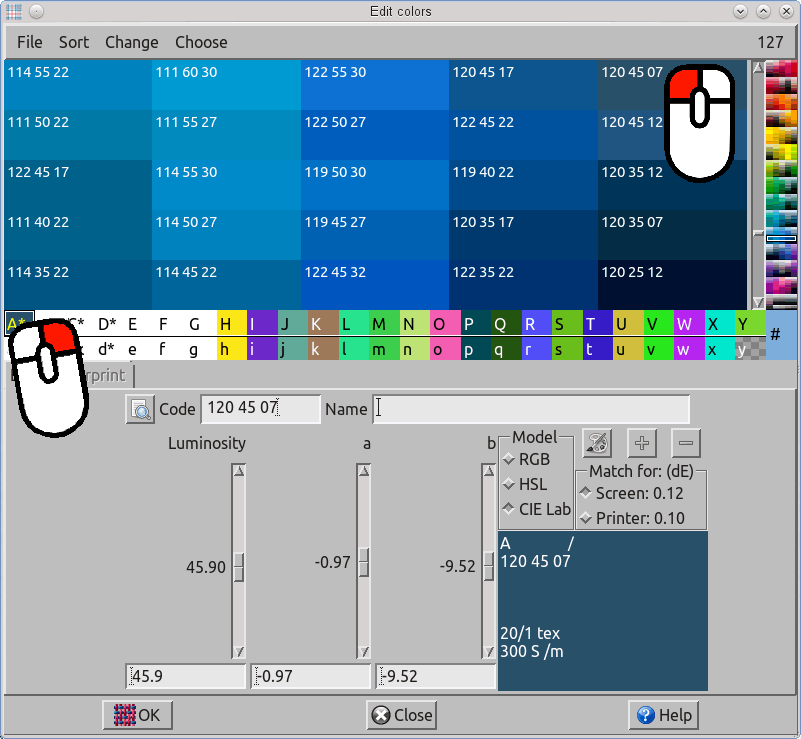
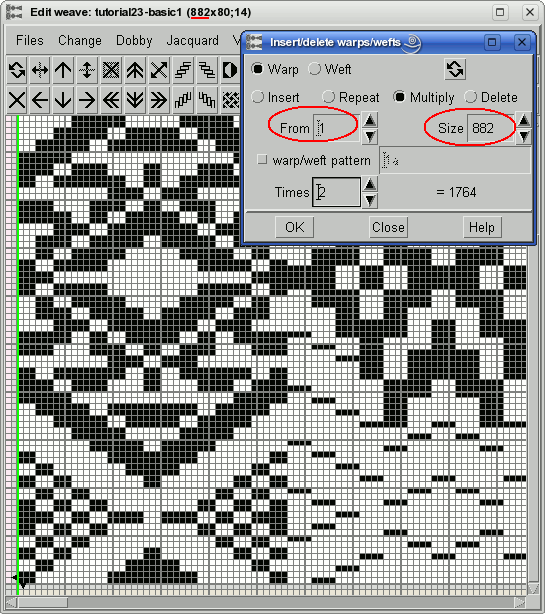
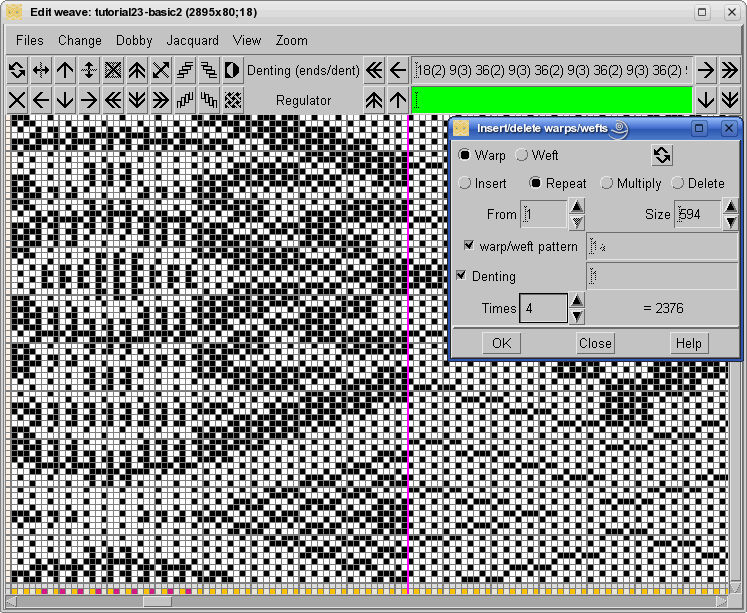
To multiply weave points, choose Change > Insert/delete warp/wefts… in the Edit weave window. You need to choose directions of multiplying (warp or weft), and select the area at which you want to multiply the points. You can do it by middle mouse button in the weave editor, or parametrically, by entering the starting point and the size of selection. The two lines in magenta colors indicate the selected area. As you change the starting point or the size, magenta lines also change the position. Finally, enter the multiplying factor (Times), and the program calculates the new size.
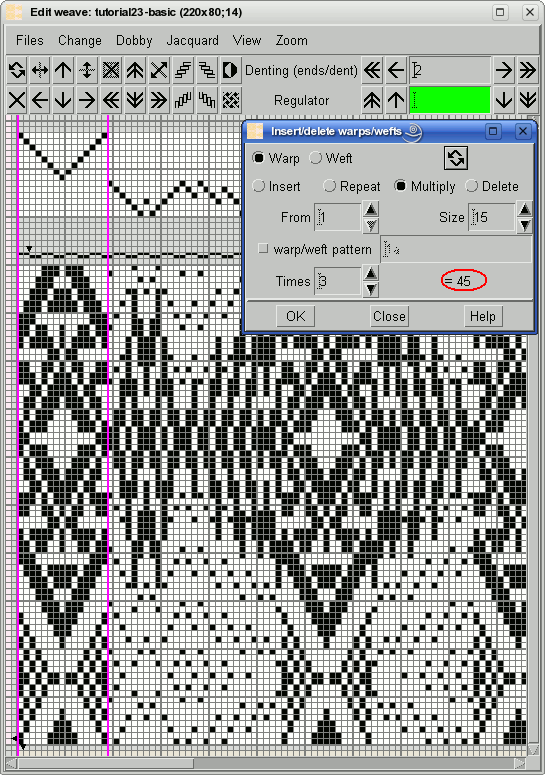
Click the OK button, and the weaving software will resize the whole weave by the number of multiplying points. You can still go back, if you click the Undo/Redo icon in this window.

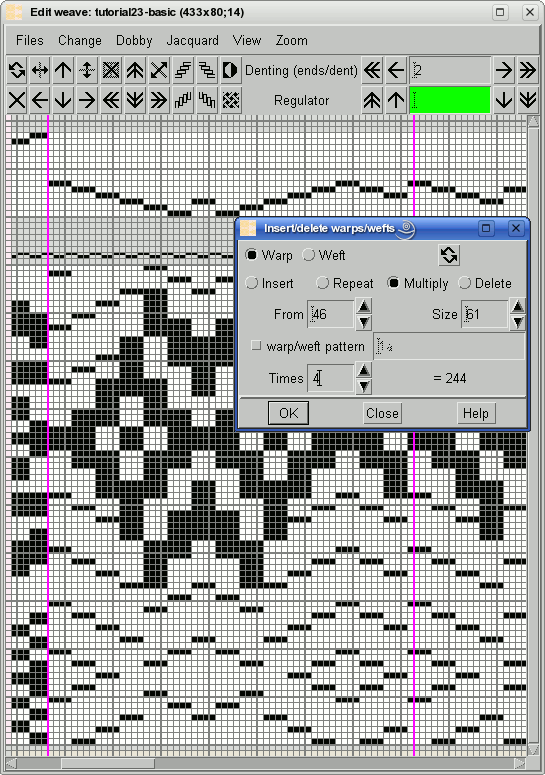
Now we continue with the next area, which needs multiplying, this time by four.

After clicking OK, you are one step closer to the big basic weave.
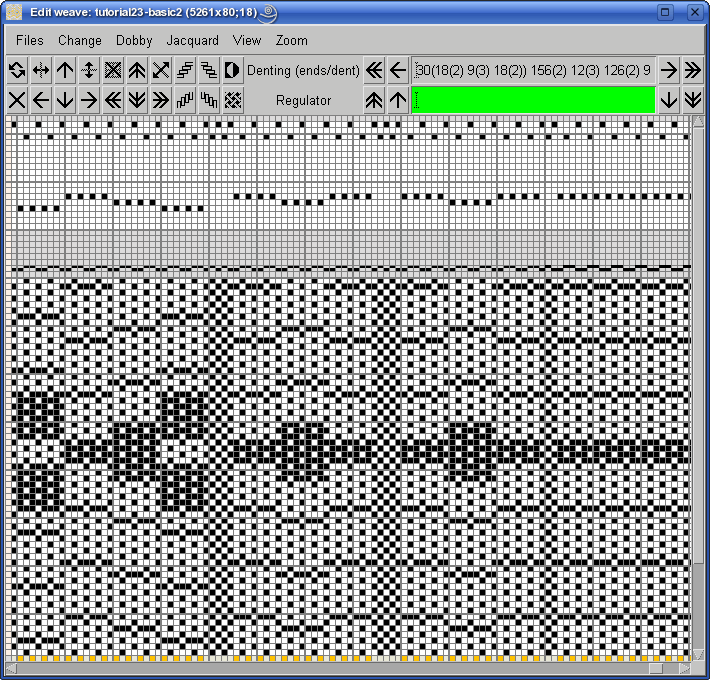
On the far right of design, we have another long section, where we need to multiply the points by four. The exact parameters are visible on the next picture.
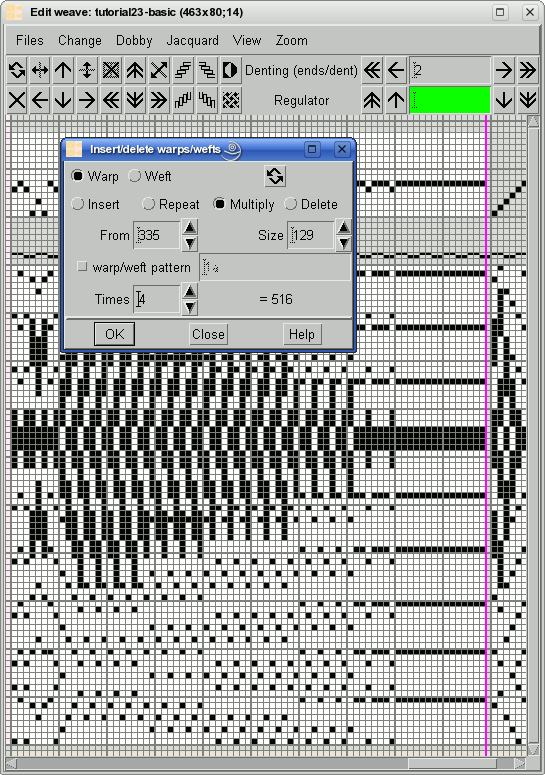
Now we have the whole golden warp part of design. Later in the process we need to repeat the first part of the design 30 times, and the middle part 7 times, as the image indicates. We will not do this just yet, since we need to insert the third warp in those areas.

We have to construct a double weave from plain weave and golden warp motif. We will use a shortcut to insert a motif weave into double weave editor without saving it, and without any calculation of double weave size.
Once again the weave editor’s power function Insert/delete warp/wefts comes to the rescue. Multiply the whole weave by two, From 1, while Size is 882, as you can see size in the title of the weave editor.
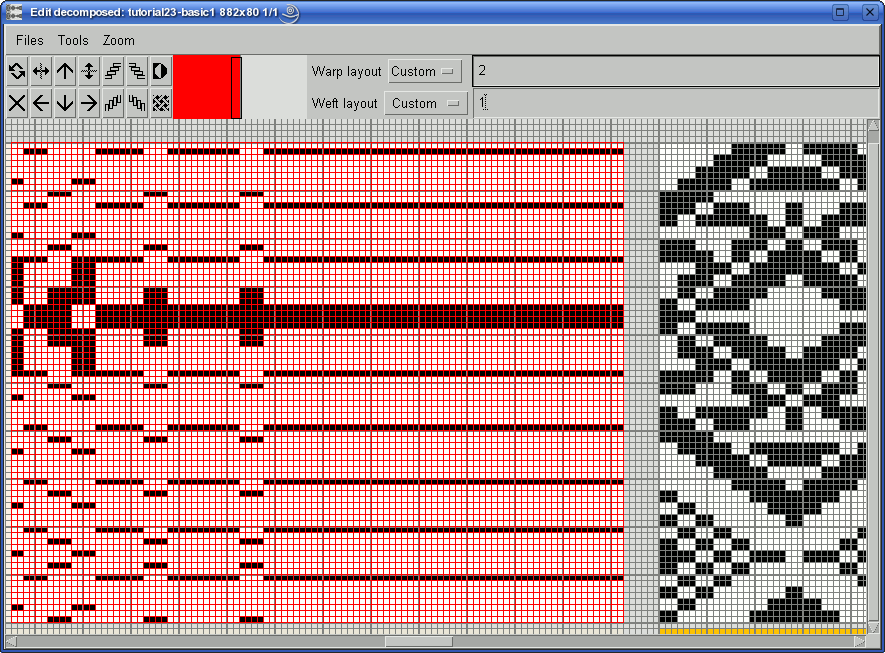
After clicking OK in the Insert/delete warp/wefts window, chose Change > Edit decomposed. Enter warp layout: 2, since we have one ground and one extra warp. The weave is divided into two identical weaves. We need to delete the content of first part of the weave; select it with mouse click, and click on ![]() in the Edit decomposed window.
in the Edit decomposed window.
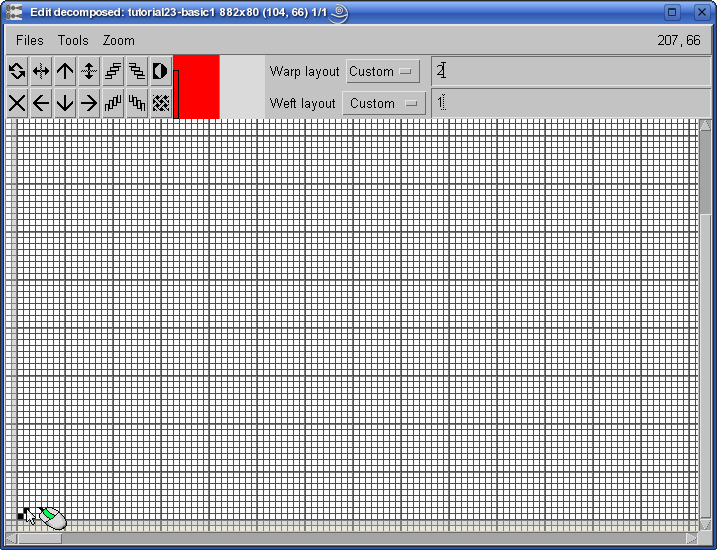
Then load or draw the plain weave into the empty weave. It is easy to draw weaves with a small repeat in the Edit decomposed window – to make the plain weave, just draw two points in the lower left corner, and click with the middle mouse button on the last point of the repeat (at the mouse position: 2,2).
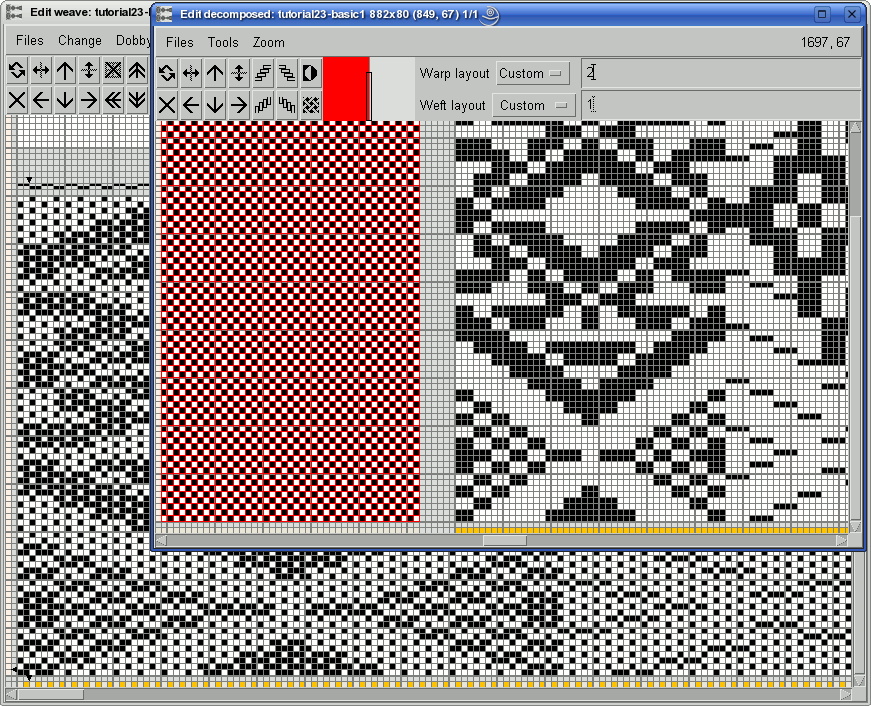
The weaving software extends the weave to the whole area – in our case to 882×80. Next picture shows the resulting weave. Decomposed editor is on the top, and normal weave editor is in the background, and they both show the same weave in two different ways:
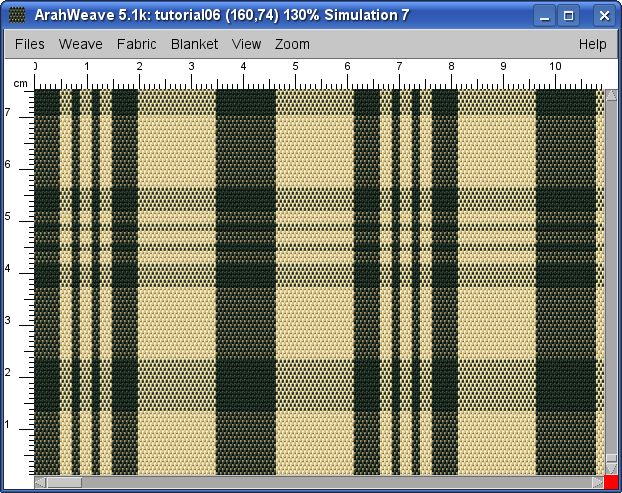
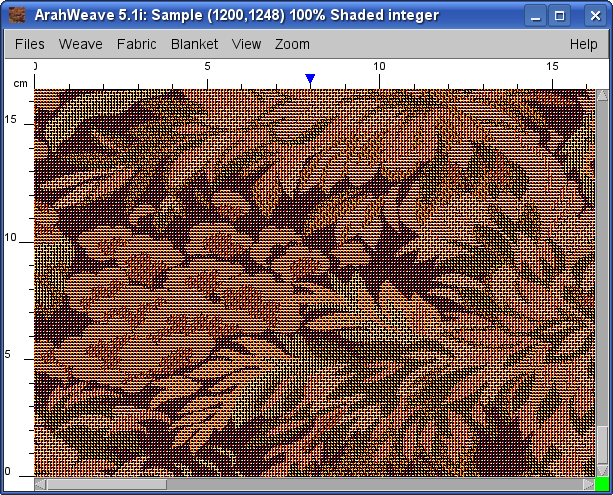
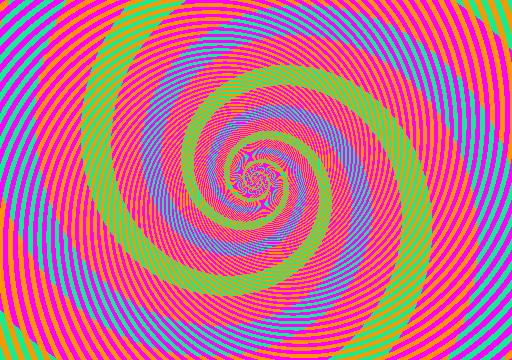
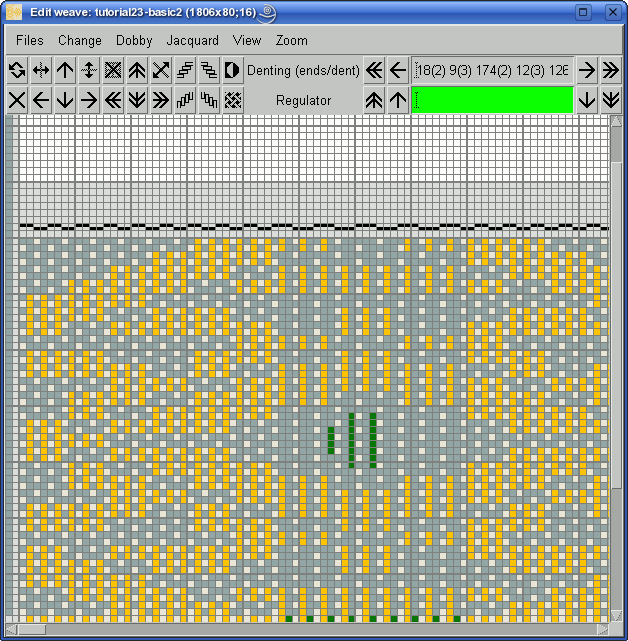
Next image shows fabric simulation of the current design. Up to now, this fabric is not too different from the fabric explained in the previous tutorial. But now the real fun begins. Arrows show the position of the third extra warp, which we still need to insert. This is more tricky, since these warps will only be present in certain areas, not across the full fabric width.

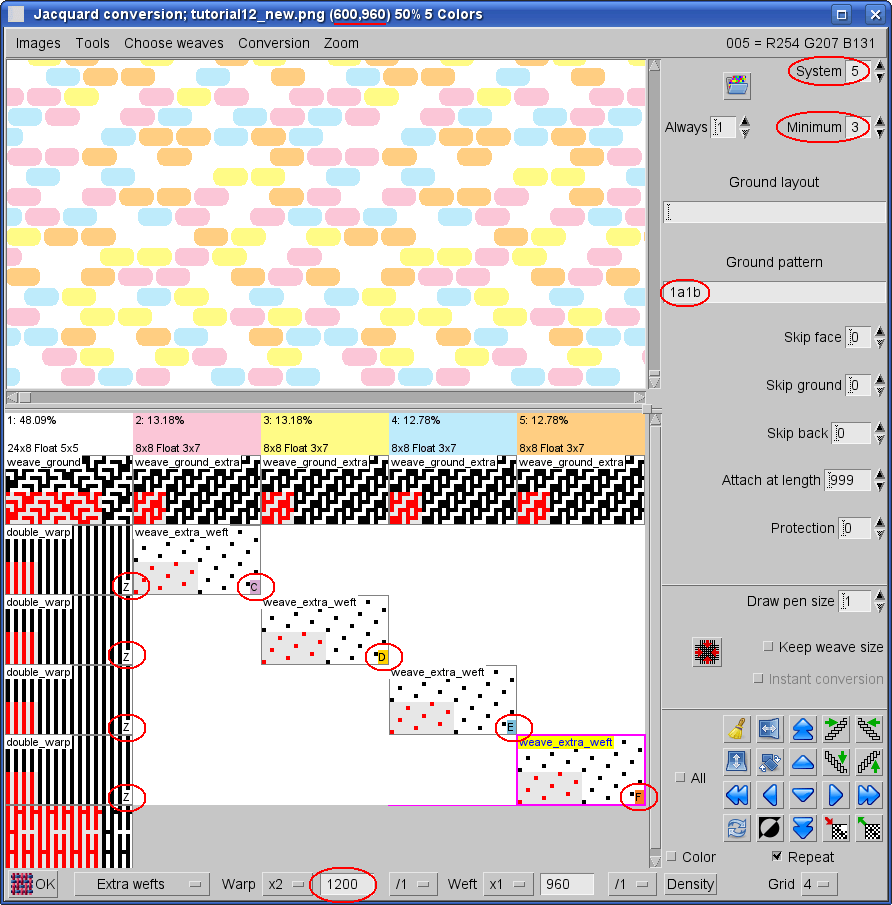
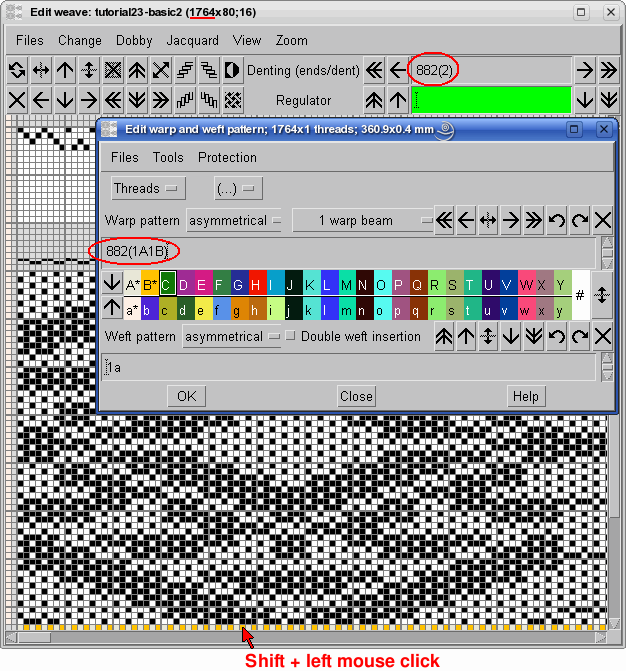
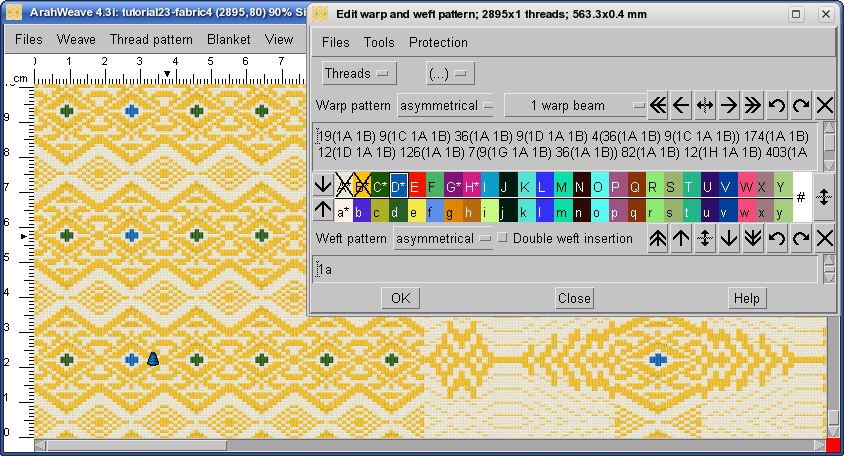
Before inserting threads, we need to take care of a few details: denting should have the same repeat size as the weave in warp direction. So instead simple denting of 2, we must modify the denting field into 882(2), which means 882 dents with 2 threads per dent, so that the total repeat has 1764 threads. We have a similar situation with warp pattern: instead 1 repeat of 1A1B, the pattern should be 882(1A1B). We had to make these two modifications to correct all the repeats (weave, denting, warp pattern), so that the program can fix everything as we insert the threads.
Then select a yarn in the warp threads bar from the Edit warp and weft pattern window (the green thread with letter C). We will use thread insert mode, which makes space for the selected thread in a weave, extend the denting, and insert the thread into the warp pattern. ArahWeave enables you to make all three modifications with one operation: Shift + left mouse click on the space in the thread pattern (warp or weft) bar in the weave editor.
After clicking, you get an extra green thread in the thread pattern, space in the weave editor, and extended dent (3 threads per dent instead of 2).
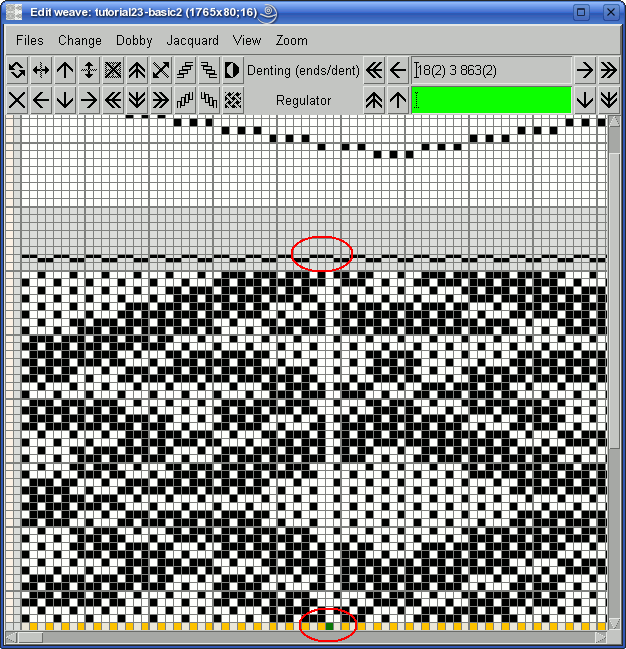
Now just proceed with the thread insertion: we need 9 additional threads in that area.
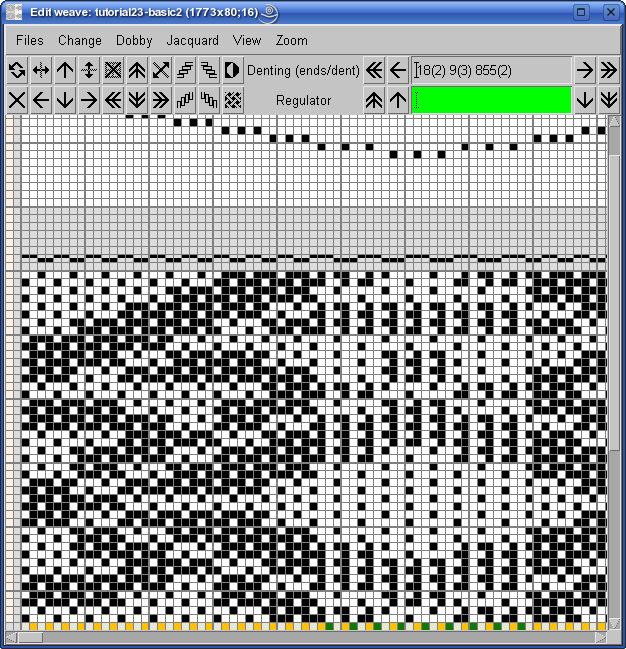
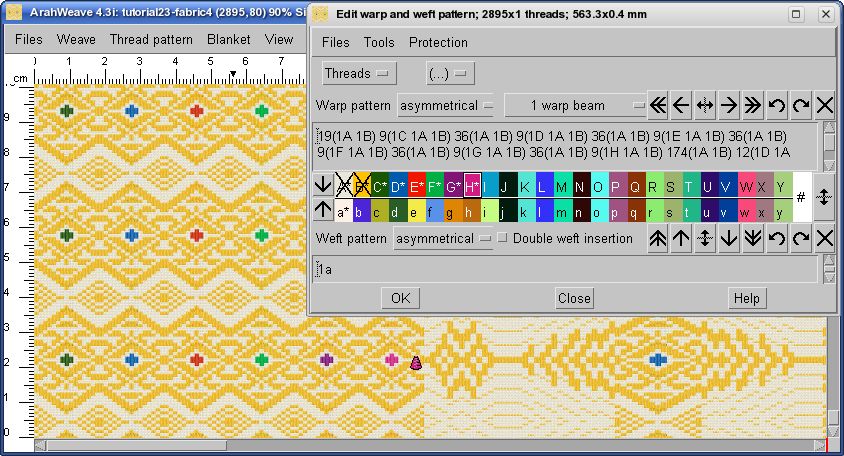
We must add extra warp in four different areas within the fabric. Use a different yarn color for each area, so that you will better distinguish the areas.
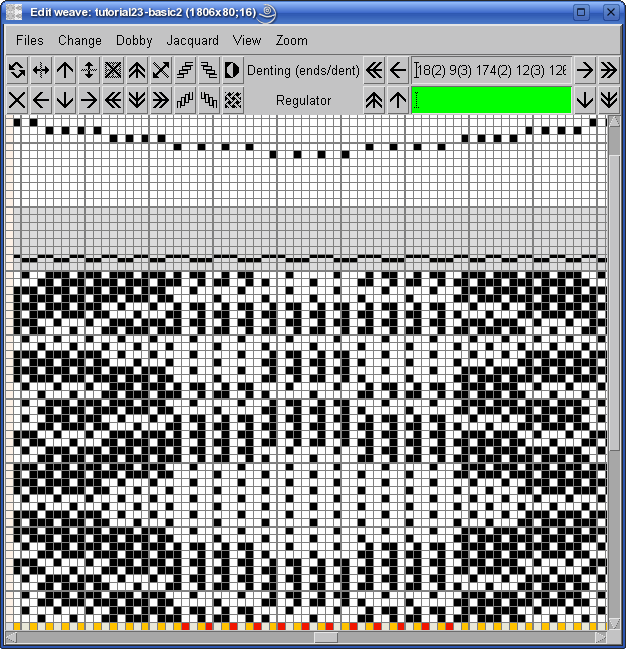
Since the inserted threads are all in weft effect (white), we need to invert the weave (change black points to white points) in order to see the inserted threads in the fabric simulation.

The above simulation is just to help you understand what is going on. If you really did invert the weave, now invert it back to get to the original situation.
Now we have to draw weave points (stitching) for extra warps, which we have inserted.
Sometimes it is easier to draw the weave in the color mode, enable it in View > Yarn colors. We will draw just a few points in the weave editor, and finish the work in the decomposed editor, since it will be faster.
You should finish drawing the extra warp weave in the following manner:

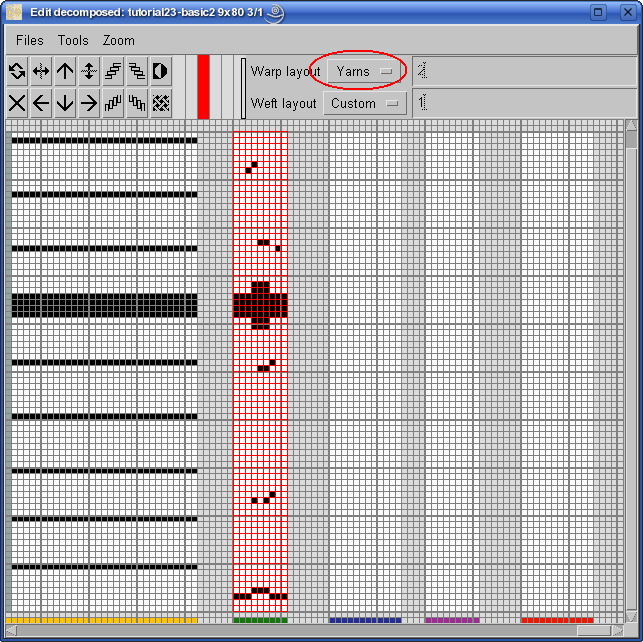
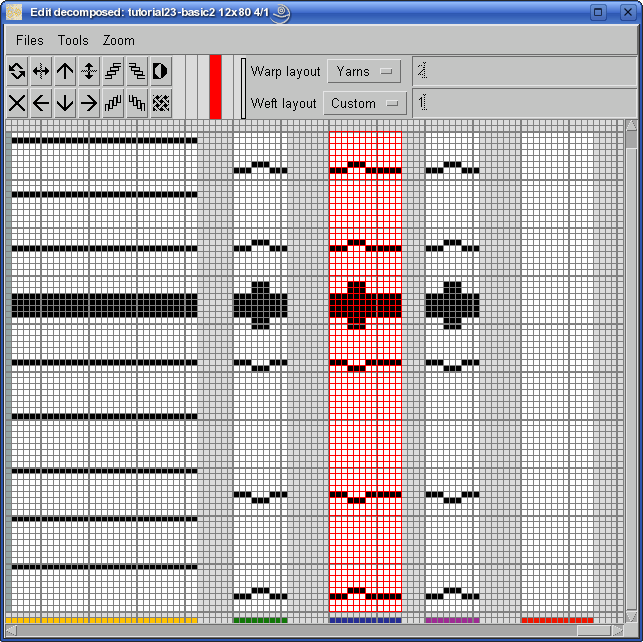
Now select Change > Edit decomposed from a menu in the weave editor. In the newly opened window, change the type of Warp layout into Yarns. Weave will be divided into 6 areas, one for each used yarn. All the yarns of the same color are grouped into the same block.
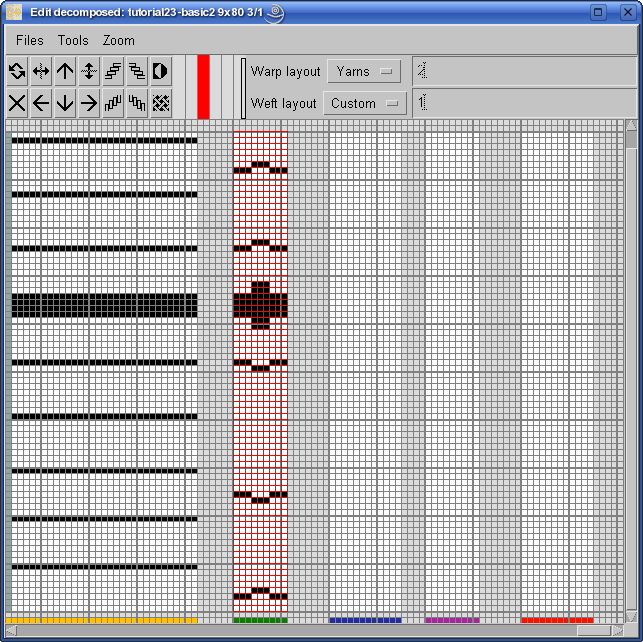
Since the weave is equal for all the extra warp colors (we will use just 2 shafts for them), you can copy the green warp weave into the blue warp area. To copy a weave, click with the right mouse button into the area, into which you want to copy the selected weave.
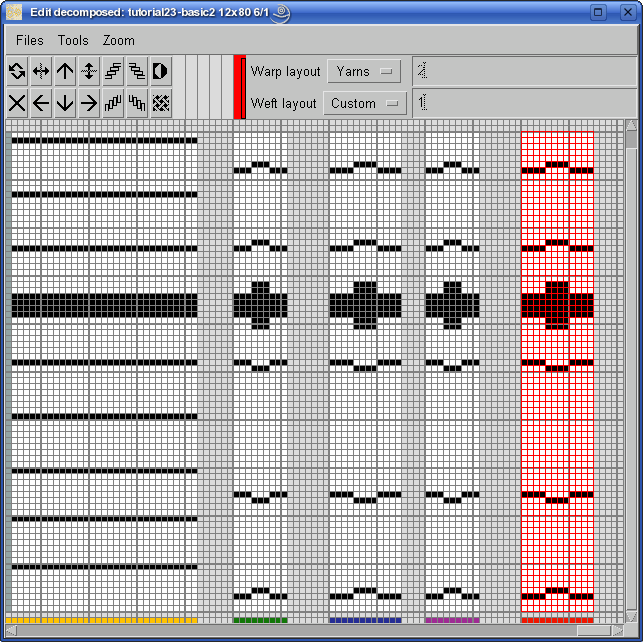
You can also copy it to the blue extra warp, which has 12 threads. It does not fit, but we have a good starting point for manual correction.
Now correct the weave in the blue area and copy it to the red warp area.
Authors of this tutorial are afraid that you are confused. Where are we? Why are we doing this? Not to worry. The following picture shows the current design stage. We have finished drawing the weave, now we have to repeat the first part six times, and the middle part seven times.

You may think that this tutorial is all about the Insert/delete warps/wefts tool. Not far from the truth. As a matter of fact, we needed to enhance this tool, so that such a fabric would be easier to develop.
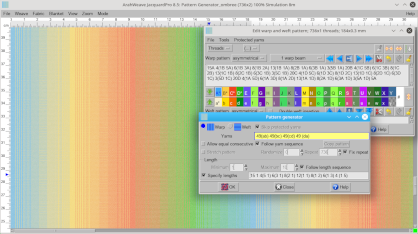
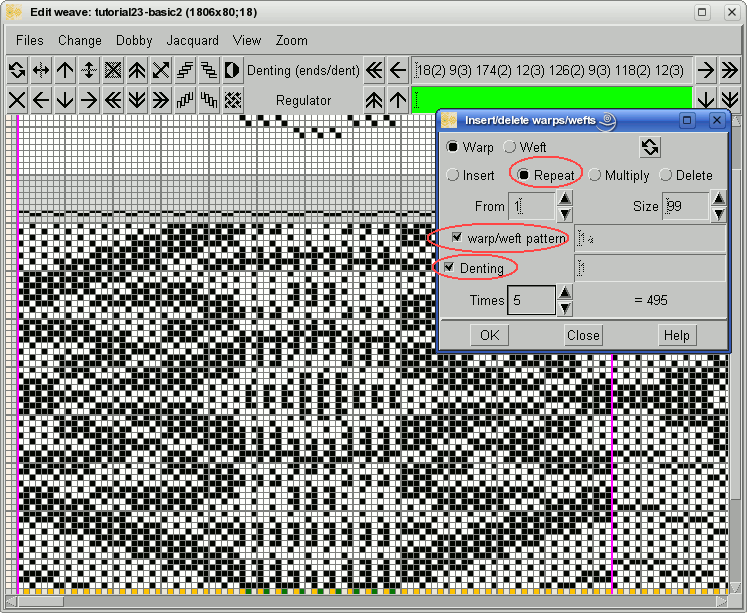
Therefore you should again choose Change > Insert/delete warp/wefts…. Select the Repeat mode, check Warp/weft pattern and Denting, so that both warp pattern and denting pattern will be repeated. Define the area you want to repeat, either parametric in the From and Sizefields, or click middle mouse button, and drag the mouse to select the area. Type the number of repeats in the Times field. If you want to have 6 repeats of the section, you should set Times to 5, since the program will add 5 repeats to existing one. So all together you will get six repeats.
Repeat procedure in the middle part. Here you need 6 additional repeats.

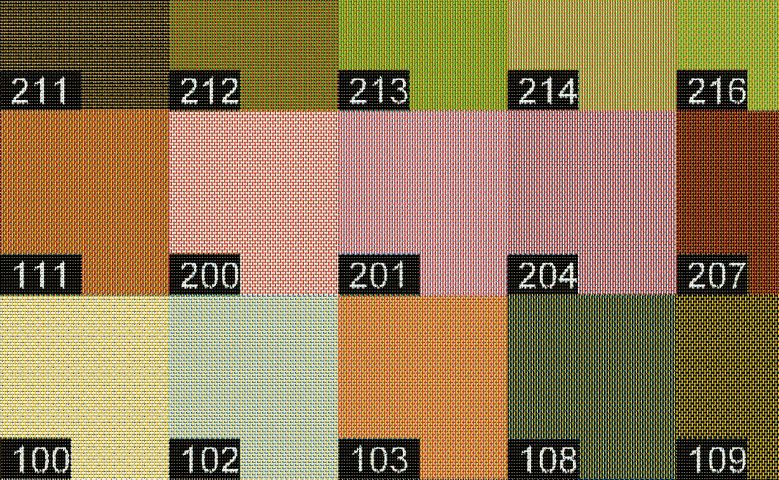
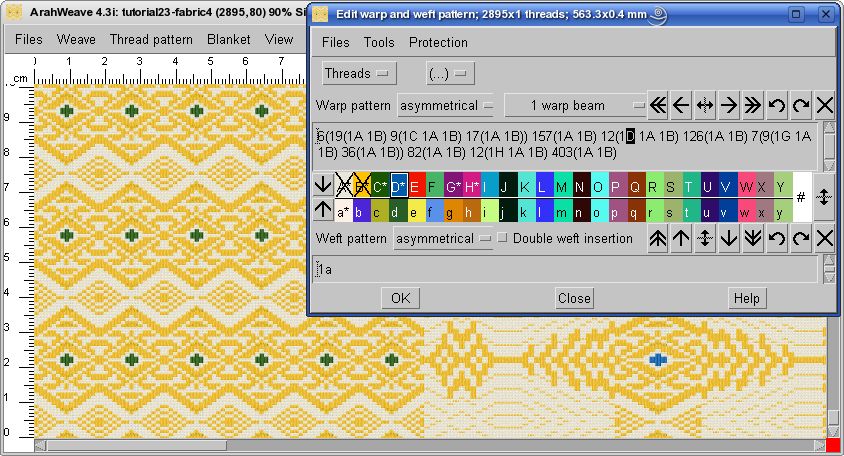
Now things are finally taking shape. Next picture shows the current stage of the fabric. We have to replace the green and magenta threads, which we got by multiplication, with the colored threads in sequence equal to the original fabric (see the beginning of the tutorial).

We will recolor the yarns by drawing with mouse. ArahWeave‘s protected yarns will be of great help here. Make white and yellow yarn protected by double mouse click (the yarn color letter will be crossed out), and select the blue yarn drawing color (letter D in the image).
The shape of the pointer changes to the cone ![]() . Now click, hold, and drag the mouse over the green yarns. Since the white and yellow warp threads (ends) are protected, they won’t be modified. You can freely draw with the mouse over the fabric simulation, without worrying of making any damage to the fabric.
. Now click, hold, and drag the mouse over the green yarns. Since the white and yellow warp threads (ends) are protected, they won’t be modified. You can freely draw with the mouse over the fabric simulation, without worrying of making any damage to the fabric.
Then select another yarn color, for example green, draw it in the fabric, and so on.
Now go to the second repeated section, and replace the magenta threads.
Now we have to repeat first part of design …

… using Insert/delete warps/wefts.
The design is almost finished.

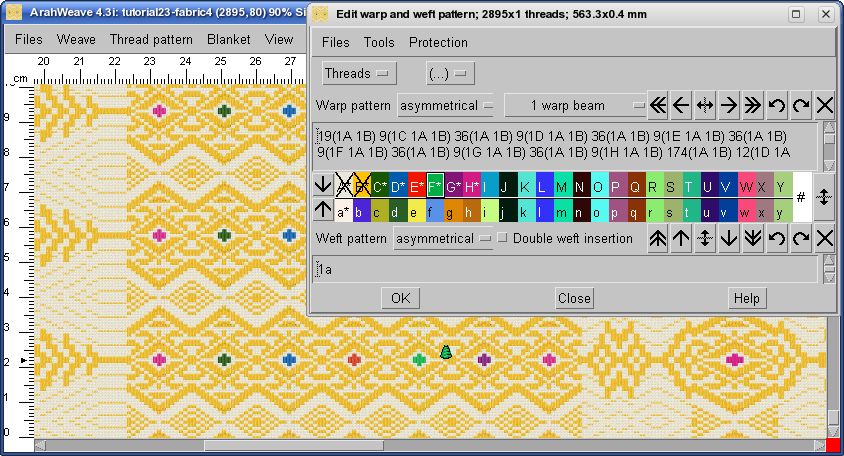
But the original fabric has an additional twist. As the great philosopher said: “The devil is in the details.” A closer examination of the photography of the fabric’s edge proves that there are also areas without the yellow warp. The fun is not over yet.
Once again we will use mouse, but this time to eliminate the unnecessary threads. Use Shift + right mouse click on the yarn in the warp pattern strip below in the weave editor. The weaving software will remove the thread from the dent, weave, and warp pattern, all at once. Correcting each of them individually would be quite difficult, at this stage of pattern complexity.
After removing some of the yellow threads, the right hand side of the weave looks like this:
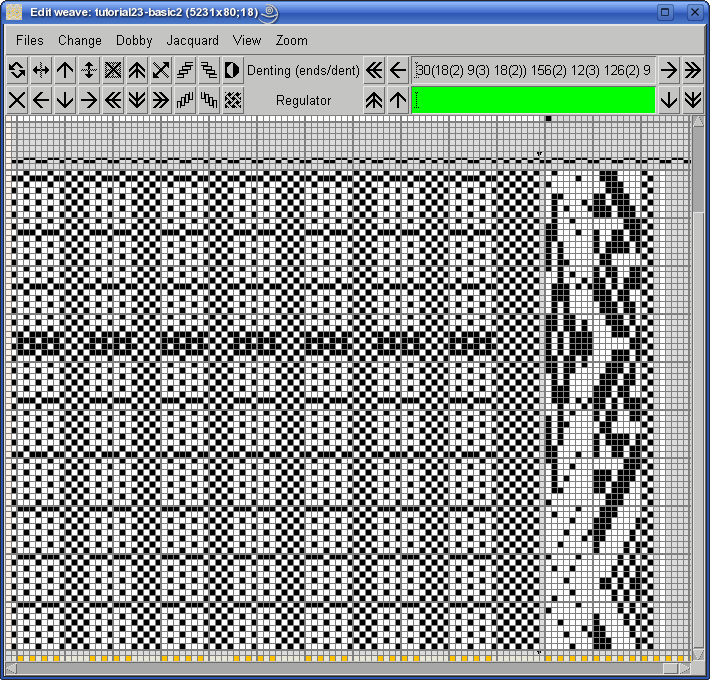
On the complete right, you also see the final dobby card, just 18 shafts and 80 wefts.
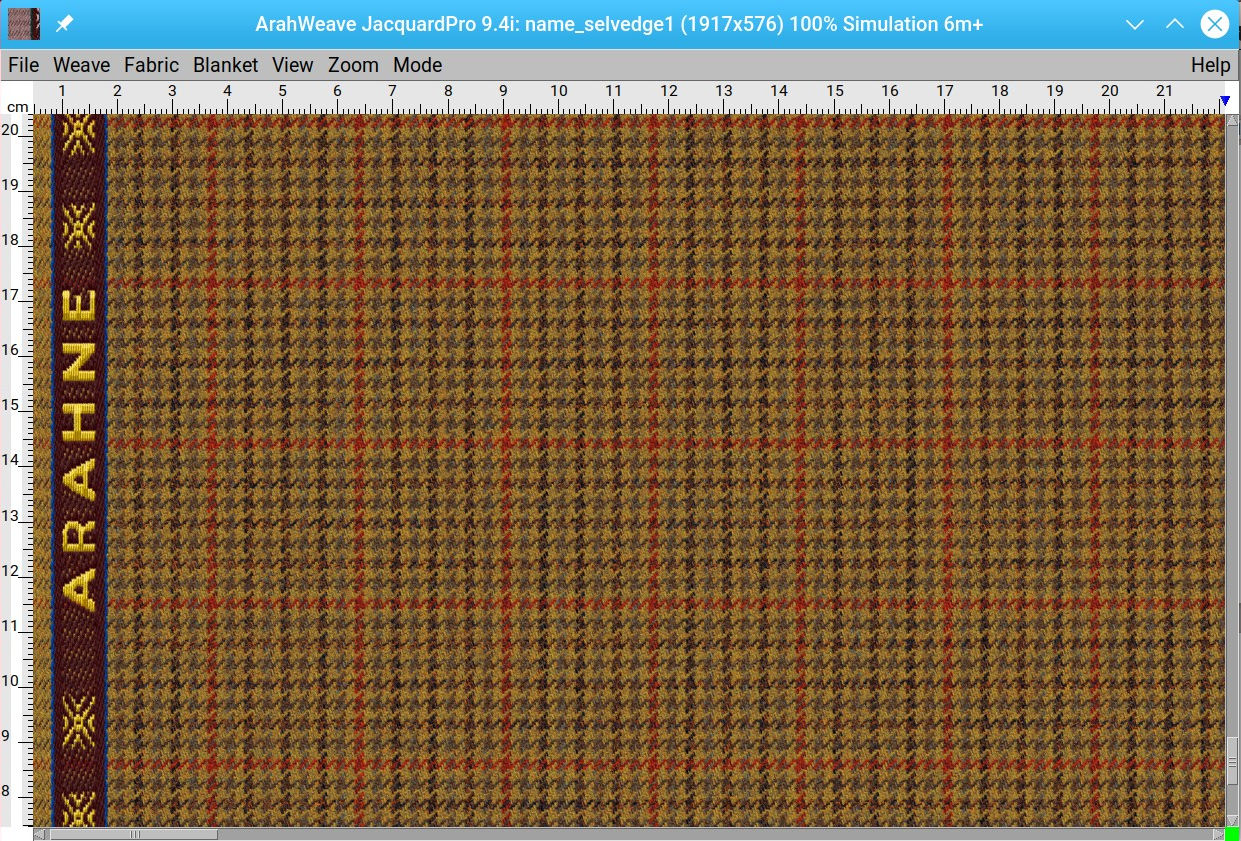
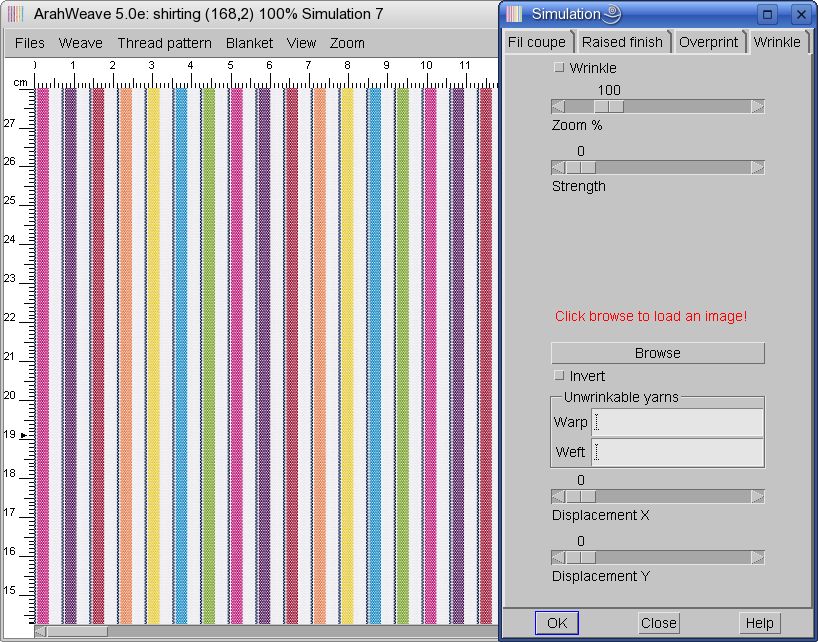
Here is the fabric simulation zoomed out at 20% (5 times smaller than real size).

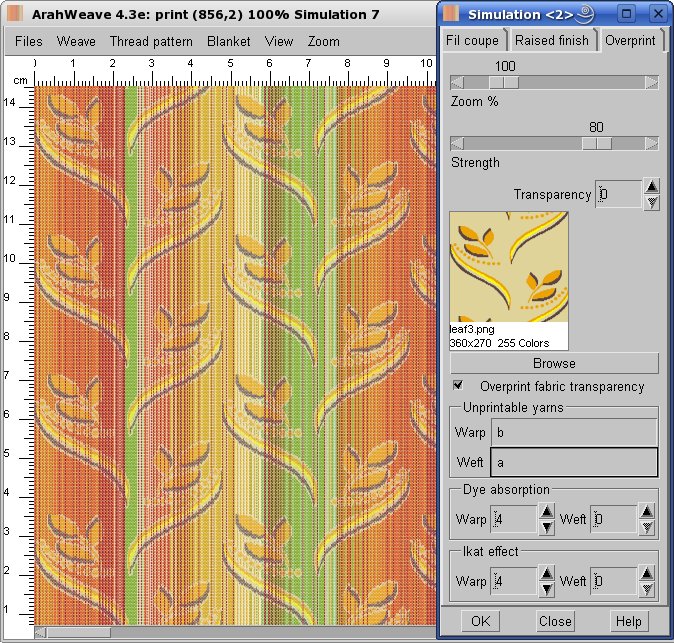
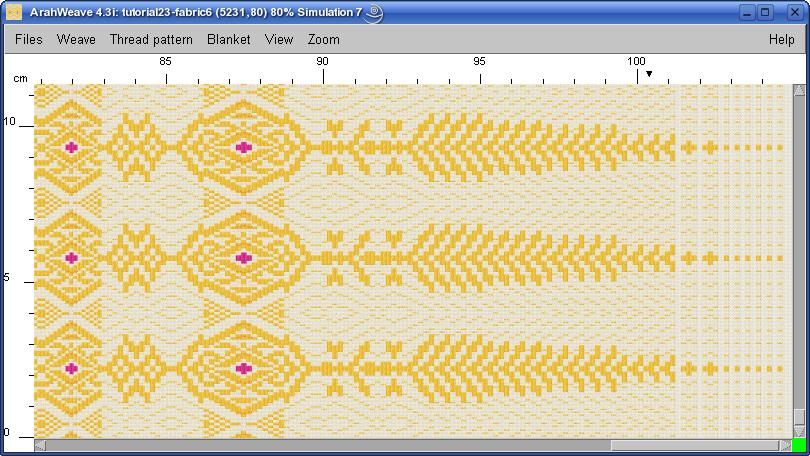
Next picture shows the fabric simulation at 80% zoom level.
We will not even attempt to show the complete weave in this case, since it is too big even with compression of the repeating areas. Anyway, only the dobby card shown above is needed for weaving. The other two pieces of informations to pass the design into production are warp pattern and denting pattern. We leave these two as an exercise to the reader 😉 If you just repeat the above steps using ArahWeave, you will find them in the appropriate fields of the program, or on the printout of the fabric production data as HTML. Note that you need at least ArahWeave Personal Edition to actually save such a fabric. The demo version will allow you to make all these operations, but you will not be able to save all the data about the fabric, since WIF fabric format, used by the demo version, does not support denting. It is time to buy ArahWeave, if you are serious about weaving.
This fabric was initially developed without a CAD, we have just shown how to make it in ArahWeave software for weaving. Once again, we must admire Thai ingenuity!
And finally, we wish to thank Mr. Weera Schwaleemapron, president of the Thai Weaving Industry Association, who gave us the fabric, so we could do this exercise in the first place.