

![]()

TUTORIALS
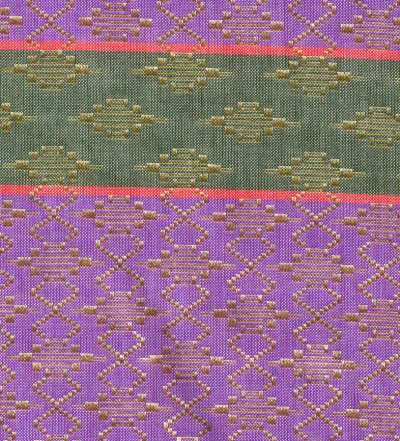
Il tessuto tradizionale Thai, un ordito extra
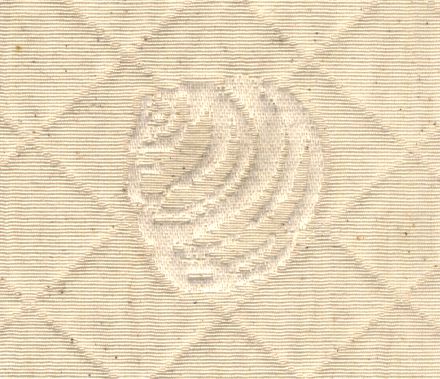
Buyers who know something about fabrics, know that dobby fabrics are simple, while jacquards are complicated, and require costly machinery to manufacture. So they can accept a higher price of a jacquard fabric. But sometimes we can trick the “experts”. We will make a jacquard-like fabric on a dobby loom with ArahWeave software for weaving. One way of making such fabrics in ArahWeave is explained in creation of the traditional Thai fabric, depicted below (detail). Such techniques are often employed in traditional weaving, where human ingenuity is used to exceed limits of technology.
When we design this kind of fabrics for the dobby loom, we must all the time think about the total number of shafts. We can develop complicated design using operations, which do not increase the number of shafts.
This fabric has two warps, one is plain weave, and the other is figuring warp in gold. The pattern of figuring warp, controlled by the weave, is quite complex. We also have a long, but not complicated weft pattern.
To simplify the construction of this fabric, we will first make two separate fabrics, and then later join them into the final fabric. First fabric will contain the violet part, and the second one will contain the green and orange areas.
First part of design
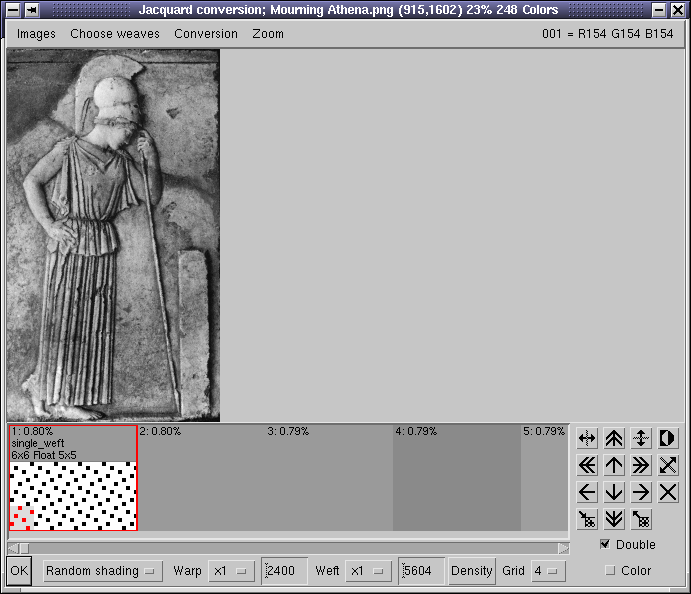
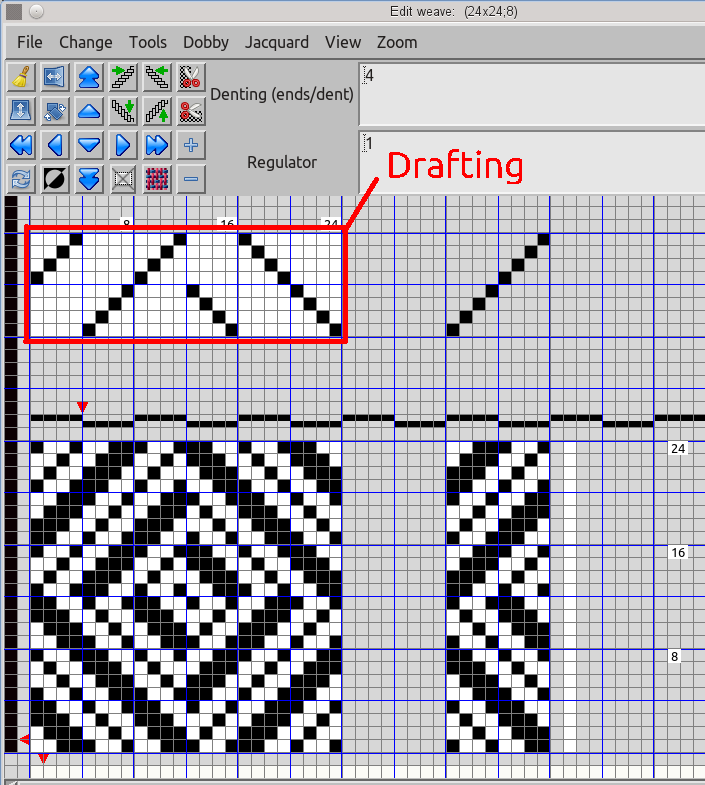
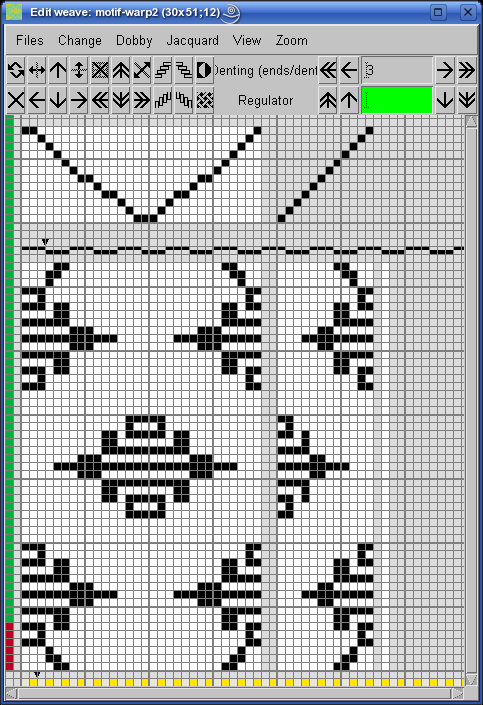
Start with a base design, which actually depicts the pattern of second (gold) warp. The easiest way to draw it is to use ArahWeave‘s weave editor. Since we have a pointed draft pattern, just draw half of design (or dobby card), and the rest will be filled in as you draw the drafting.
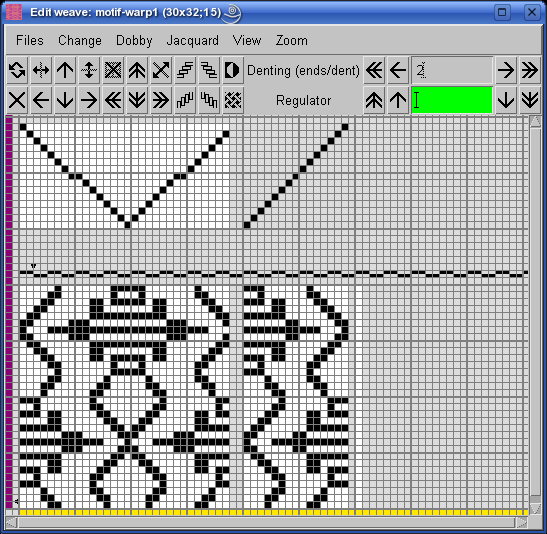
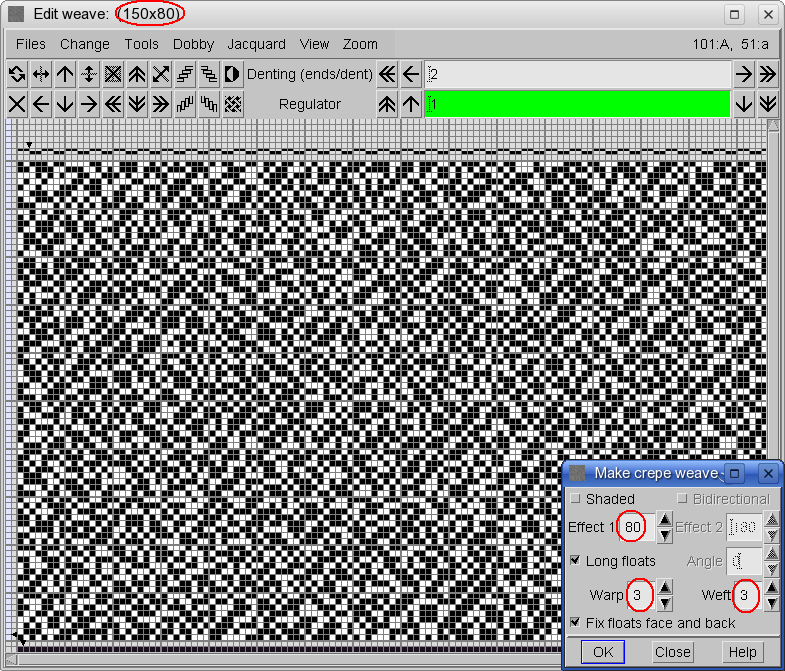
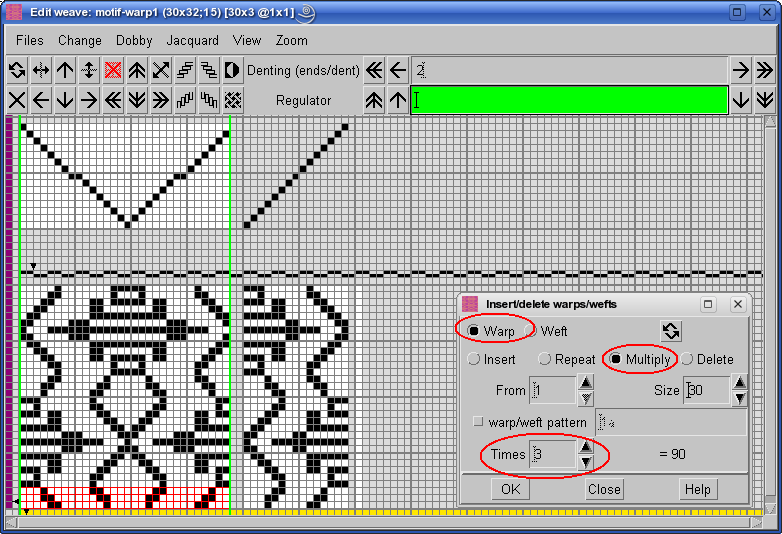
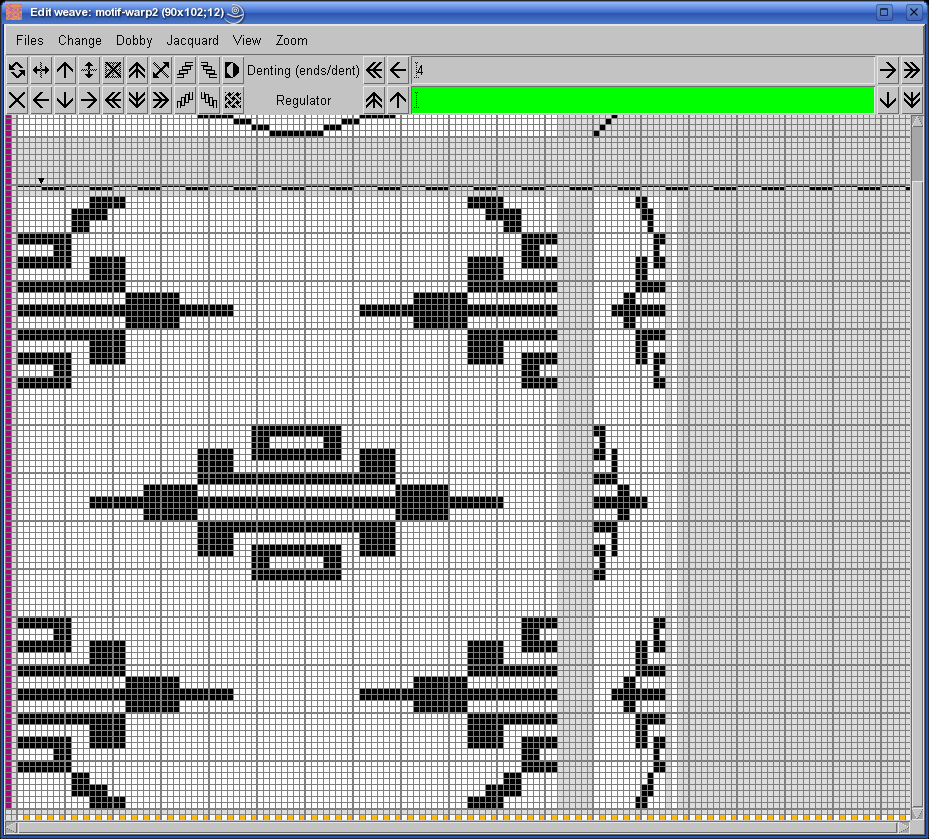
In this kind of fabric, three or four warp threads usually weave in the same way, so that we can get a bigger repeat without increasing the number of shafts. We need to multiply warp points by three. Later, we will also multiply the points in weft direction by two, so that the whole figure will keep some proportion with respect to initial image. There are several ways to multiply the weave, the fastest is by using Change > Insert/delete warp/wefts... You have to make a selection (click and drag with middle mouse button), in the area which you want to multiply. In our case, this is the whole width. Program draws green lines to indicate the affected area, then set the parameters (Warp, Multiply, Times) as shown on the image below. The red rectangle just indicates the selection, which we made to define the multiplication area.
After clicking OK, you get the following situation:

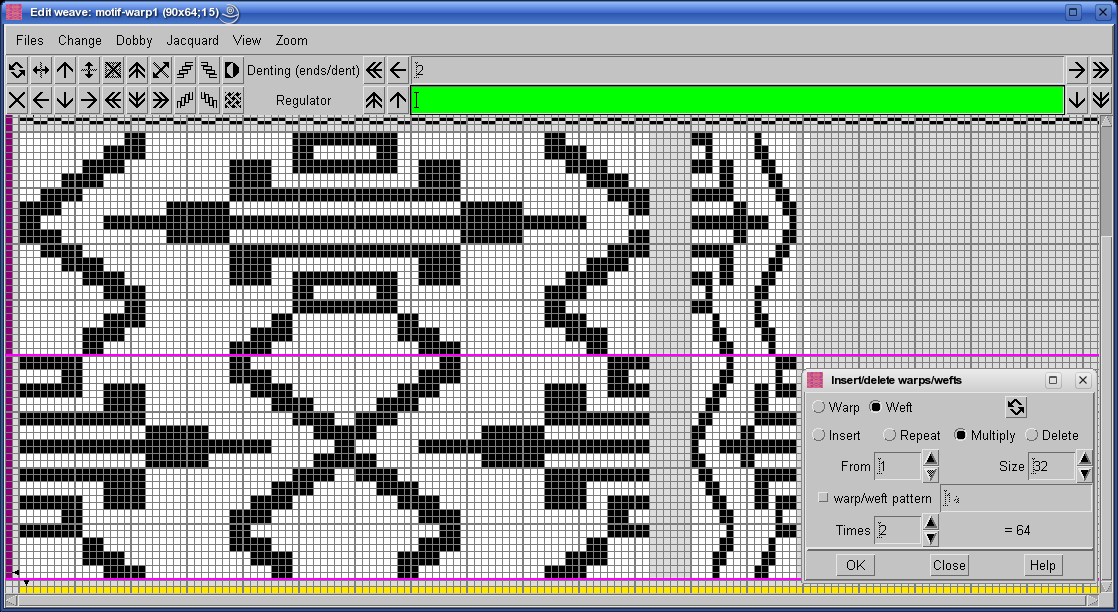
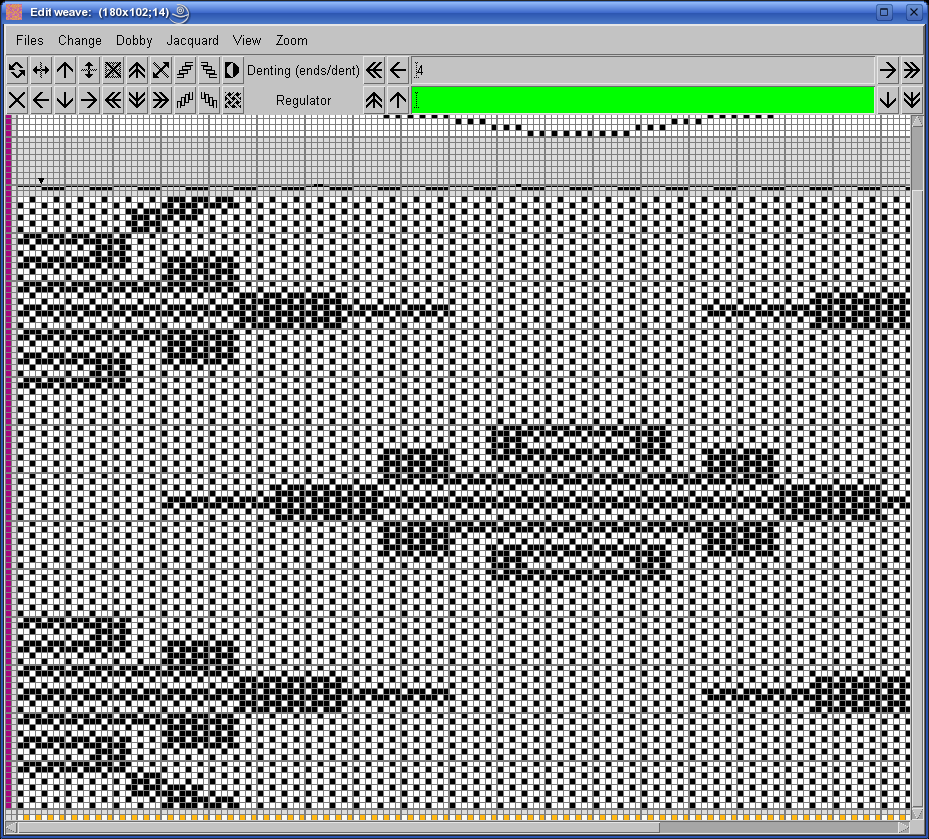
Then multiply the wefts in the same manner:
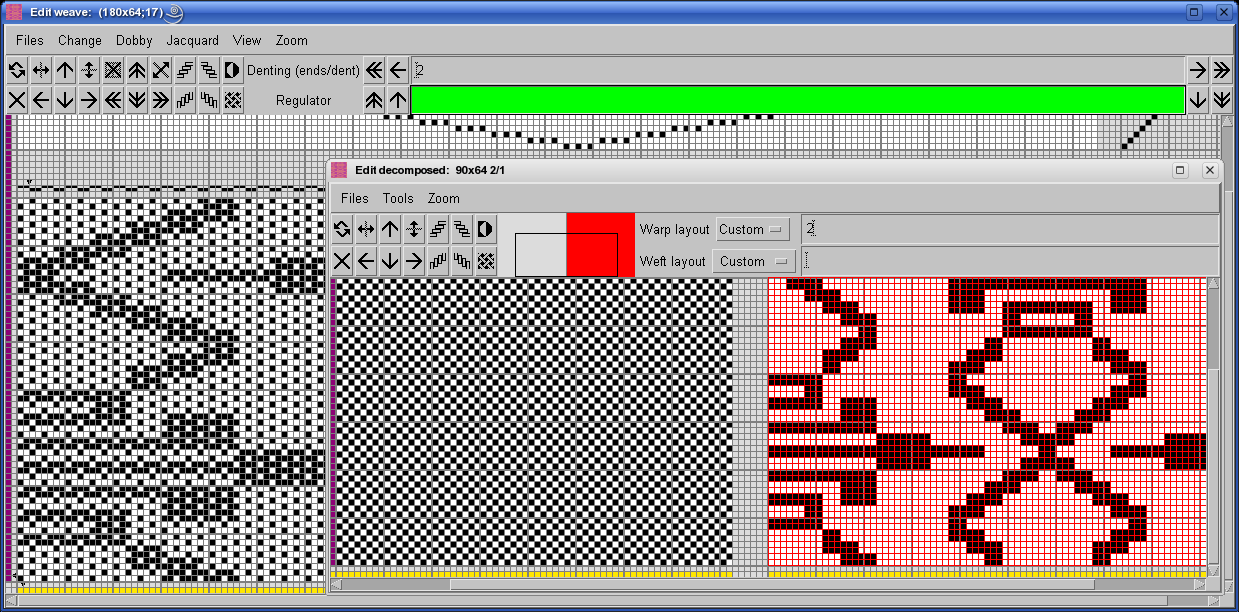
Now save the weave, since this is just a motif, used for construction of the double weave, which makes our first fabric. The size of the base weave is 90×64 points. You will get the final double weave by interleaving base motif and plain weave. Clear the weave editor’s content by clicking on ![]() , and change the repeat size to 180×64. Chose Change > Edit decomposed. Enter warp layout: 2, since we have one ground and one extra warp. In the first part load or draw the plain weave. It is easy to draw weaves with small repeat in the Edit decomposed window – for plain weave just draw two points and click with middle mouse button on the last point of the repeat (at mouse position 2,2), and program will extend the weave to the whole area – in our case to 90×64. In the second part load the basic motif weave, which you have saved previously. You will get the following weave (Decomposed editor is shown on top of normal weave editor, they show the same weave in two different ways):
, and change the repeat size to 180×64. Chose Change > Edit decomposed. Enter warp layout: 2, since we have one ground and one extra warp. In the first part load or draw the plain weave. It is easy to draw weaves with small repeat in the Edit decomposed window – for plain weave just draw two points and click with middle mouse button on the last point of the repeat (at mouse position 2,2), and program will extend the weave to the whole area – in our case to 90×64. In the second part load the basic motif weave, which you have saved previously. You will get the following weave (Decomposed editor is shown on top of normal weave editor, they show the same weave in two different ways):
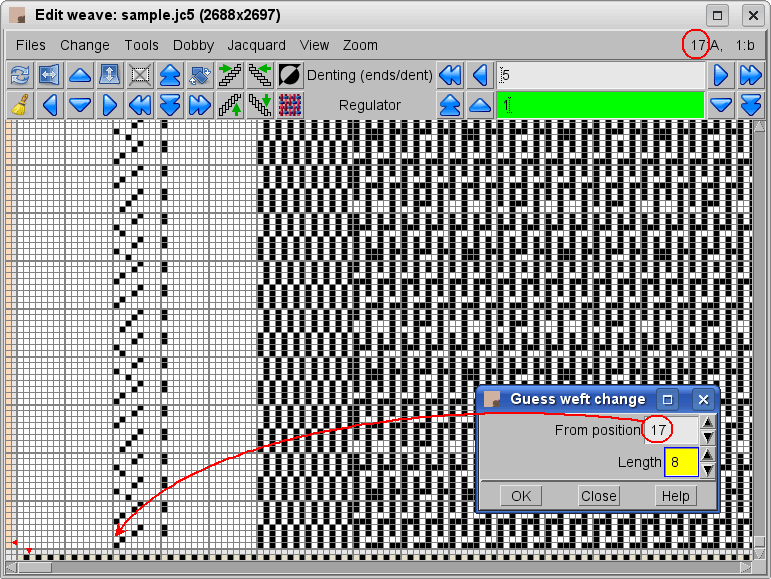
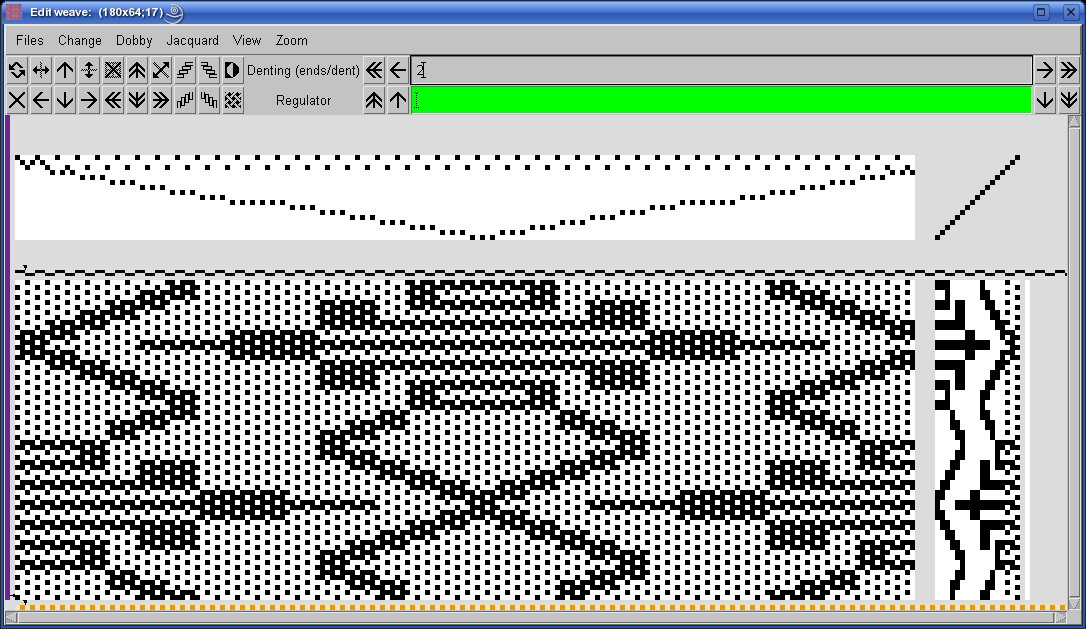
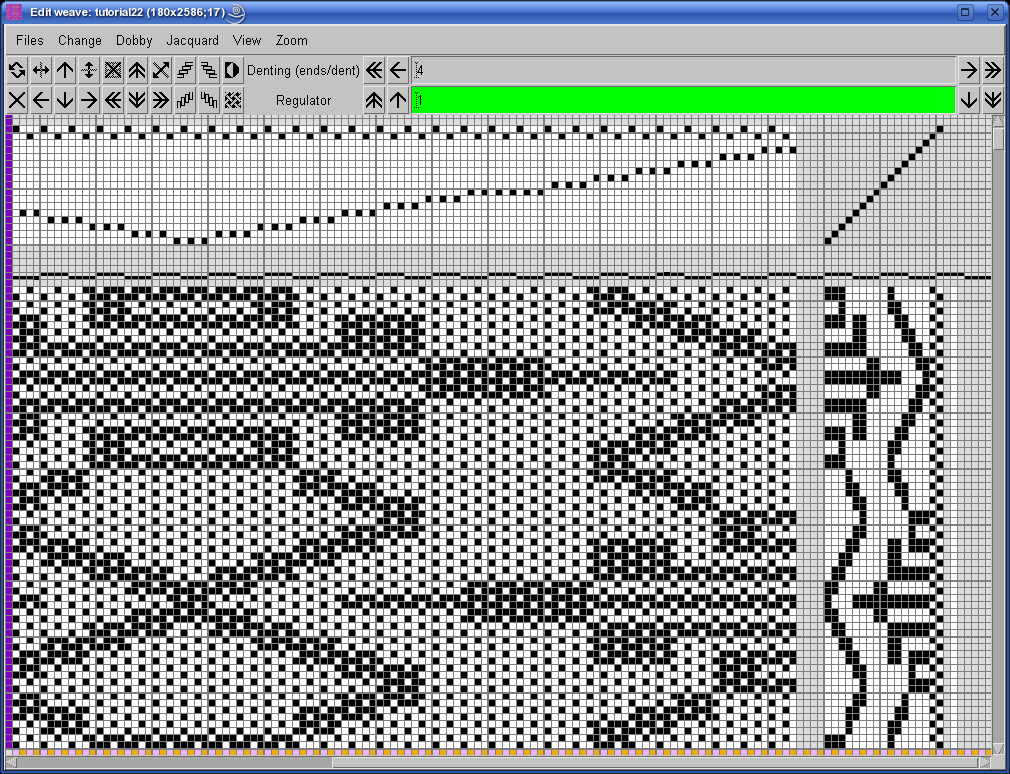
Once you do Dobby > Check weave > Optimize the number of shafts, you will know that at least 17 shafts are necessary to weave this fabric:
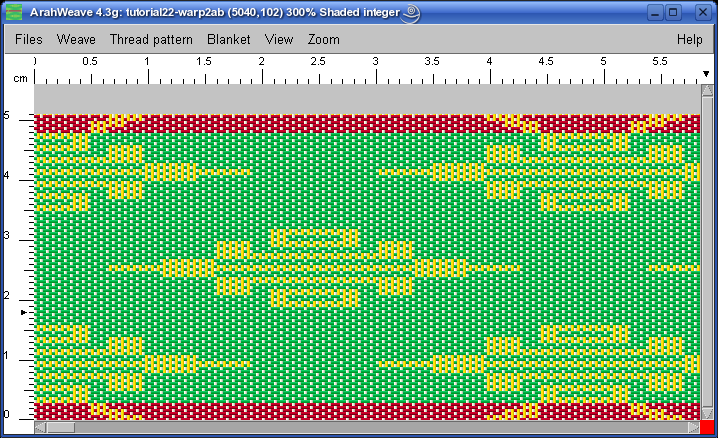
You can now switch to the integer view of the fabric in main window, set warp/weft colors and enter warp pattern of 1A1B, while weft pattern has only one color, so a weft pattern of 1a is enough.

Save this fabric with a new name, we are ready to make the next fabric.
Second part of design
We will make the second fabric as using a similar procedure as for the first one, and then join them using function Weft blanket, into the final fabric. The base design for second part should have same width (number of threads) and we should use the same or very similar drafting, so we avoid introducing new shafts.
This is the multiplied motif:
As with the previous weave, we will make a combination of plain weave and base motif to get the double warp weave:
Warp pattern is the same as before (1A1B), but you need to change the weft pattern to get stripes (6a 90b 6a).
Now save the second fabric with a new name.
Final design
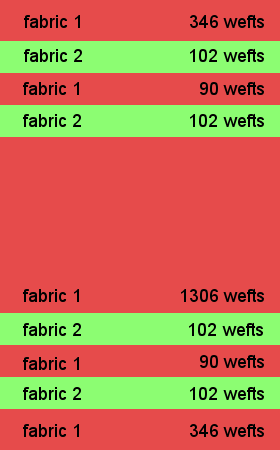
In the last stage of making this particular fabric, we will join both fabrics, which we made earlier, into one design. The image below shows the structure of the final fabric, which we want to achieve.
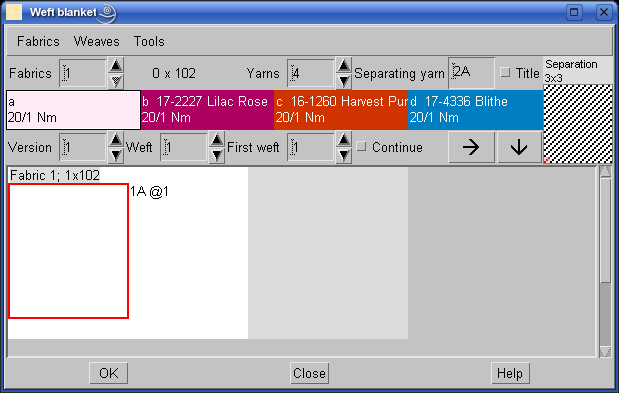
Again, there are more ways to do it, but the most elegant is to use the unique ArahWeave‘s feature, called Weft blanket. It was initially conceived as a sampling tool, but now many designers use it as a pure design tool for combining different fabrics into one design. In the main ArahWeave window choose Blanket > Weft blanket.
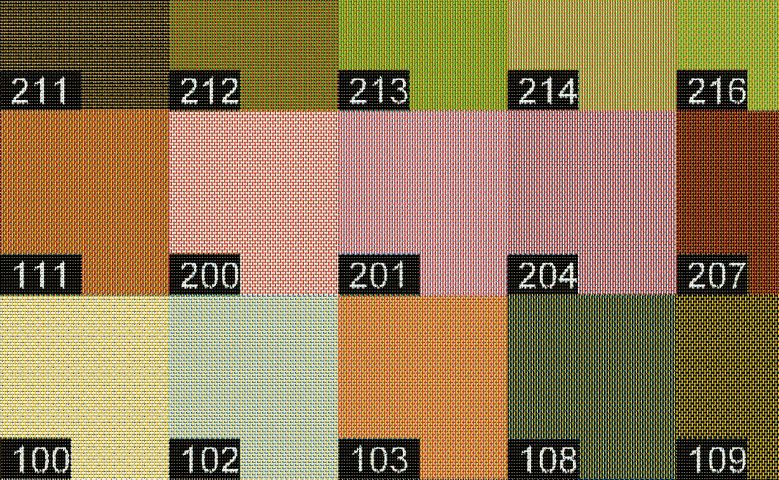
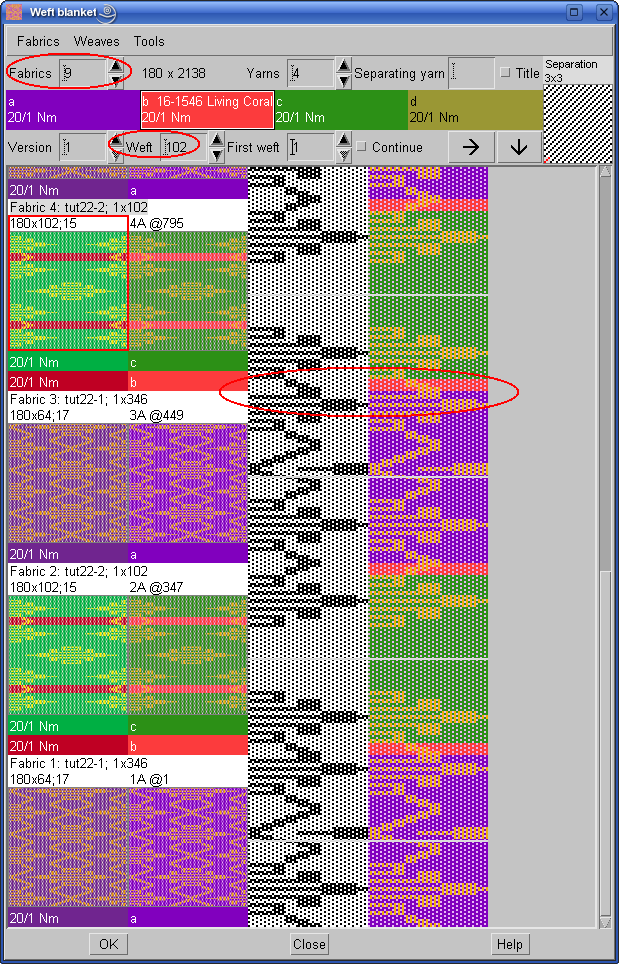
In the Weft blanket window set the number of fabrics you will use. We have 9 fabric sections. You should load fabrics in the Weft blanketwindow in the correct order, and for each fabric part, you should enter desired number of wefts (picks). On the figure below, we have selected the fabric number 4, and it has 102 wefts. On the right column you can preview the transition between two fabrics, and if you need, you can move beginning of each fabric, by modifying the first weft. The indication of fabric junction shows first the weave, and then the integer fabric simulation, so you can control both the weave transition, as the weft color transition.
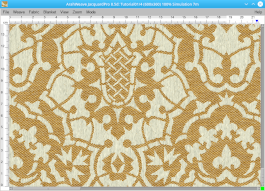
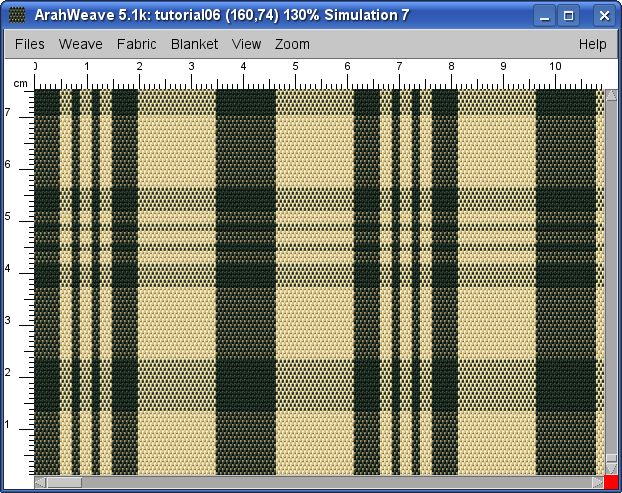
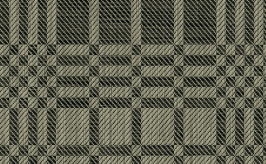
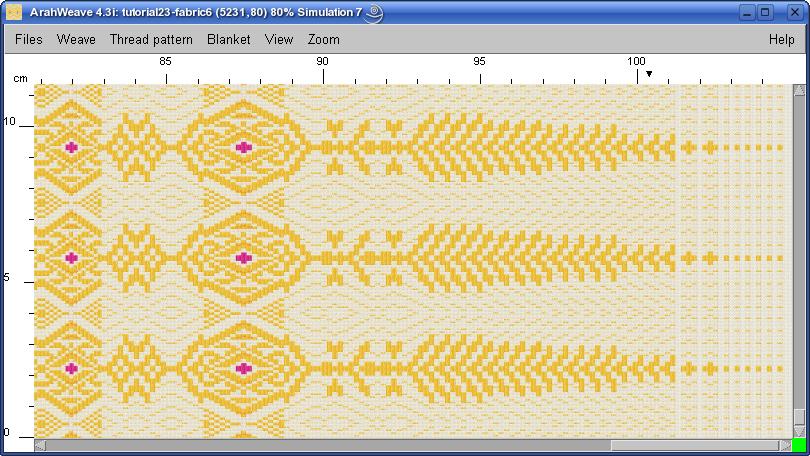
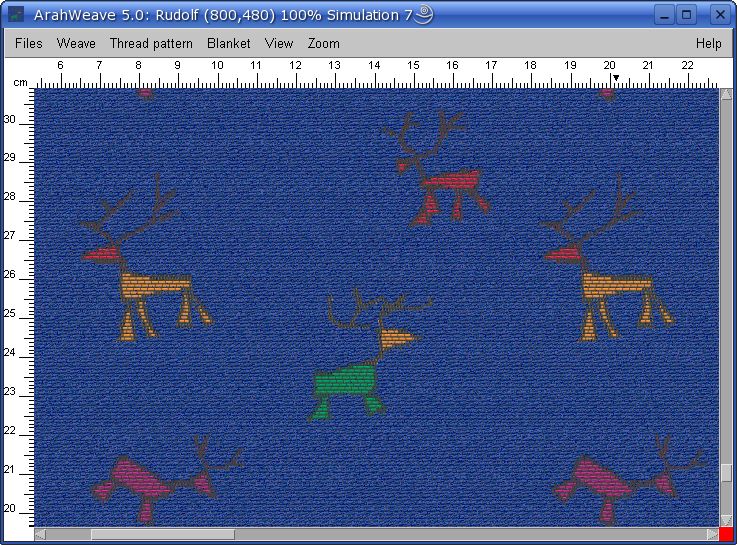
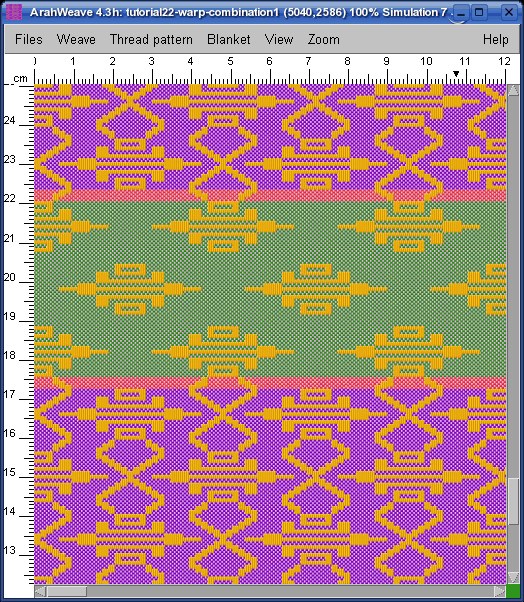
After clicking OK, you instantly get the final fabric in the main window. Here is a zoomed out simulation of the whole fabric:
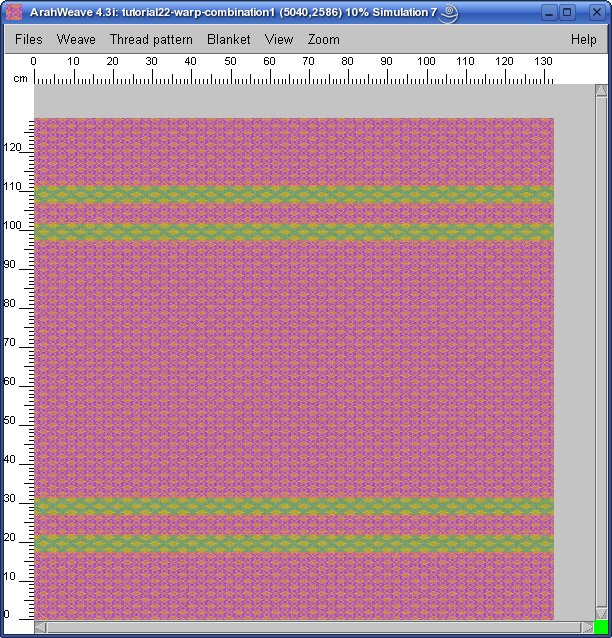
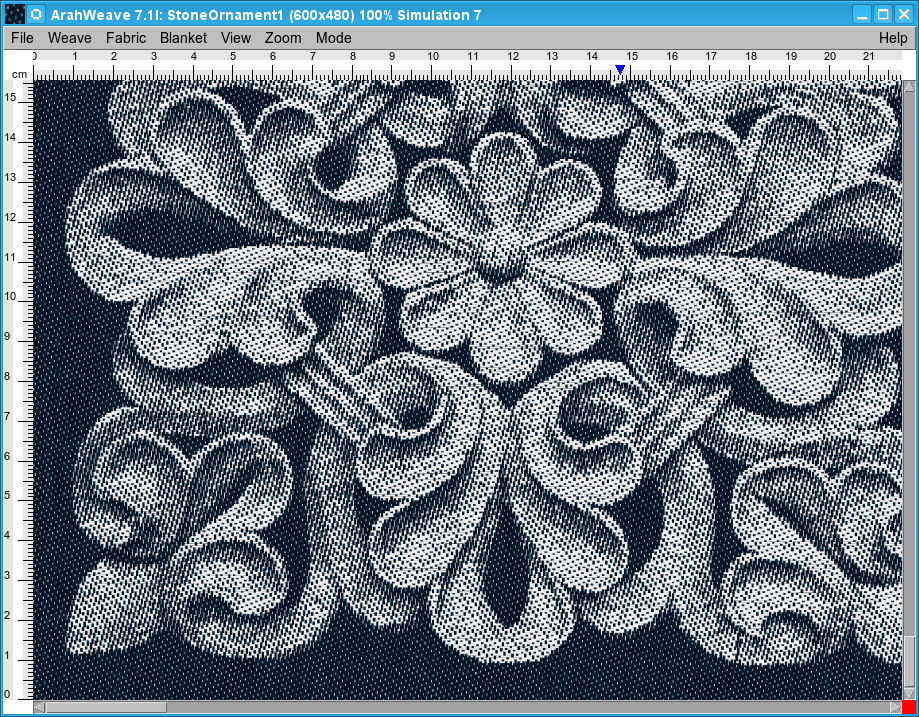
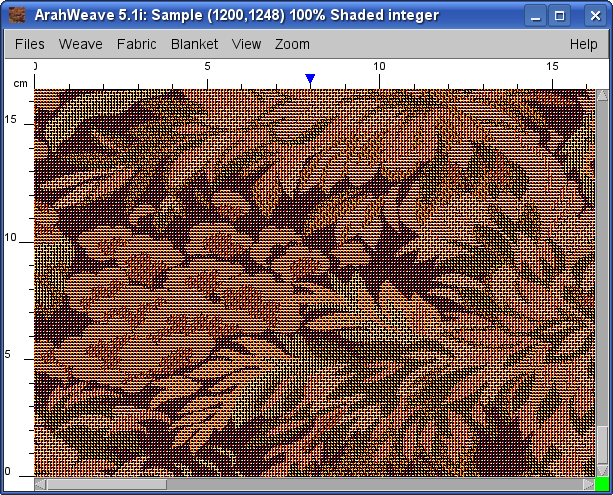
…and this is a detail at 100% (1:1 view):
One more hint: You may want to change shafts’ order, so that ground shafts (plain weave) will be together. That means that we want to exchange shaft number 2 and shaft number 3. To do this, go in weave editor, press Shift on the keyboard and click with the middle mouse button at any intersection point of the second and the third shaft. One such point is marked with red x on the image below.

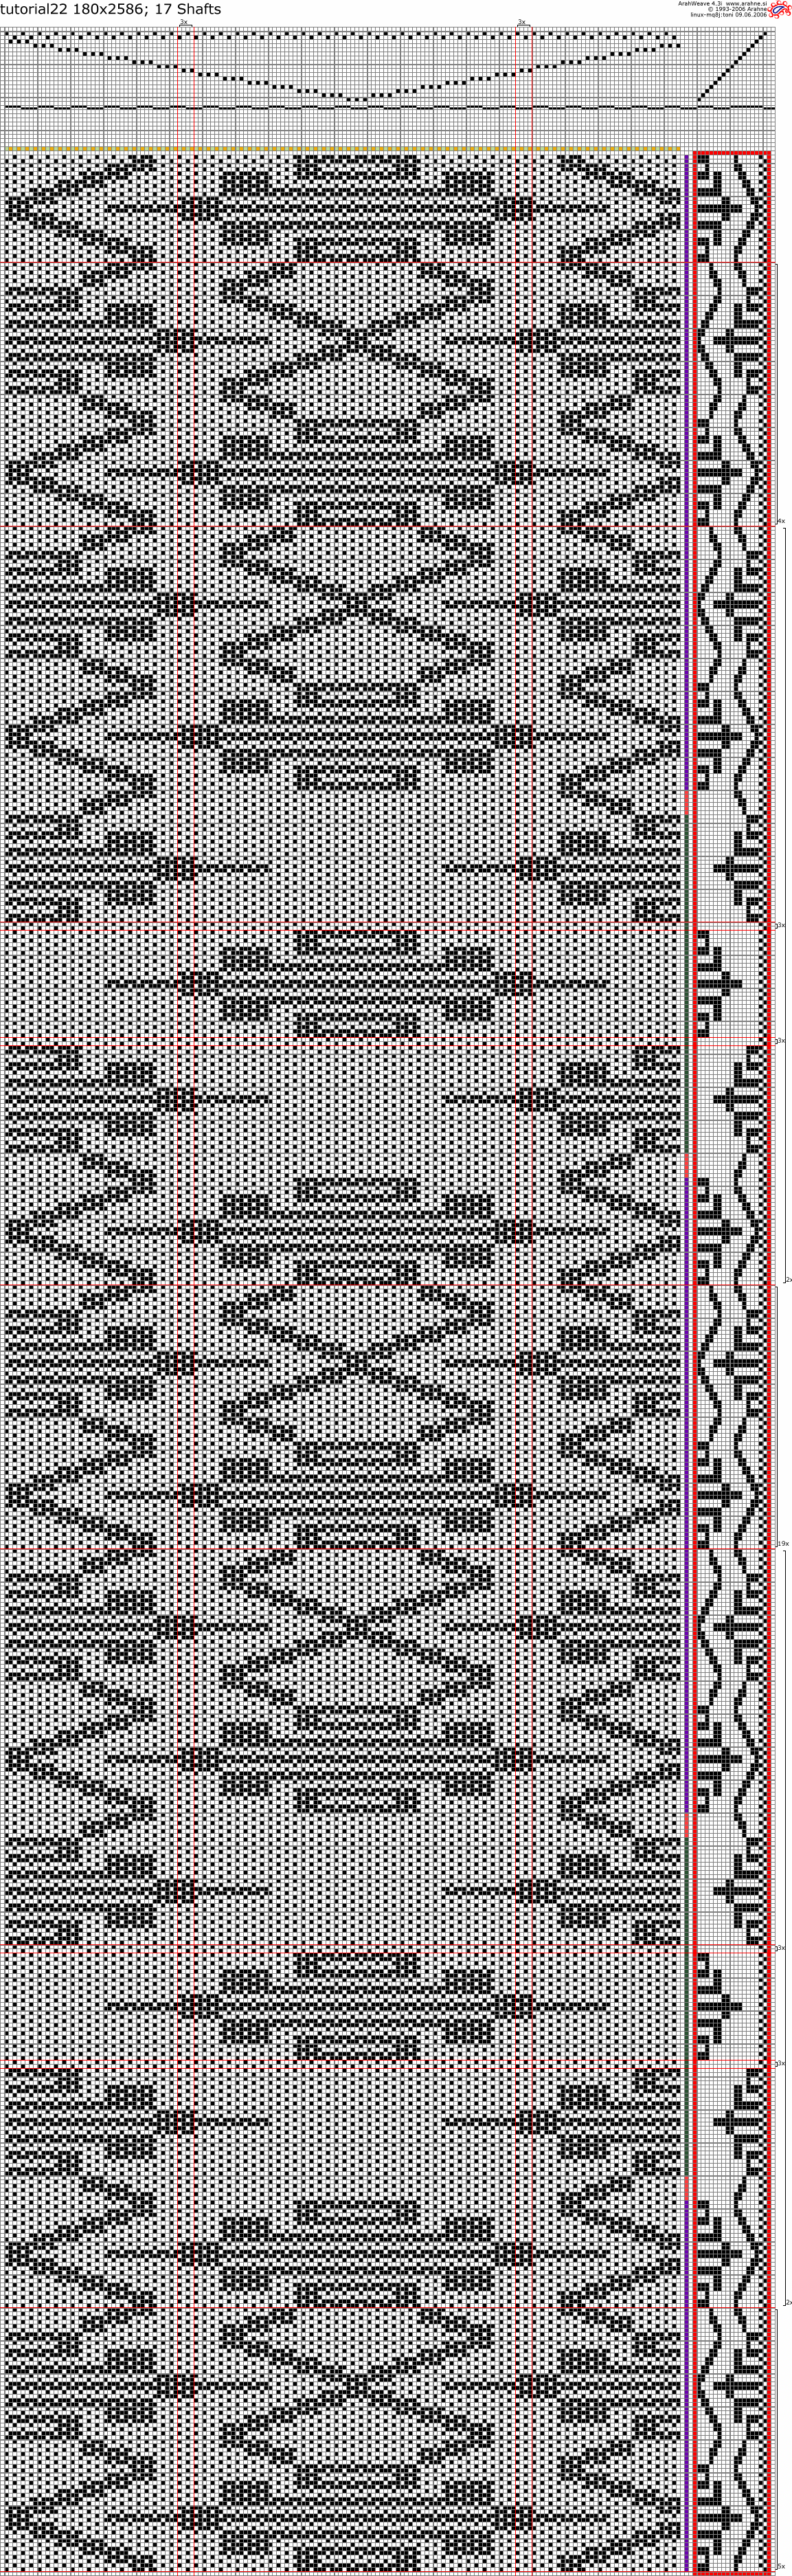
This is the corrected dobby weave, which will make more sense in production.
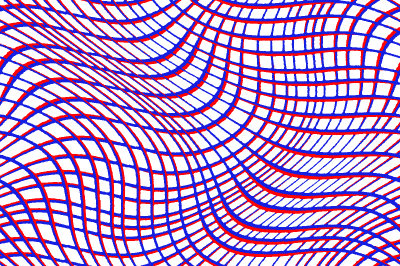
And finally, not for the faint of heart, the full weave:
This fabric was initially developed without a CAD, we have just shown how to make it in ArahWeave. Quite a feat!